Published - Wed, 02 Oct 2024
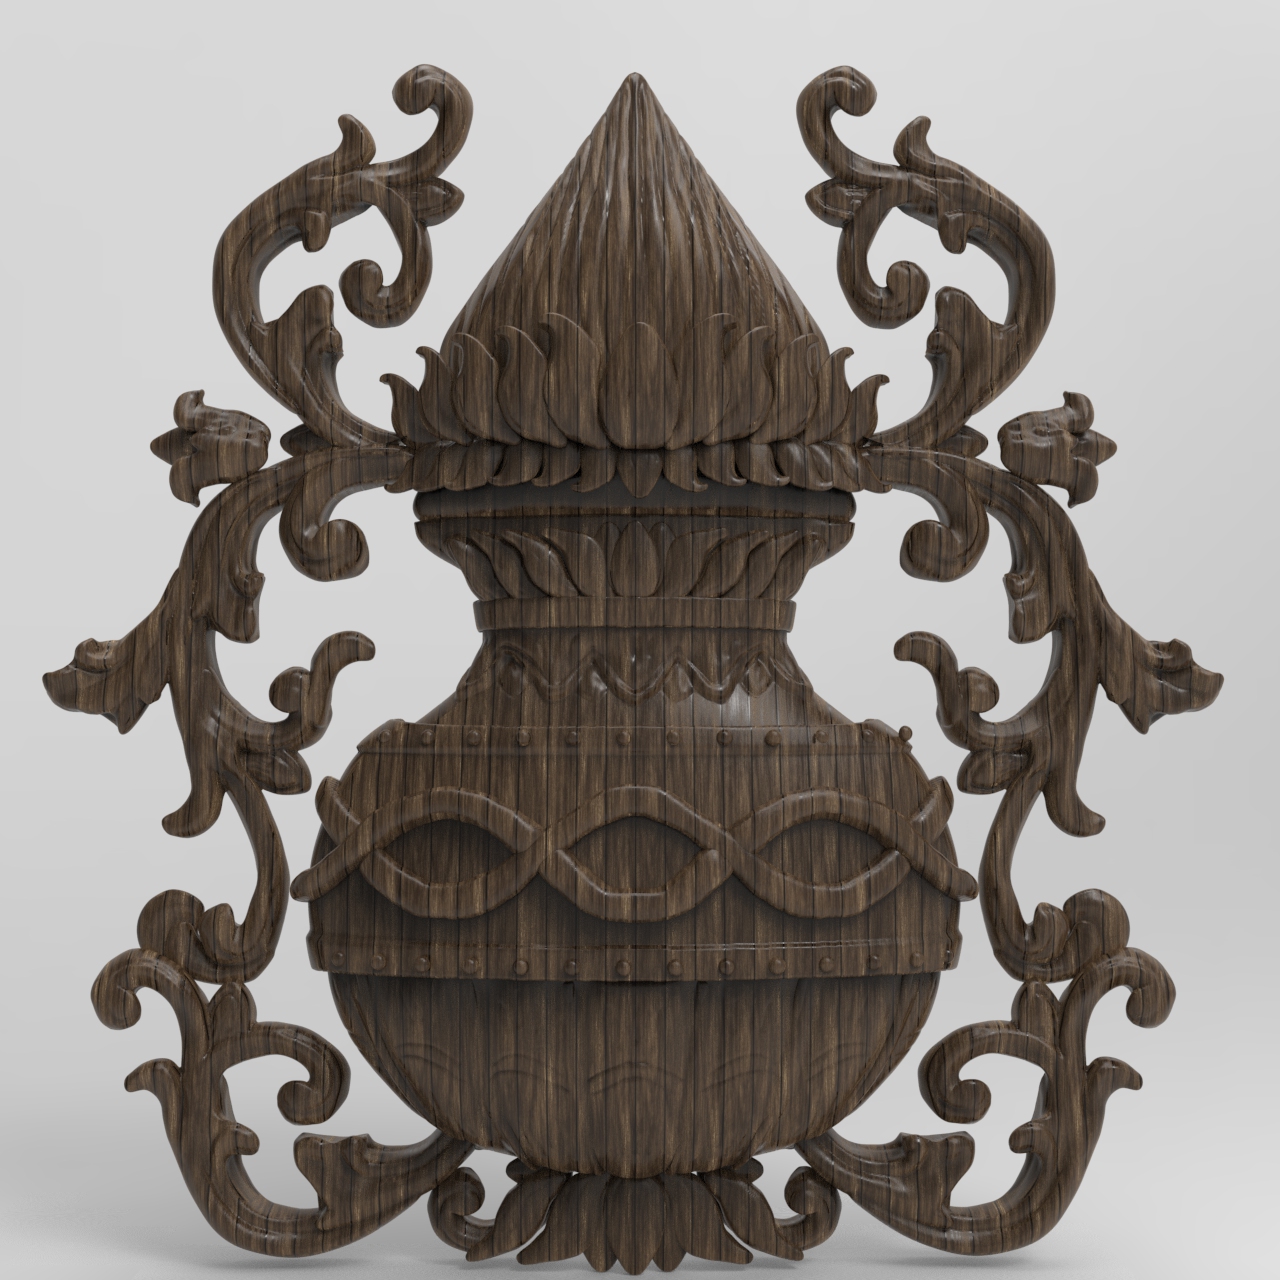
carving | wood carving
Carving and sculpting in ZBrush, followed by rendering in KeyShot, can yield stunning results! Here’s a streamlined workflow you might find useful:
### 1. Sculpting in ZBrush
- **Start with a Base Mesh**: Use a primitive shape or a low-poly base mesh to define the overall form.
- **Dynamic Subdivision**: Enable dynamic subdivision for a smoother surface without increasing polygon count initially.
- **Sculpting Tools**: Utilize brushes like the Standard, Clay Buildup, and Move tools to shape your model. Use the Zadd and Zsub functions for adding and subtracting volume.
- **Detailing**: Use the Detail tools for finer details. Consider using alphas for textures, and make sure to frequently save your progress.
- **Polygroups**: Organize your model using polygroups for easier selection and masking.
- **UV Mapping**: Once satisfied, unwrap your model using ZBrush’s UV Master for proper texture mapping later.
### 2. Exporting to KeyShot
- **Export the Model**: Export your sculpted model as an OBJ or FBX file. Ensure you have proper UVs and, if necessary, create a low-res version for faster rendering.
- **Texture Maps**: If you've created texture maps (like normal, displacement, or diffuse), export these as well.
### 3. Rendering in KeyShot
- **Import Model**: Open KeyShot and import your ZBrush model. KeyShot supports OBJ and FBX formats well.
- **Material Setup**: Apply materials from the library. You can also create custom materials for specific effects.
- **Lighting**: Set up your scene’s lighting. Use HDRI images for realistic lighting, or adjust the environment settings for different moods.
- **Camera Settings**: Adjust the camera perspective and settings to frame your sculpt well.
- **Rendering**: Set your desired resolution and quality settings. Render your scene and make adjustments as needed.
### Tips
- **Workflow Integration**: Consider using GoZ to streamline the transfer between ZBrush and KeyShot.
- **Post-Processing**: After rendering, you can further enhance your images in software like Photoshop.
### Practice
Experiment with different techniques and settings to refine your workflow. The combination of ZBrush's detailed sculpting and KeyShot's powerful rendering capabilities can lead to impressive results. Happy sculpting!
Created by

Anil Chauhan
Welcome to my website! My name is Anil Chauhan, and I am a 3D modeling and animation expert with over 15 years of experience in the field. I have a passion for creating visually stunning 3D models, animations, and graphics, and I'm excited to share my expertise with you. Whether you're a beginner or an experienced artist, I can help you improve your skills in 3D modeling, texturing, lighting, animation, rigging, CG graphics, and VFX. Let's work together to bring your creative ideas to life!
Welcome to my website! My name is Anil Chauhan, and I am a 3D modeling and animation expert with over 15 years of experience in the field. I have always had a passion for creating visually stunning 3D models, animations, and graphics, and my work has been featured in a variety of industries including film, television, advertising, and video games.
Throughout my career, I have had the opportunity to work on a wide range of projects, from small independent films to large-scale productions. This has given me a diverse set of skills and a deep understanding of the 3D animation process from start to finish. I have expertise in complete 3D modeling, texturing, lighting, animation, rigging, CG graphics, and VFX, and I'm always eager to take on new and exciting challenges.
As a tutor, I am dedicated to sharing my knowledge and experience with aspiring artists and professionals alike. I believe that everyone has the potential to create amazing 3D models and animations, and I'm committed to helping my students achieve their goals. Whether you're a beginner looking to get started in the world of 3D animation, or an experienced artist looking to take your skills to the next level, I can provide personalized training and guidance to help you achieve your creative vision.
Comments (0)
Search
Popular categories
Adobe After Effects 2025
28Unreal Engine
14zbrush
10Maya Animation
8zbrush tutorial jewelry
7Maya 2025
6Latest blogs
Mesh |Edit Mesh|Mesh Tools
4 Hours Ago

Advanced Editing Techniques
13 Hours Ago

Introduction to Level Design Through Blocking in Unreal Engine
2 Days Ago
Write a public review