Created by - Anil Chauhan
zbrush tutorial jewelry
Creating jewelry in ZBrush involves sculpting intricate designs and details. Here's a basic step-by-step tutorial for creating jewelry using ZBrush:Step 1: Setting UpOpen ZBrush and select a project or start a new one.Make sure your document size and resolution are suitable for detailed work. You can adjust these in the Document menu.Step 2: Basic ShapeChoose a base shape for your jewelry piece. You can start with a primitive like a sphere or cylinder.Use the basic sculpting brushes to shape your object. Pay attention to proportions and overall form.Step 3: DynaMeshEnable DynaMesh in the Geometry menu to add resolution where needed without stretching the mesh.Press "Ctrl + drag" on an empty canvas area to activate DynaMesh and refine the geometry.Step 4: DetailingSwitch to finer brushes like ClayBuildup, DamStandard, and Move to add intricate details.Use the Standard brush with a low intensity to carve patterns and designs into the surface.Step 5: Insert BrushesUtilize Insert Brushes to add pre-made elements like gemstones, loops, or other decorative elements.Adjust the placement and size of these elements to fit your design.Step 6: SubtoolsDivide your model into subtools for better organization.Create a new subtool for each distinct part of your jewelry piece, like the band, gems, or connectors.Step 7: PolypaintUse the Polypaint feature to add color to your jewelry. This is especially useful for visualizing the final result.Assign different materials to various subtools for a more realistic look.Step 8: RenderingSet up lighting and materials in the Render menu to showcase your jewelry in the best way possible.Experiment with different materials, reflections, and shadows to achieve the desired look.Step 9: ExportOnce satisfied with your design, export the model. Common formats include STL for 3D printing or OBJ for use in other software.Step 10: RefinementFine-tune your design based on feedback or personal preferences.Make sure the model is suitable for the intended purpose, whether it's for 3D printing, rendering, or other applications.Additional Tips:Brush Customization: Explore and customize your brushes to suit the specific needs of jewelry design.Reference Images: Use reference images for inspiration and to ensure accuracy in your designs.ZModeler: Experiment with the ZModeler brush for creating precise geometric shapes and clean edges.Remember, this is a basic overview, and there's a lot more to explore in ZBrush for jewelry design. Practice and experimentation will help you develop your skills further.YouWhat you'll learn in zbrush tutorial jewelry description ChatGPTChatGPTIn a ZBrush tutorial for jewelry design, you can expect to learn the following key concepts and skills:Basic ZBrush Navigation:Familiarize yourself with the ZBrush interface.Learn navigation controls, including rotating, panning, and zooming.Primitive Shapes and Sculpting:Start with primitive shapes as a base for your jewelry design.Use sculpting brushes to shape and refine the overall form of your jewelry piece.DynaMesh Workflow:Understand the basics of DynaMesh for adding and redistributing geometry.Learn how to use DynaMesh to maintain a uniform mesh resolution.Detailing Techniques:Explore various sculpting brushes for adding intricate details to your jewelry.Understand the importance of brush intensity, size, and stroke in detailing.Insert Brushes:Learn how to use Insert Brushes to add predefined elements like gemstones or decorative features to your design.Understand how to manipulate and customize inserted elements.Subtools and Organization:Divide your model into subtools for better organization and control.Create and manage subtools for different parts of your jewelry piece.Polypaint:Use the Polypaint feature to add color and texture to your jewelry model.Assign different materials to achieve a realistic appearance.Rendering in ZBrush:Set up lighting and materials for rendering your jewelry design within ZBrush.Experiment with different rendering settings to enhance the presentation of your model.Exporting for Different Purposes:Understand how to export your jewelry model in suitable formats for various purposes (e.g., 3D printing, rendering in other software).Refinement and Iteration:Learn the importance of refining your design based on feedback or personal preferences.Understand the iterative process of making adjustments to achieve the desired result.Advanced Techniques (Optional):Depending on the tutorial, you might explore more advanced techniques such as using ZModeler for precise geometry, customizing brushes, or incorporating additional features.Remember, each tutorial may have its own unique focus and may cover additional topics based on the instructor's expertise and the specific goals of the tutorial. It's also recommended to practice regularly and experiment with the tools and techniques to develop your skills further.#ZBrush#JewelryDesign#DigitalSculpting#3DModeling#ZBrushTutorial#JewelryArt#DigitalArt#3DPrinting#SculptingTechniques#ZBrushTips#JewelryRendering#ZBrushWorkflow#GemstoneDesign#JewelryCreation#ZBrushArtist#CreativeProcess#JewelryCrafting#DigitalDesign#ZBrushLearning#JewelryPrototyping
More detailsPublished - Mon, 11 Dec 2023
Created by - Anil Chauhan
zbrush 2023.1.1
As of my last knowledge update in January 2023, I don't have specific details about the features introduced in ZBrush 2023.1.1. However, I can provide a general introduction to ZBrush and its features based on previous versions.**ZBrush Overview:**ZBrush is a digital sculpting and painting software that allows artists to create highly detailed 3D models. It is widely used in industries such as film, video games, and animation for its powerful and intuitive sculpting capabilities.**Key Features of ZBrush:**1. **DynaMesh:** ZBrush uses a unique modeling technology called DynaMesh, which allows artists to dynamically adjust the resolution of their models as they sculpt. This provides a flexible and non-destructive way to work with 3D geometry.2. **ZSpheres:** ZSpheres are a powerful tool for creating base meshes. They allow artists to quickly sketch out the main forms of a character or object before refining the details.3. **Sculpting Brushes:** ZBrush comes with a wide variety of sculpting brushes that simulate different artistic tools. These brushes allow artists to shape, smooth, and add intricate details to their models.4. **Subdivision Surfaces:** ZBrush supports subdivision surfaces, allowing artists to work with high-resolution models while maintaining control over the level of detail.5. **Polypaint:** ZBrush allows artists to paint directly on the surface of their 3D models using Polypaint. This is useful for adding color and texture details to the models.6. **ZRemesher:** ZRemesher is a tool for automatic retopology, helping artists create clean and optimized geometry for their models.7. **Fibermesh:** Fibermesh is a feature that enables the creation of realistic hair and fur on 3D models.8. **Rendering:** ZBrush includes a built-in renderer that allows artists to create high-quality renders of their models.9. **Live Boolean:** Live Boolean is a feature that allows artists to preview the results of boolean operations in real-time, making it easier to create complex shapes.**Learning Resources:**If you're new to ZBrush or want to learn about the latest features in ZBrush 2023.1.1, you can explore the following resources:1. **Official Documentation:** Check the official Pixologic website for the latest documentation and release notes.2. **Video Tutorials:** There are many video tutorials available online, including on the Pixologic website, YouTube, and other tutorial platforms.3. **Online Communities:** Joining ZBrush communities, forums, or social media groups can be a great way to connect with other users, share experiences, and get help.Remember to check the official sources for the most accurate and up-to-date information on ZBrush and its features.
More detailsPublished - Sat, 16 Dec 2023

Created by - Anil Chauhan
Getting started with zbrush
ZBrush is a powerful digital sculpting software widely used in the entertainment industry for creating detailed and high-resolution 3D models. Here's a basic guide to help you get started with ZBrush:### 1. **Installation:** - Download and install ZBrush from the official Pixologic website. - Make sure your computer meets the system requirements.### 2. **Interface Overview:** - Familiarize yourself with the ZBrush interface. It has a unique layout with various panels and customizable features. - Understand the navigation controls, such as rotating, panning, and zooming.### 3. **Basic Navigation:** - Rotate: Right-click and drag - Pan: Hold down the Alt key and right-click and drag - Zoom: Hold down the Alt key and right-click and drag up or down### 4. **ZBrush Concepts:** - **ZBrush Core Concepts:** Understand terms like ZSphere, Subtool, DynaMesh, ZRemesher, and more. These are fundamental to ZBrush workflows.### 5. **Brushes and Sculpting:** - Explore the Brush palette to understand different brushes for sculpting. - Start with simple shapes and experiment with brushes to understand their effects. - Use the "Sculptress Pro" mode for dynamic tessellation and detailed sculpting.### 6. **Subtools:** - Learn about Subtools, which allow you to work on separate pieces of geometry within the same project. - Use the Subtool palette to manage and manipulate different parts of your model.### 7. **Dynamesh and ZRemesher:** - DynaMesh is a feature that allows you to dynamically remesh your model, providing more uniform geometry. - ZRemesher helps in creating cleaner and more organized topology for your models.### 8. **PolyPainting:** - ZBrush allows you to paint directly on your 3D models. Use the Color palette to apply PolyPaint to your sculptures.### 9. **Texturing and Materials:** - Explore the Texturing and Material palettes to apply textures and materials to your models. - Experiment with the various materials and shaders available.### 10. **Rendering:** - Familiarize yourself with the BPR (Best Preview Render) functionality for rendering your models. - Learn about lighting, shadows, and other rendering settings.### 11. **Save and Export:** - Save your ZBrush project regularly. Use the Tool palette to save individual tools. - When finished, export your models in a suitable format for use in other software.### 12. **Community and Resources:** - Join the ZBrushCentral community for support, inspiration, and sharing your work. - Explore online tutorials and documentation on the official Pixologic website.### 13. **Practice:** - The best way to learn ZBrush is through hands-on practice. Sculpt different objects, characters, and environments to refine your skills.Remember that ZBrush has a steep learning curve, but with practice and exploration, you'll become more comfortable with its tools and features. Don't hesitate to consult the official documentation and community forums when you encounter challenges.
More detailsPublished - Sat, 16 Dec 2023
Created by - Anil Chauhan
zbrush 2024
ZBrush has a unique and powerful user interface designed for digital sculpting and 3D modeling. The interface is highly customizable, allowing users to arrange and organize tools according to their preferences. Here's a general overview of the ZBrush user interface:1. **Title Bar:** - Displays the name of the current document or project. - Contains standard window controls (minimize, maximize/restore, close).2. **Top Shelf:** - Houses various menus and buttons, including File, Edit, Tool, and others. - Quick access to frequently used functions.3. **Palette Trays:** - Located on the left and right sides of the interface. - Hold various palettes such as brushes, materials, and tools. - Can be collapsed or expanded for convenience.4. **Canvas:** - The central area where the 3D model is displayed. - You can rotate, zoom, and pan the model using the mouse or tablet.5. **Draw Palette:** - Contains options for drawing and manipulating objects in 3D space.6. **Tool Palette:** - Displays the currently selected tool (3D brush, insert mesh, etc.). - Allows you to select, edit, and manage your tools.7. **Subtool Palette:** - Manages subtools, which are individual components of your model. - Allows for duplicating, deleting, and organizing subtools.8. **Timeline:** - Used for creating animations and morph targets. - Allows you to manipulate time-based actions.9. **Lightbox:** - Provides access to ZBrush projects, tools, and materials. - Can be toggled on and off with the Lightbox button.10. **Status Bar:** - At the bottom of the interface, it displays information about the current tool, brush, and other settings. - Also includes navigation information and quick buttons.11. **Quick Access Buttons:** - Various buttons for commonly used functions, such as saving, undo/redo, and other options.12. **Customizable Menus:** - You can customize menus and create your own custom interface layouts.ZBrush's interface is known for its flexibility and user-friendly design. It's important to explore the various menus and submenus to discover the full range of features available. Additionally, ZBrush provides extensive documentation and tutorials to help users become familiar with its interface and tools.
More detailsPublished - Thu, 21 Dec 2023
Created by - Anil Chauhan
Retopology in ZBrush
Retopology in ZBrush is the process of creating a new, clean, and optimized mesh with a lower polygon count while preserving the details of a high-resolution mesh. This is often necessary for efficient modeling, animation, or game development. Here's a general guide on how to perform retopology in ZBrush:1. **Import your High-Resolution Mesh:** - Start by importing the high-resolution mesh into ZBrush.2. **Prepare ZBrush Workspace:** - Set up your workspace by adjusting the view and customizing the interface to make the retopology process more comfortable.3. **Create a New Topology:** - In the "Tool" palette, select "ZSphere" and draw it on the canvas. - Use the "Edit Topology" button to start drawing new topology directly on the high-resolution mesh.4. **Add and Connect ZSpheres:** - Continue adding ZSpheres and connecting them to form the basic structure of your new topology. - You can use the "Draw" mode to draw new ZSpheres and the "Move" and "Scale" modes to adjust their positions.5. **Adapt Topology to High-Resolution Mesh:** - Use the "Move," "Scale," and "Rotate" tools to adjust the ZSpheres to match the contours of the high-resolution mesh. - Pay attention to the natural flow of the geometry and place ZSpheres where you need more detail.6. **Convert ZSpheres to Topology:** - Once you are satisfied with the basic structure, press the "Adaptive Skin" button to convert the ZSpheres into a new topology. - Adjust the resolution and preview settings to control the density of the new mesh.7. **Refine Topology:** - After generating the adaptive skin, use the "ZRemesher" tool or other retopology tools in ZBrush to further refine and optimize the topology. - Manually adjust vertices and edges to achieve the desired edge flow.8. **Project Details:** - Use the "Project" tools in ZBrush to transfer details from the high-resolution mesh to the new topology. - This ensures that intricate details are preserved on the optimized mesh.9. **Final Adjustments:** - Make any final adjustments, fix any issues, and optimize the new mesh as needed. - Use tools like "Smooth" and "Move" to refine the overall shape.10. **Export:** - Once you are satisfied with the retopologized mesh, you can export it for use in other 3D applications.Remember that retopology is a skill that requires practice, and the exact steps may vary depending on the specific project and requirements. Experiment with different techniques and tools in ZBrush to find the workflow that works best for you.
More detailsPublished - Sat, 03 Feb 2024
Created by - Anil Chauhan
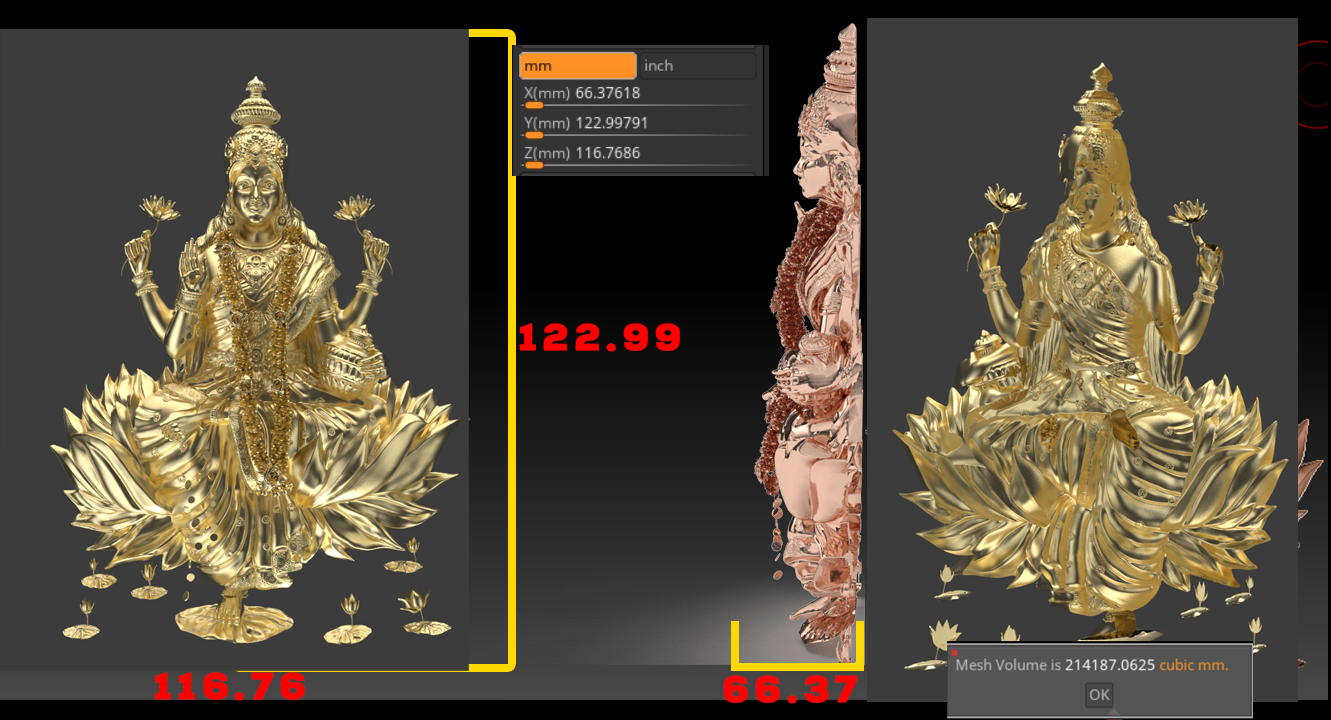
Laxmi 3d Model | Laxmi Mata | Laxmi Ma| 3d Laxmi mata model
More details
Published - Tue, 01 Oct 2024
Created by - Anil Chauhan
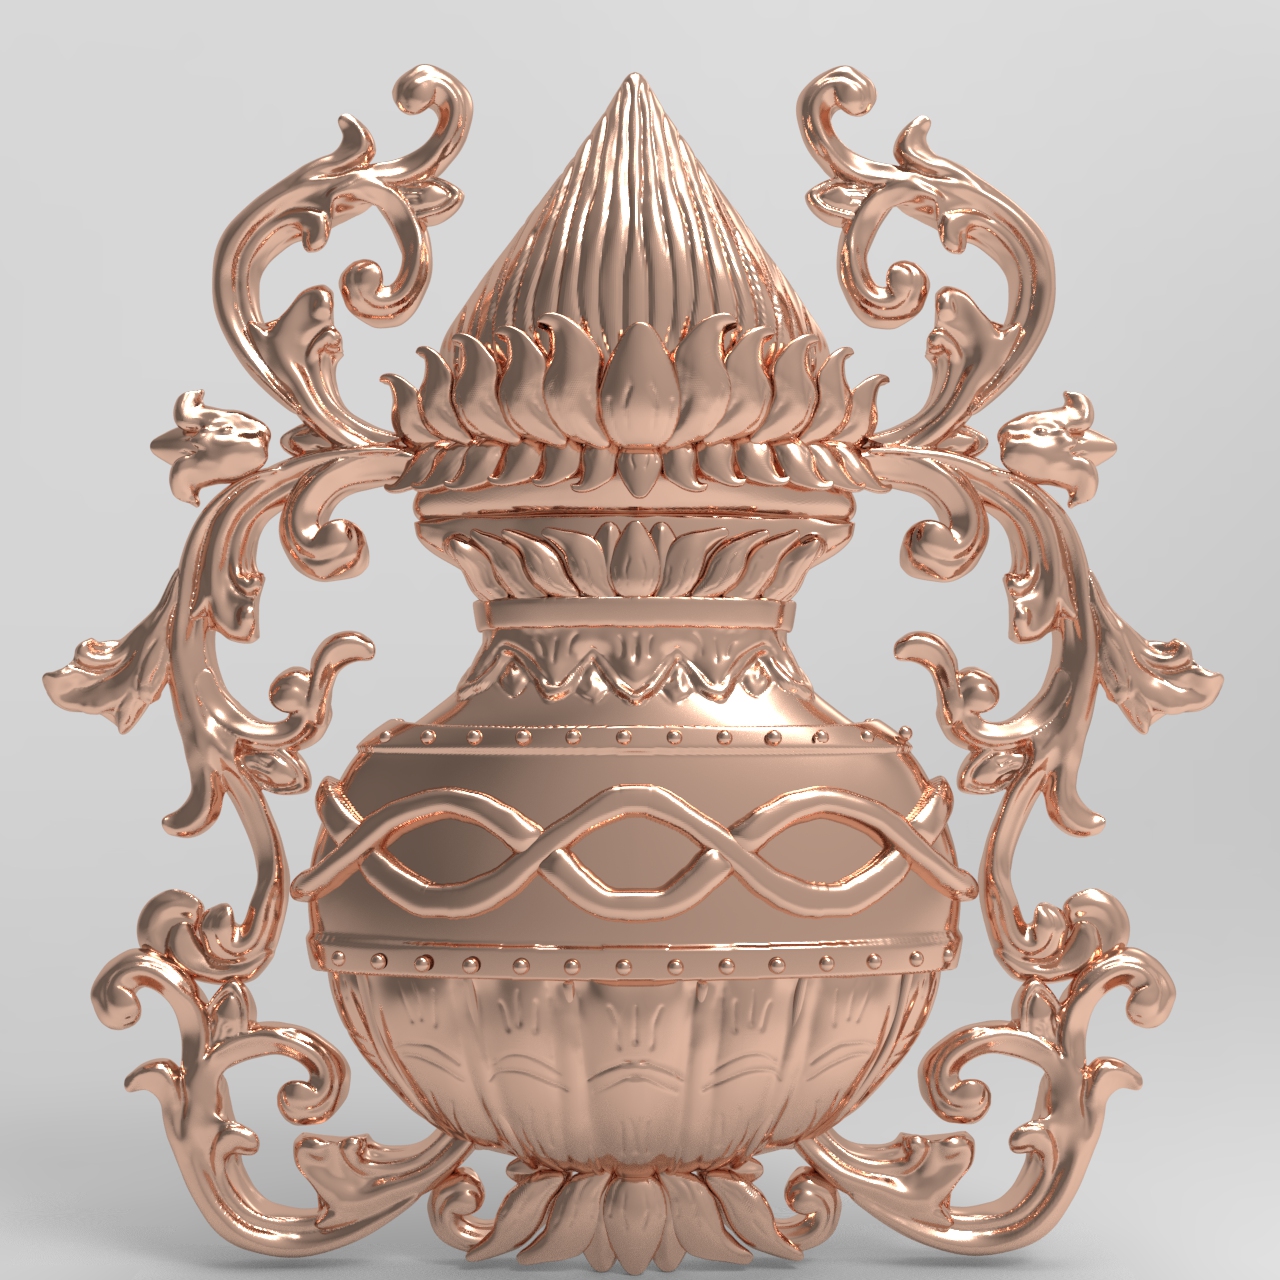
carving | wood carving
Carving and sculpting in ZBrush, followed by rendering in KeyShot, can yield stunning results! Here’s a streamlined workflow you might find useful:### 1. Sculpting in ZBrush- **Start with a Base Mesh**: Use a primitive shape or a low-poly base mesh to define the overall form.- **Dynamic Subdivision**: Enable dynamic subdivision for a smoother surface without increasing polygon count initially.- **Sculpting Tools**: Utilize brushes like the Standard, Clay Buildup, and Move tools to shape your model. Use the Zadd and Zsub functions for adding and subtracting volume.- **Detailing**: Use the Detail tools for finer details. Consider using alphas for textures, and make sure to frequently save your progress.- **Polygroups**: Organize your model using polygroups for easier selection and masking.- **UV Mapping**: Once satisfied, unwrap your model using ZBrush’s UV Master for proper texture mapping later.### 2. Exporting to KeyShot- **Export the Model**: Export your sculpted model as an OBJ or FBX file. Ensure you have proper UVs and, if necessary, create a low-res version for faster rendering.- **Texture Maps**: If you've created texture maps (like normal, displacement, or diffuse), export these as well.### 3. Rendering in KeyShot- **Import Model**: Open KeyShot and import your ZBrush model. KeyShot supports OBJ and FBX formats well.- **Material Setup**: Apply materials from the library. You can also create custom materials for specific effects.- **Lighting**: Set up your scene’s lighting. Use HDRI images for realistic lighting, or adjust the environment settings for different moods.- **Camera Settings**: Adjust the camera perspective and settings to frame your sculpt well.- **Rendering**: Set your desired resolution and quality settings. Render your scene and make adjustments as needed.### Tips- **Workflow Integration**: Consider using GoZ to streamline the transfer between ZBrush and KeyShot.- **Post-Processing**: After rendering, you can further enhance your images in software like Photoshop.### PracticeExperiment with different techniques and settings to refine your workflow. The combination of ZBrush's detailed sculpting and KeyShot's powerful rendering capabilities can lead to impressive results. Happy sculpting!
More detailsPublished - Wed, 02 Oct 2024
Search
Popular categories
Unreal Engine
7zbrush tutorial jewelry
7Maya Animation
6vray for 3ds max
4vfx
4zbrush
3Latest blogs

The general workflow in Adobe After Effects
12 Hours Ago
Videography
3 Days Ago
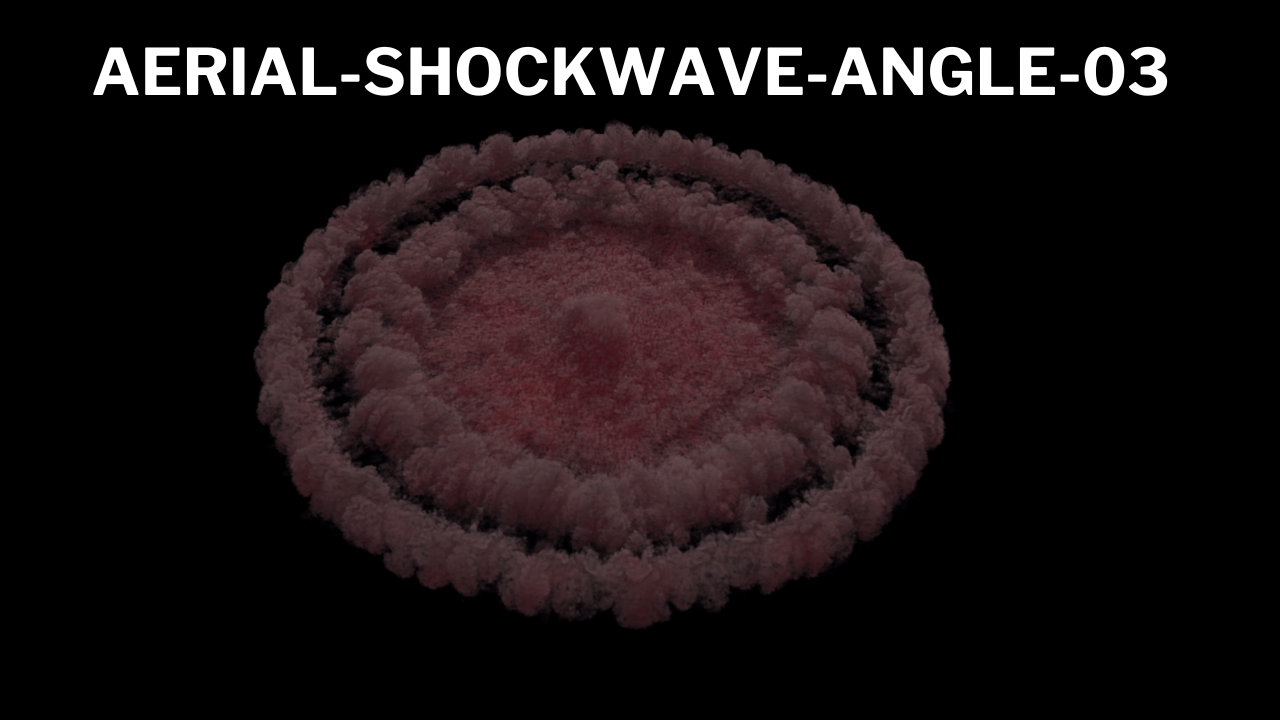
Shockwave
3 Days Ago
Write a public review