Where possibilities begin

We’re a leading marketplace platform for learning and teaching online. Explore some of our most popular content and learn something new.
Total 85 Blogs
88 pictures (Andheri e) Mumbai

Created by - Anil Chauhan

88 pictures (Andheri e) Mumbai

Recruiter : 88 pictures (Andheri e) MumbaiSkillset : Production Coordinator (VFX). The student must have Strong organizational and time-management skills, excellent communication, and interpersonal skills. Screening Process : Test, Interview RoundsJob Type : Offline

More details

Published - Wed, 11 Oct 2023

ganpat vfx

Created by - Anil Chauhan

ganpat vfx

More details

Published - Wed, 11 Oct 2023

3ds max Lighting

Created by - Anil Chauhan

3ds max Lighting

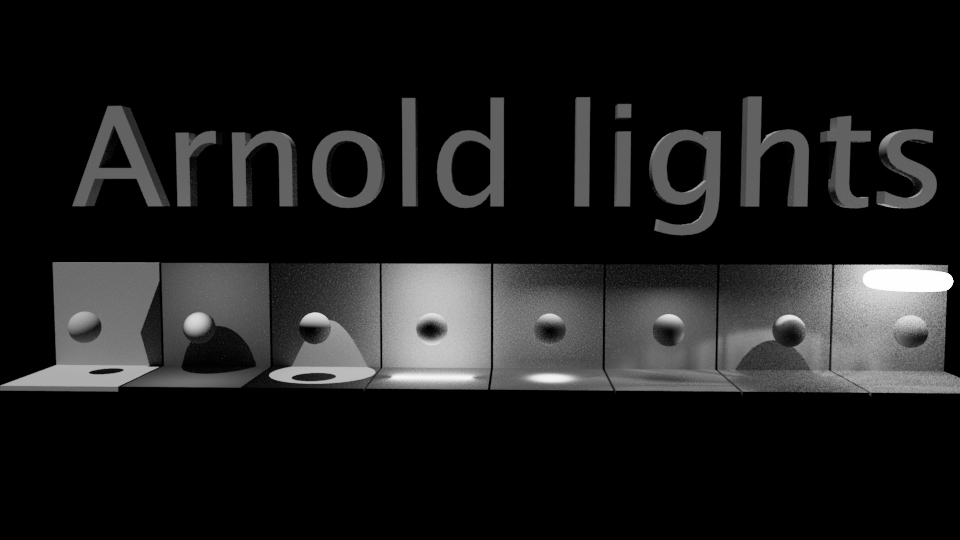
Lighting in 3ds Max is an essential aspect of 3D rendering and can greatly influence the final look and feel of your scenes. Here's an overview of how to work with lighting in 3ds Max:Standard Lights: 3ds Max offers various types of standard lights, including:Omni Lights: These are point lights that emit light in all directions.Spotlights: These are focused lights that emit light in a cone shape.Directional Lights: These are like sunlight, with parallel light rays.Target Lights: These are spotlights that target a specific point in the scene.Free Direct Lights: These are similar to directional lights but provide more control.Photometric Lights: 3ds Max also offers photometric lights that simulate real-world lighting properties. You can use photometric lights to achieve more realistic lighting in your scenes.Skydome and Daylight System: The "Daylight" system in 3ds Max allows you to simulate the lighting conditions of different times of day and geographical locations. You can use the "Skydome" feature to create a realistic sky and environment lighting.HDRI Environment Lighting: You can use High Dynamic Range Images (HDRI) to light your scenes realistically. HDRI images capture the lighting information from real environments and can be used as a light source in 3ds Max.Light Properties: Each light source has various properties that you can adjust, including intensity, color, attenuation, and shadows. You can also control the visibility of the lights in the rendering.Light Placement: Positioning and aiming your lights correctly is crucial. You can move, rotate, and scale lights in the viewport to achieve the desired lighting effects.Light Linking: You can control which lights affect specific objects in your scene by using light linking. This allows you to fine-tune the lighting and optimize rendering times.Rendering Settings: To get the best results, you may need to adjust rendering settings like the exposure control, global illumination, and ambient occlusion. These settings have a significant impact on how your scene is lit and rendered.Realistic Materials: Consider the materials of your objects when working with lighting. Materials can reflect, absorb, or transmit light differently, affecting the overall look of your scene.Test Renders: It's essential to test your lighting setup through test renders (usually in draft mode) to see how it's affecting your scene. Adjust the lighting as needed based on the results.Render Engines: 3ds Max supports various render engines, including the built-in Scanline, Mental Ray, and third-party options like V-Ray and Arnold. Different render engines may have unique lighting features and settings.Light Animation: You can animate the properties of lights, such as intensity and color, to create dynamic lighting effects in your animations.Remember that achieving realistic and aesthetically pleasing lighting requires practice and experimentation. Try different setups and lighting techniques to find the look that best suits your project's needs.

More details

Published - Thu, 12 Oct 2023

3ds max material

Created by - Anil Chauhan

3ds max material

In 3ds Max, materials are essential for giving your 3D objects their appearance, texture, and color. Materials define how light interacts with an object's surface, making it look realistic. Here's an overview of working with materials in 3ds Max:Material Editor: The Material Editor is where you create, modify, and assign materials to objects in 3ds Max. To open the Material Editor, press the "M" key or go to the "Rendering" menu and choose "Material Editor."Standard Materials: 3ds Max offers a range of standard materials, including:Standard Material: The default material type for most surfaces.Arch & Design Material: A physically based material for architectural visualization.Multi/Sub-Object Material: Allows you to assign different materials to different parts of an object.Material Parameters: When you create or edit a material, you can adjust various parameters, such as:Diffuse: The color and texture of the material.Specular: Reflectivity and shininess.Bump/Normal: Simulates surface detail through height maps.Opacity/Transparency: Controls the visibility of the material.Reflection/Refraction: Determines how the material reflects or refracts light.Self-Illumination: Makes the material emit its own light.Texture Maps: Materials often use texture maps to add detail and realism. Common types of texture maps include:Diffuse Map: Specifies the color and texture of the material.Normal Map: Simulates surface detail and bumpiness.Specular Map: Controls the shininess and reflectivity of the material.Bump Map: Adds surface irregularities without changing the geometry.Material Libraries: 3ds Max provides material libraries that you can use as starting points for your materials. These libraries contain pre-made materials with various textures and settings.UV Mapping: Before applying textures, you often need to perform UV mapping to define how the 2D texture coordinates are mapped onto the 3D object's surface. Proper UV mapping is essential for accurate texture placement.Assigning Materials: To apply a material to an object, select the object and then drag the material from the Material Editor onto the object in the viewport. You can also use the Material/Map Browser to assign materials.Material Animation: You can animate material properties, such as color, transparency, and self-illumination, to create dynamic visual effects.Render Settings: The choice of rendering engine (e.g., Scanline, Mental Ray, V-Ray, Arnold) may affect how materials are interpreted and rendered, so ensure your material setup is compatible with your chosen rendering engine.Material Libraries: You can create and save your material libraries to reuse materials across different projects or share them with others.Material Instances: Instead of creating unique materials for each object, you can use material instances to share the same material across multiple objects. Any changes made to the instance will apply to all objects using it.Remember that creating realistic and visually appealing materials often requires a combination of texture maps, shaders, and careful parameter tuning. Experimentation and practice are key to mastering material creation in 3ds Max.

More details

Published - Thu, 12 Oct 2023

Unreal Engine Tutorial

Created by - Anil Chauhan

Unreal Engine Tutorial

Creating a tutorial for Unreal Engine can be quite extensive, as it's a complex game engine with a wide range of features and capabilities. However, I can provide you with a basic step-by-step guide on how to get started with Unreal Engine:Step 1: Download and Install Unreal Engine:Go to the Unreal Engine website (https://www.unrealengine.com/).Sign in with your Epic Games account or create one.Download the Epic Games Launcher.Install the Epic Games Launcher and open it.Go to the "Unreal Engine" tab in the Launcher and click "Install Engine" to download and install Unreal Engine.Step 2: Launch Unreal Engine:Open the Epic Games Launcher.Under the "Unreal Engine" tab, click the "Launch" button to start Unreal Engine Editor.Step 3: Create a New Project:In Unreal Engine Editor, click "New Project" from the "Library" tab.Choose a template for your project (e.g., First Person, Third Person, Top Down, etc.).Specify project settings like name, location, and target platform (e.g., PC, mobile, VR).Click "Create."Step 4: Familiarize Yourself with the Interface:Unreal Engine has a complex interface. Spend some time exploring the main areas, including the Viewport, Content Browser, Details panel, and World Outliner.Step 5: Build Your Level:In the Viewport, you can start building your game world. You can add assets, landscapes, and create a level layout.Step 6: Adding Assets:Use the "Content Browser" to import 3D models, textures, materials, and sound files.Right-click in the Content Browser to import or create new assets.Step 7: Blueprints and Scripting:Unreal Engine uses Blueprints for visual scripting. You can create gameplay logic, interactions, and AI using Blueprints.To open the Blueprint editor, right-click in the Content Browser and choose "Blueprint Class."Step 8: Lighting and Materials:Unreal Engine's lighting system is powerful. Experiment with different lighting sources and settings.Create materials and apply them to your 3D models.Step 9: Testing and Play:Click the "Play" button to test your game inside the Editor.Debug and adjust your game as needed.Step 10: Packaging and Distribution:Once your project is complete, you can package it for distribution on various platforms (e.g., Windows, Android, iOS, etc.).Step 11: Learn and Expand:Unreal Engine has a wealth of documentation, tutorials, and a supportive community. Continue learning and expanding your skills.For more in-depth and specific tutorials, I recommend checking out the Unreal Engine documentation, video tutorials on YouTube, and the Unreal Engine community forums. Unreal Engine is a vast tool with many possibilities, so it's essential to learn gradually and build upon your knowledge as you go.

More details

Published - Thu, 12 Oct 2023

unreal engine tutorial : how to create house

Created by - Anil Chauhan

unreal engine tutorial : how to create house

Creating a house in Unreal Engine involves several steps, including modeling the house in a 3D modeling software (like Blender or 3ds Max), importing it into Unreal Engine, and then adding materials, lighting, and interactivity. Here's a simplified step-by-step guide to create a basic house in Unreal Engine:Step 1: Model the House in a 3D Modeling Software:Use a 3D modeling software like Blender or 3ds Max to create the 3D model of the house.Include details such as walls, roof, doors, windows, and any other architectural features you want.Make sure to properly UV map your model for textures if needed.Step 2: Export the House Model:Export the house model in a compatible 3D file format such as FBX or OBJ.Be sure to include any associated texture maps (diffuse, normal, specular, etc.) when exporting.Step 3: Import the House Model into Unreal Engine:Open Unreal Engine and your project.In the Content Browser, navigate to the location where you want to import the house model.Right-click and choose "Import."Select your house model file (e.g., FBX) and any texture files.Adjust import settings as needed and click "Import."Step 4: Add Materials:In the Content Browser, create materials for your house.Apply the materials to the corresponding parts of your house model.You can use the Material Editor to create and fine-tune materials.Step 5: Place the House in the Level:Open your level or create a new one.Drag and drop the house model from the Content Browser into the level's viewport.Step 6: Add Lighting:Place light sources in your scene to illuminate the house. You can use Directional Lights for sunlight, Point Lights for indoor lighting, and Spotlights for focused lighting.Adjust the properties of these lights to achieve the desired lighting effect.Step 7: Set Up the Landscape and Surroundings:Create a landscape or terrain around the house if your scene requires it.Add foliage, trees, and other environmental elements.Step 8: Add Interactivity:If you want to create an interactive experience, you can use Blueprints to add functionality like opening doors, turning on lights, or other interactive elements.Step 9: Test and Refine:Playtest your scene to ensure everything works as expected.Make adjustments and refinements to improve the overall look and feel.Step 10: Packaging and Distribution:Once your house and scene are ready, package the project for your target platform (e.g., Windows) and distribute it if needed.Please note that this is a simplified guide, and creating a detailed, realistic house in Unreal Engine can be quite complex, especially if you're looking for a highly detailed, architectural visualization. It may involve additional considerations like real-world scale, accurate materials, and realistic lighting setups. Consider exploring Unreal Engine's documentation and taking more in-depth tutorials for a comprehensive understanding of the process.

More details

Published - Thu, 12 Oct 2023

Maya Animation Tutorial

Created by - Anil Chauhan

Maya Animation Tutorial

Maya is a popular 3D animation and modeling software developed by Autodesk. It's widely used in the entertainment industry for creating 3D animations for video games, movies, television, and more. Here's a description of Maya's animation capabilities and how it is used:https://www.youtube.com/watch?v=6Vb3Nm7m2Wg&list=PLIi3DnFfUZQFvoWjjYWqvy3qL1MOEWArPKey Animation Features in Maya:Keyframing: Maya supports keyframe animation, where animators set specific keyframes to define the position, rotation, and scale of 3D objects at different points in time. The software interpolates between keyframes to create smooth animation.Character Rigging: Maya is known for its robust character rigging tools, which allow animators to create skeletons (bones), skin models to the skeleton, and rig characters for animation. This is essential for character animation.Character Animation: Maya provides a variety of tools for animating characters, including inverse kinematics (IK) and forward kinematics (FK) controls, character sets, and animation layers.Non-Linear Animation: With the Trax Editor, Maya allows animators to layer multiple animation clips or takes to create complex, non-linear animations. This is useful for blending different animations seamlessly.Graph Editor: The Graph Editor in Maya gives animators precise control over animation curves, enabling them to fine-tune motion and timing for a smooth and natural look.Fluid and Particle Animation: Maya offers dynamic simulations for fluids, particles, cloth, and hair. This is essential for creating realistic physical effects in animations.Motion Capture Integration: You can import motion capture data into Maya for realistic character animation. The software provides tools to clean up and retarget motion capture data to 3D characters.Rendering and Playback: Maya provides a real-time 3D viewport for animators to preview their work. It also integrates with powerful render engines like Arnold for creating high-quality, photorealistic animations.Common Uses of Maya Animation:Character Animation: Maya is extensively used in the animation and gaming industries for character animation. It's ideal for creating lifelike characters with complex movements and expressions.Visual Effects (VFX): Maya is used for creating special effects, such as explosions, smoke, fire, and other dynamic elements, in movies and television shows.Architectural Visualization: Some professionals use Maya for architectural visualization to create walkthroughs and flythroughs of buildings and environments.Product Design: Maya is also used for product design, allowing designers to create 3D animations of products to showcase their features and functionality.Educational and Training Videos: Maya is used in the creation of educational animations and training videos, providing a visual and interactive way to present information.Gaming: In the gaming industry, Maya is used to create character animations, environment animations, cutscenes, and more for video games.Maya is a versatile and powerful tool for 3D animation and is widely regarded for its professional-grade capabilities. Learning Maya can be a significant asset for those interested in a career in animation, gaming, visual effects, or 3D design.https://www.youtube.com/@cgartistallrounder9389/search?query=animation

More details

Published - Thu, 12 Oct 2023

unreal engine tutorial : Light and Post Process Volumes and game setting

Created by - Anil Chauhan

unreal engine tutorial : Light and Post Process Volumes and game setting

Creating realistic lighting and setting up post-process effects in Unreal Engine is crucial for achieving a visually appealing and immersive game environment. Here's a step-by-step tutorial on how to set up lighting, post-process volumes, and game settings in Unreal Engine:https://in.pinterest.com/pin/580964420708642426/https://www.youtube.com/watch?v=SB7KOBTpHooStep 1: Create or Open Your Project:If you haven't already, create a new project or open an existing one in Unreal Engine.Step 2: Light Setup:Unreal Engine provides several types of lights. For this tutorial, we'll focus on Directional Light (sunlight) and Point Light (lamp). You can experiment with other types as well.Directional Light (Sunlight):In the "Modes" panel, select "Lights" and then "Directional Light."Place the Directional Light in your level and adjust its rotation to simulate the sun's position.You can configure its intensity and color in the "Details" panel.Point Light (Lamp):In the "Modes" panel, select "Lights" and then "Point Light."Place the Point Light where you want your lamp or light source.Adjust its intensity, color, and radius in the "Details" panel.Skylight:A Skylight simulates ambient lighting and the color of the sky.Place a Skylight in your level and configure its settings to enhance the overall lighting.Step 3: Post Process Volume:In the "Modes" panel, select "Volumes" and then "Post Process Volume."Place the Post Process Volume in your level to cover the area where you want to apply post-process effects.In the "Details" panel, you can configure various post-process settings, such as exposure, color grading, bloom, and more. Experiment with these settings to achieve the desired visual style.Step 4: Game Settings:Go to the "Edit" menu and select "Project Settings."In the Project Settings window, navigate to "Engine > Rendering" to adjust various rendering settings:Set the "Default Camera" FOV (Field of View).Configure the "Default Settings" for Post Process Volumes.In the Project Settings, under "Engine > General Settings," you can set the "Default Maps" for your game, including the Default Level and Game Default Map.Step 5: Building Lighting:After setting up your lights and post-process effects, you should build the lighting to see the final result.Click "Build" on the toolbar, and Unreal Engine will calculate the lighting based on your setup.Step 6: Play and Test:Click the "Play" button in the toolbar to test your game with the new lighting and post-process settings.Evaluate the visual quality and make adjustments as needed.Step 7: Packaging and Distribution:Once you're satisfied with your game's lighting and settings, you can package it for your target platform (e.g., Windows, Android, iOS) and distribute it to others.Remember that creating visually appealing lighting and post-process effects often involves experimentation and fine-tuning. Unreal Engine offers numerous settings and features to help you achieve your desired look and feel for your game or project. For more in-depth information and guidance, consider exploring Unreal Engine's official documentation and tutorials.

More details

Published - Thu, 12 Oct 2023

Story Board

Created by - Anil Chauhan

Story Board

A storyboard is a visual representation of a story, typically used in film, animation, video games, and other visual media to plan and visualize scenes before production. It serves as a blueprint for how a narrative will unfold, allowing creators to make important decisions about composition, camera angles, pacing, and more. A well-crafted storyboard provides a clear and efficient way to communicate the intended narrative and visual style to the entire production team. Here's how a storyboard is typically described:https://www.youtube.com/watch?v=TG_4n3ChFHA1. Visual Sequences: A storyboard is presented as a series of panels or frames, each representing a specific visual moment in the story. These panels can be hand-drawn or created digitally. Each panel often includes a sketched or illustrated scene that conveys the key elements of that moment.2. Shot Composition: Each panel not only depicts characters and objects but also shows the composition of the shot. This includes the placement of characters, the framing of the scene, camera angles, and any essential visual elements.3. Dialogue and Captions: Alongside or below each panel, there are often descriptions or captions that provide additional context. This can include dialogue, character actions, camera movements, and other relevant information.4. Pacing and Timing: Storyboards can also indicate the timing of scenes and transitions between shots. This is crucial for understanding the flow of the story and how individual shots fit together.5. Notes and Annotations: Storyboards may include notes or annotations to further clarify the director's or artist's vision. These notes can provide guidance on the mood, special effects, lighting, or any other important details.6. Story Elements: Each panel of a storyboard represents a part of the overall story. The panels collectively form a sequence that conveys the narrative's progression.7. Scene Transitions: Storyboards help plan how scenes transition from one to another. Whether it's a cut, a fade, a dissolve, or another type of transition, storyboards indicate how these will be executed.8. Collaboration Tool: Storyboards are a communication tool used by directors, cinematographers, animators, and other team members to ensure everyone is on the same page about how to bring the story to life visually.9. Pre-production Planning: Storyboards are created in the pre-production phase to guide the production team, from cinematographers to set designers, in understanding the director's vision for the project.10. Flexibility: Storyboards can be modified and adjusted as the project evolves. They provide a framework for the visual storytelling but are not set in stone, and changes can be made as needed.In summary, a storyboard is a visual roadmap for storytelling in visual media. It provides a detailed, frame-by-frame representation of a story's visual elements, shot compositions, pacing, and other crucial information, serving as a crucial planning tool for filmmakers, animators, and other creative professionals.

More details

Published - Thu, 12 Oct 2023

Search
Popular categories
Latest blogs
alphas in Adobe Substance
Using alphas in Adobe Substance tools (like Substance Painter) is a powerful way to create intricate details, textures, and effects. Here’s a step-by-step guide on how to use alphas effectively:What Are Alphas?Alphas are black-and-white textures or images used as masks or stamps. The white areas represent the highest intensity (or opacity), and the black areas represent zero intensity (or transparency).Using Alphas in Substance Painter1. Add an Alpha to a Brush Choose a Tool: Select a painting tool (e.g., Paint, Eraser, or Projection). Open the Alphas Panel: In the Properties panel, locate the Alpha slot. Select an Alpha: Drag an alpha from the Assets panel or import your own (drag and drop or use File > Import Resources). Adjust Brush Settings: Customize the brush size, flow, or hardness in the Brush Properties to match the desired effect. 2. Stamping Details After selecting the alpha, click or drag on the 3D model to stamp the alpha pattern directly onto the surface. Use the projection tool for more precise placement if necessary. 3. Using Alphas with Height Maps Add a Layer: Create a new layer and set its material properties to include height. Apply the Alpha: Use an alpha to define the shape of the height details. Adjust Depth: Modify the height slider to control the intensity of the effect. 4. Masks with Alphas Add a mask to a layer by right-clicking it and selecting Add Black/White Mask. Select an alpha and paint on the mask to reveal or hide specific areas. 5. Fine-Tuning the Alpha Rotate or Scale: Use the alpha-specific sliders in the brush settings to change the rotation, scale, or tiling. Blending Modes: Experiment with blending modes in the layer stack to combine alpha effects with other materials. Using Custom Alphas Create or Download: Make an alpha in Photoshop or download it from online resources. Import Alphas: Go to File > Import Resources. Select Alpha as the resource type and add it to the project or library. Apply: Use the imported alpha like any other in Substance Painter. Tips for Best Results Resolution: Use high-resolution alphas for sharp details. Combine Effects: Mix alphas with other tools like normal maps or roughness for more complex materials. Experiment: Try layering multiple alphas on different layers to create unique patterns. Brush Dynamics: Enable pressure sensitivity for more natural results (if using a tablet). Let me know if you need more details or help with a specific alpha-related workflow!

3 Hours Ago

animation |Curve Editor | Customize the Interface
"nuke" animationCreating a "nuke" animation typically involves simulating an explosion with a nuclear-like aesthetic. The parameters you need depend on the software you're using (e.g., Blender, Maya, After Effects, Houdini). Below is a general breakdown of key parameters to consider:1. General Animation Settings Timeline/Duration: Set the total length of your animation (e.g., 10–20 seconds for a full explosion). Frame Rate: Standard rates are 24, 30, or 60 FPS for smoother animations. 2. Simulation Parametersa. Explosion Shape Blast Radius: Controls the size of the explosion. Blast Shape: Adjust to create a mushroom cloud with a distinct stalk and cap. Falloff: Determines how the intensity decreases with distance. b. Smoke & Fire Density: Controls the thickness of the smoke. Turbulence: Adds chaotic movement to smoke and fire. Velocity: Determines the speed of expansion. Heat/Temperature: Affects fire intensity and dissipation. Color Mapping: Controls gradients (e.g., bright white to orange to black). c. Particles/Debris Emission Rate: Number of particles per frame. Size Variation: Randomize particle sizes for realism. Gravity/Drag: Affects how particles fall and settle. Lifetime: How long particles are visible before fading out. 3. Lighting Key Light: Represents the explosion’s initial flash. Area Light: Illuminates the surrounding environment. Falloff: How light intensity decreases over distance. Color: Typically starts as bright white, transitions to orange/yellow. 4. Shader/Material Parameters Emission Strength: Intensity of the glowing areas (fireball, sparks). Transparency: Use alpha maps for smoke fading. Noise/Detail: Add procedural textures to enhance realism. Reflection/Refraction: Simulate light interactions with nearby objects. 5. Camera Settings Field of View (FOV): Adjust for cinematic framing. Shake: Simulate a shockwave effect. Depth of Field (DOF): Blur distant or close elements for focus. 6. Post-Processing Glow/Bloom: Adds a radiant effect to the explosion. Lens Flare: Simulate the light burst. Motion Blur: Makes fast-moving elements smoother. Color Grading: Adjust contrast, saturation, and hues. Software-Specific FeaturesBlender Use the Mantaflow simulation engine for smoke/fire. Enable Cycles Renderer for realistic lighting. Use Volume Shaders for detailed smoke. Houdini Use Pyro FX for advanced fluid dynamics. Fine-tune the density, temperature, and fuel attributes. After Effects Use Trapcode Particular or Element 3D for particles. Add Optical Flares for light effects. What software are you using? I can provide more tailored guidance if needed!Curve EditorThe Curve Editor in Nuke is a powerful tool for animating and fine-tuning the timing and motion of keyframes. It allows you to control how parameters change over time, providing a detailed and precise interface for creating smooth and dynamic animations.Accessing the Curve Editor Open your Node Graph. Select the node whose parameters you want to animate. Open the Curve Editor from the menu: View > Curve Editor or press Shift + E (default shortcut). Key Features of the Curve Editor1. Parameter List Located on the left, it shows all animatable properties of the selected node (e.g., Translate, Scale, Opacity). Click the checkboxes next to parameters to view/edit their curves in the timeline. 2. Timeline Horizontal axis: Represents time (frames or seconds). Vertical axis: Represents the parameter's value. Scrub through the timeline to see changes in real-time. 3. Keyframes Represented as dots along the curve. You can: Add Keyframes: Alt/Option + Click on the curve. Delete Keyframes: Select and press Delete. Move Keyframes: Drag to adjust timing or value. 4. Curve Types Linear: Creates straight transitions between keyframes. Bezier: Allows smooth, adjustable curves for ease-in/out. Constant: Maintains a static value until the next keyframe. 5. Spline Handles Appear when using Bezier curves. Drag handles to adjust the curve's shape and smoothness. Common Use Cases Animating Transformations: Use the Transform node's curves (Translate X/Y, Rotate, Scale) to animate movement or zoom effects. Opacity Fades: Animate the Opacity parameter of a node for fade-ins/outs. Color Grading Over Time: Adjust parameters like Gain or Gamma to change brightness or contrast dynamically. Advanced Tools Expression Links: Link parameters using expressions for dynamic, procedural animations. Example: Link a rotation to time for a spinning effect (frame * 10). Time Warping: Use the TimeWarp node to manipulate the curve and adjust playback speed. Predefined Easing: Apply easing options to control the acceleration and deceleration of animations. Tips for Using the Curve Editor Zoom & Pan: Use the mouse wheel to zoom and Alt + Drag to pan. Fit to View: Right-click in the curve editor and choose Fit to View to display all keyframes. Snap to Frames: Enable snapping to ensure keyframes align with whole frames. Scripting: Use Python or TCL scripts to programmatically set keyframes. Let me know if you’d like guidance on a specific animation setup in the Curve Editor!nuke customizing the interfaceCustomizing the interface in Nuke allows you to tailor the workspace to your workflow. Nuke offers flexible options for rearranging panels, creating custom layouts, and modifying settings to suit your preferences.Ways to Customize the Interface1. Rearranging Panels Docking Panels: Drag panels (e.g., Viewer, Node Graph, Properties) to different areas of the interface. You'll see highlights showing where the panel will dock. Floating Panels: Undock panels by dragging them out of the main window to create standalone, floating panels. Combining Panels: Drag one panel onto another to combine them as tabs. 2. Custom Layouts Saving Layouts: Arrange the interface as desired. Go to Workspace > Save Layout. Name the layout and save it for future use. Loading Layouts: Access your saved layouts from Workspace > Custom Layouts. 3. Customizing Menus and Toolbars Adding Shortcuts: Open the Preferences panel (Edit > Preferences). Go to the Panels > Custom Shortcuts section. Assign custom shortcuts to frequently used commands. Custom Toolbar: Right-click in the toolbar area and select Manage Toolbars. Add, remove, or rearrange tools to streamline your workflow. 4. Python Scripts for Customization Use Python scripts to add custom functionality to menus or panels. Creating a Custom Menu: Add a .py file to the .nuke directory. Example: import nuke def my_custom_function(): nuke.message("Hello, Nuke!") nuke.menu('Nuke').addCommand('Custom/My Function', my_custom_function) This adds a menu item under Custom > My Function that triggers the script. 5. Custom Node Graph Settings Node Appearance: Change the appearance of nodes in the Node Graph via Preferences > Node Graph. Customize node shapes, colors, and sizes. Backdrop Nodes: Organize groups of nodes with backdrop nodes for better clarity. Add a custom label, color, or size to backdrops. 6. Adjusting Viewer Settings Customize the Viewer panel to suit your needs: Viewer Color Settings: Adjust LUTs (Look-Up Tables) for color grading. Viewer Controls: Rearrange overlays like grid lines or safe areas. 7. Setting Default Preferences Default Nodes: Set default values for nodes by editing the init.py file in the .nuke directory. Example: To set default values for a Blur node: nuke.knobDefault('Blur.size', '10') Startup Layout: Save your preferred layout and set it as the default when Nuke starts (Workspace > Set as Default). Restoring DefaultsIf the customization becomes overwhelming or you want to reset everything: Go to Workspace > Reset to Default. Delete the .nuke directory (back it up first if needed) to remove all customizations. Let me know if you’d like help with specific customizations or scripting!

4 Hours Ago

Inroduction Unreal Engine
Unreal Engine (UE) is a powerful and widely-used real-time 3D creation tool developed by Epic Games. Originally designed for developing video games, Unreal Engine has grown into a versatile platform used in various industries, including gaming, film, architecture, automotive, simulation, and more. Below is an introduction to its core features and uses:Key Features:1. High-Quality Graphics: Unreal Engine is renowned for its cutting-edge rendering capabilities, delivering photorealistic visuals and immersive environments. It supports ray tracing, global illumination, and advanced shading techniques. 2. Blueprint Visual Scripting: UE offers a Blueprint Visual Scripting system, allowing users to create game logic without requiring extensive coding knowledge. It's an accessible way for beginners and artists to prototype and develop interactive features. 3. C++ Programming: For developers, UE provides full access to its source code, enabling custom functionality and optimizations using C++. 4. Cross-Platform Development: Unreal Engine supports multiple platforms, including PC, consoles (like Xbox and PlayStation), mobile devices, and even virtual/augmented reality (VR/AR) systems. 5. Unreal Editor: The central hub for creating content, the Unreal Editor, includes tools for level design, material creation, animation, and more. It features a user-friendly interface for developers and artists. 6. Marketplace: The Unreal Engine Marketplace offers a vast library of pre-built assets, plugins, and tools that can accelerate development. Many of these assets are free or affordably priced. Applications of Unreal Engine:1. Game Development: UE is a top choice for developing games ranging from indie projects to AAA titles. Examples include Fortnite, Gears of War, and Borderlands 3. 2. Film & Animation: Unreal Engine's real-time rendering capabilities are transforming the film industry. It’s used for virtual production, pre-visualization, and creating cinematic experiences. Shows like The Mandalorian leverage UE. 3. Architecture & Design: Architects and designers use UE to create interactive walkthroughs and stunning visualizations of buildings and environments. 4. Simulation & Training: Unreal Engine powers simulations for industries like automotive, healthcare, and military training, providing realistic environments and scenarios. 5. Virtual & Augmented Reality (VR/AR): UE offers robust tools for creating immersive VR/AR experiences, making it popular for both entertainment and professional applications. Getting Started with Unreal Engine: Download Unreal Engine: Visit the Unreal Engine website to download the latest version through the Epic Games Launcher. Explore Tutorials: Epic Games provides comprehensive tutorials and learning resources, including the Unreal Engine Documentation and free courses on platforms like the Unreal Online Learning portal. Experiment with Templates: UE comes with pre-built templates for various game genres, such as first-person shooters, side-scrollers, and VR. Join the Community: The Unreal Engine community is vibrant and supportive. Participate in forums, Discord channels, or events like Unreal Fest to connect with other developers. Unreal Engine’s versatility, ease of use, and robust tools make it a go-to platform for creators across many fields. Whether you're a beginner or an experienced developer, UE offers tools to bring your ideas to life.

23 Hours Ago

All blogs