Published - Thu, 02 Jan 2025
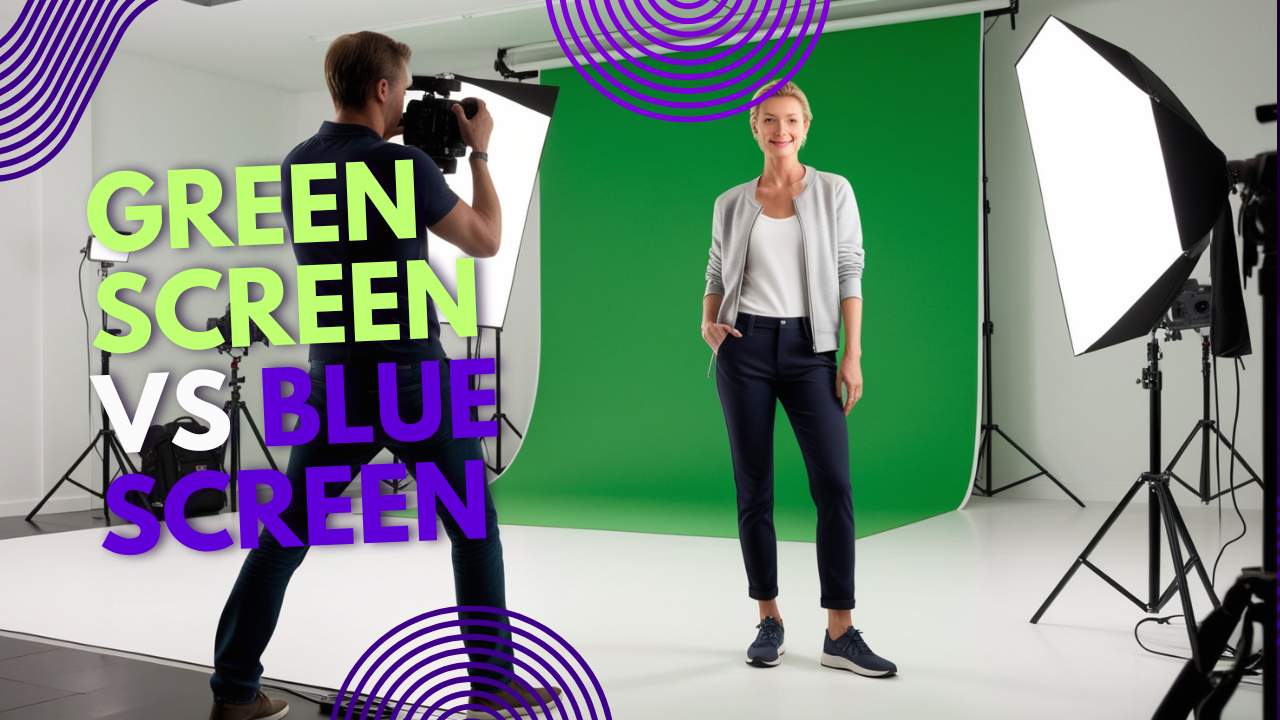
Green screen and blue screen

Green screen and blue screen

In After Effects, a green screen (also known as chroma keying) is a technique used to remove a specific color (typically green) from a video clip, allowing the background to be replaced with different footage or imagery. Here's a detailed description of how green screen works within After Effects:

Key Concepts:

  1. Chroma Keying Process:

    • The first step is to isolate the green background using the chroma key effect.
    • The green color is removed, and the pixels that matched it are made transparent, leaving the subject or objects in the foreground.
    • The transparent areas can then be replaced with any background, such as video footage, images, or graphics.
    • https://www.youtube.com/watch?v=UfGGSR6-Kks
  2. Green Screen Effect (Keylight):

    • In After Effects, the most commonly used tool for green screen work is the Keylight effect.
    • The Keylight effect allows the user to specify the color they want to remove (usually green or blue) and adjusts settings such as screen gain, screen balance, and screen softness to ensure the edges of the subject are clean and the keying looks natural.
    • https://www.youtube.com/watch?v=VrH-O7aKWLc
  3. Fine-Tuning:

    • Edge Refinement: After applying the key, you often need to refine the edges of the subject to remove any residual green spill that may still appear on the edges of the subject, especially on hair or fine details. This can be done with various settings in Keylight or with additional effects like Spill Suppression.
    • Matte Choking: To get rid of unwanted edges and to make the key more precise, the matte choking technique is used. This tightens or expands the transparent areas around the subject.
    • Feathering: Soften the edges of the matte (the transparent area) to make the transition between the subject and the new background more natural.
  4. Replacement of Background:

    • Once the green screen is keyed out, you can place any new background or visual element behind the subject.
    • This could include a 3D environment, animated visuals, or real-world footage.
    • In After Effects, you can track the camera or subject's motion to ensure that the new background moves accordingly.

    https://www.youtube.com/watch?v=p0Pe5v0aXzY

    Advantages of Using Green Screen in After Effects:

    • Flexibility: Green screens allow filmmakers and editors to place subjects in environments that may be difficult, expensive, or impossible to shoot in reality.
    • Precision: After Effects offers powerful tools for fine-tuning the green screen effect, making it a great choice for high-quality professional results.
    • Integration with Other Effects: After Effects makes it easy to combine chroma keying with other advanced visual effects, such as motion graphics, particle systems, and compositing.

    Common Use Cases:

    • Film and TV: For placing actors in complex environments, like fantasy worlds, or for CGI-heavy scenes.
    • Weather Forecasts: Used in news broadcasts where the presenter is positioned in front of a map or weather graphic.
    • Virtual Sets: In studio productions, where a green screen is used to create virtual backgrounds for talk shows or live performances.
    • YouTube and Content Creation: For vloggers and creators to place themselves into different environments, such as gaming streams or special effects-heavy videos.

    This green screen process in After Effects gives creators the ability to manipulate and composite footage seamlessly for dynamic and visually captivating results.

    https://www.youtube.com/watch?v=TU8VVtehflc
    Green screen and blue screen are techniques used in video production and photography to create special effects by replacing a solid-colored background with different images or footage. Here's a breakdown of both:

    Green Screen (Chroma Keying)

    • Color: Green is typically used because it is not a color commonly found in skin tones, making it easier to isolate the background from the subject.
    • Usage: The background behind the subject is a bright green color, which is then replaced (keyed out) by digital imagery or video during post-production.
    • Advantages:
      • Higher contrast with skin tones: Most people’s skin tones do not contain much green, making it easy to separate the subject from the background.
      • Works well with most modern cameras: Green is bright and can be captured effectively by cameras, making it easier to work with in editing software.
    • Common Uses: Weather broadcasts, movie special effects, video games, and virtual sets.

    https://www.youtube.com/watch?v=6PYqGsJCJeU

    Blue Screen (Chroma Keying)

    • Color: Blue is the alternative to green and is used for similar purposes.
    • Usage: Like green screen, blue screen involves shooting with a blue background, which is then digitally replaced with another image or video.
    • Advantages:
      • More suitable for certain subjects: Blue is sometimes preferred over green, especially if the subject has green colors in their wardrobe or the scene has a lot of greenery, as it avoids blending with the background.
      • Works well for darker skin tones: Blue tends to contrast better with darker skin tones compared to green.
    • Common Uses: Same as green screen, but sometimes used in cases where green might interfere with other elements in the shot.

    Key Differences

    • Color Choice: Green is brighter and often easier to work with, while blue might be chosen depending on the subject matter or lighting conditions.
    • Lighting Considerations: Both techniques require the background to be evenly lit to prevent shadows or variations in color that could complicate post-production keying.
    • https://www.youtube.com/watch?v=YlQrhQv778c

    In both techniques, once the background is removed, you can insert virtually any kind of image or footage to replace it, creating the illusion that the subject is somewhere else entirely (e.g., in space, on a different planet, or in front of a digital set).

    https://www.youtube.com/watch?v=C2BatTa8zdI


    Both green screen and blue screen are commonly used in chroma keying, a technique in filmmaking and video production to remove a background and replace it with a different image or scene. While they serve the same purpose, they differ in certain characteristics, and the choice between them depends on the situation. Here’s a breakdown:

    1. Color Choice and Background Compatibility

    • Green Screen:

      • Green is the most commonly used color because it is the least likely to match human skin tones, hair colors, and clothing, making it easier to separate the subject from the background.
      • It's brighter and requires less lighting power compared to blue, which helps with cleaner keying.
      • Ideal for outdoor shooting: When shooting in natural light, green often works better as it stands out more against typical environments.
    • Blue Screen:

      • Blue is often used when the subject has green in their outfit or props, as the blue will be less likely to overlap with those colors.
      • It’s more common in situations where the subject is surrounded by green (like forest settings) or when skin tones are darker.
      • Works better for skin tones with more red or yellow hues, such as in Caucasian or Asian actors with light skin, where green might cause some issues.

    2. Lighting and Technical Factors

    • Green Screen:
      • Green is much brighter, so it often requires less lighting to achieve the same level of brightness.
      • Ideal for high-resolution footage: It captures a cleaner image with less noise, especially in bright settings.
    • Blue Screen:
      • Blue is darker and can require more lighting to properly key out.
      • It can sometimes result in more noise in low-light situations.
      • Blue can be harder to work with in terms of keying and compositing, as it tends to be a bit more challenging to separate from similar colors.

    3. Post-production and Editing

    • Green Screen:
      • Green is typically easier to key out because it's a more distinct and brighter color, giving better contrast with most skin tones.
      • The use of green allows for more flexibility when it comes to compositing complex images and backgrounds.
    • Blue Screen:
      • In some cases, blue can create more issues when compositing, especially when fine details such as hair or transparent objects are involved, since blue may spill onto edges and details.
      • Some special effects, like reflections or fog, may work better with a blue screen.

    4. Choosing Based on Subject

    • Green Screen: Better for most general use, including actors, animated characters, and special effects involving objects or backgrounds that don't have green.
    • Blue Screen: Useful when dealing with subjects that are wearing green, or if the background or lighting necessitates blue over green.

    Conclusion:

    • Green screens are preferred for most shoots due to their brightness and cleaner keying, especially when working with daylight and modern cameras.
    • Blue screens are still used, especially in situations where green might conflict with the subject's colors or in certain visual effects workflows.

    Ultimately, it depends on the subject, lighting conditions, and intended effects in post-production!

    Created by
    Shavikant Chauhan

    Welcome to my website! My name is Anil Chauhan, and I am a 3D modeling and animation expert with over 15 years of experience in the field. I have a passion for creating visually stunning 3D models, animations, and graphics, and I'm excited to share my expertise with you. Whether you're a beginner or an experienced artist, I can help you improve your skills in 3D modeling, texturing, lighting, animation, rigging, CG graphics, and VFX. Let's work together to bring your creative ideas to life!

    Welcome to my website! My name is Shavikant Chauhan, and I am a 3D modeling and animation expert with over 15 years of experience in the field. I have always had a passion for creating visually stunning 3D models, animations, and graphics, and my work has been featured in a variety of industries including film, television, advertising, and video games.


    Throughout my career, I have had the opportunity to work on a wide range of projects, from small independent films to large-scale productions. This has given me a diverse set of skills and a deep understanding of the 3D animation process from start to finish. I have expertise in complete 3D modeling, texturing, lighting, animation, rigging, CG graphics, and VFX, and I'm always eager to take on new and exciting challenges.


    As a tutor, I am dedicated to sharing my knowledge and experience with aspiring artists and professionals alike. I believe that everyone has the potential to create amazing 3D models and animations, and I'm committed to helping my students achieve their goals. Whether you're a beginner looking to get started in the world of 3D animation, or an experienced artist looking to take your skills to the next level, I can provide personalized training and guidance to help you achieve your creative vision.

    View profile

    Comments (0)

    Search
    Popular categories
    Latest blogs
    Introduction to Arnold in Maya
    Introduction to Arnold in Maya
    **Introduction to Arnold in Maya**Arnold is a high-quality, advanced Monte Carlo ray tracing renderer used for generating photorealistic images and animations. It is widely used in the film, television, and visual effects industries due to its efficiency, flexibility, and ability to handle complex scenes. Arnold is integrated into Autodesk Maya as **Arnold for Maya** (or **MtoA**), making it a powerful tool for 3D artists and animators.---### **Key Features of Arnold in Maya**1. **Physically-Based Rendering (PBR):**   - Arnold simulates real-world lighting and materials, producing realistic results.   - It uses physically accurate shading models, such as the Standard Surface shader.2. **Ray Tracing:**   - Arnold uses ray tracing to calculate light paths, reflections, refractions, and global illumination (GI) for accurate lighting.3. **Scalability:**   - It efficiently handles large and complex scenes, making it suitable for production environments.4. **Interactive Rendering (IPR):**   - Arnold provides an interactive rendering mode that allows artists to see changes in real-time as they adjust lighting, materials, or camera settings.5. **AOVs (Arbitrary Output Variables):**   - Arnold supports AOVs, enabling artists to render separate layers (e.g., diffuse, specular, shadows) for compositing.6. **Integration with Maya:**   - Arnold is deeply integrated into Maya, allowing seamless workflow with Maya's tools and features.7. **Support for Volumetrics:**   - Arnold can render volumetric effects like fog, smoke, and clouds using its volumetric shaders.8. **GPU Rendering:**   - Arnold supports GPU rendering, which can significantly speed up rendering times for compatible hardware.---### **Basic Workflow with Arnold in Maya**1. **Set Up Your Scene:**   - Model your objects, create materials, and set up your scene in Maya.2. **Assign Arnold Materials:**   - Use Arnold's **Standard Surface Shader** (aiStandardSurface) for materials. This shader is versatile and can simulate a wide range of surfaces, from metals to glass.3. **Add Lighting:**   - Use Arnold lights (e.g., aiAreaLight, aiSkyDomeLight) to illuminate your scene. Arnold supports physically accurate lighting setups.4. **Adjust Render Settings:**   - Open the **Render Settings** window and set Arnold as the renderer.   - Configure settings like sampling, ray depth, and global illumination to optimize quality and performance.5. **Render the Scene:**   - Use the Arnold RenderView to preview and render your scene. The IPR mode allows for real-time feedback.6. **Post-Processing:**   - Use AOVs to render separate passes and composite them in software like Adobe After Effects or Nuke.---### **Common Arnold Nodes in Maya**- **aiStandardSurface:** The primary shader for creating materials.- **aiSkyDomeLight:** Used for environment lighting, such as HDRI maps.- **aiAreaLight:** A versatile light source for simulating soft lighting.- **aiVolume:** For rendering volumetric effects like fog or smoke.- **aiStandIn:** Allows you to reference external Arnold-asset files (.ass) for efficient scene management.---### **Tips for Using Arnold in Maya**- **Optimize Sampling:** Adjust the Camera (AA) and Diffuse/Glossy samples to balance render quality and speed.- **Use Denoising:** Enable Arnold's denoiser to reduce noise in renders without increasing sample counts.- **Leverage GPU Rendering:** If you have a compatible GPU, switch to GPU mode for faster renders.- **Experiment with Lighting:** Arnold's lighting tools are powerful—try combining area lights with HDRI environments for realistic results.---Arnold is a robust and versatile renderer that can elevate the quality of your Maya projects. With its integration into Maya, it provides a streamlined workflow for creating stunning visuals. Whether you're working on still images or animations, Arnold's capabilities make it a go-to choice for professionals in the industry.

    Mon, 24 Feb 2025

    Substance to Maya Workflow
    Substance to Maya Workflow
    substance to maya workflowIntegrating Substance Painter with Autodesk Maya is a common workflow for creating high-quality textures and materials for 3D models. Below is a step-by-step guide to help you seamlessly transfer textures and materials from Substance Painter to Maya: --- ### **1. Prepare Your Model in Maya** - **Model and UVs**: Ensure your 3D model is properly UV unwrapped in Maya. Clean UVs are essential for texture painting in Substance Painter. - **Export the Model**: Export your model in a format compatible with Substance Painter (e.g., `.fbx`, `.obj`). --- ### **2. Texture Painting in Substance Painter** - **Import the Model**: Open Substance Painter and import your model. - **Create a New Project**: Set the texture resolution (e.g., 2K, 4K) and choose the appropriate template. - **Paint and Texture**: Use Substance Painter's tools to paint textures, create materials, and add details like roughness, metallic, normal maps, etc. - **Bake Maps**: Bake necessary maps (e.g., normal, ambient occlusion, curvature) for accurate texture application. --- ### **3. Export Textures from Substance Painter** - **Configure Export Settings**: - Go to `File > Export Textures`. - Choose a configuration preset (e.g., `Maya (Arnold)` or `Maya (Standard)` depending on your renderer). - Select the maps you want to export (e.g., Base Color, Normal, Roughness, Metallic, etc.). - Choose the file format (e.g., `.png`, `.tif`, `.exr`). - **Export**: Save the textures to a folder accessible to your Maya project. --- ### **4. Import Textures into Maya** - **Apply Textures in Maya**: - Open your Maya scene and select the model. - Assign a new material to the model (e.g., `aiStandardSurface` for Arnold or `Standard Surface` for other renderers). - Connect the exported textures to the appropriate material channels: - **Base Color**: Connect to the `Base Color` or `Color` input. - **Normal Map**: Connect to the `Normal Map` input (ensure you enable `Tangent Space Normals` if needed). - **Roughness**: Connect to the `Roughness` input. - **Metallic**: Connect to the `Metallic` input. - **Ambient Occlusion**: Connect to the `Ambient Occlusion` input (optional, depending on your workflow). --- ### **5. Adjust and Render** - **Tweak Material Settings**: Adjust material properties in Maya to match your desired look. - **Lighting and Rendering**: Set up lighting and render settings in Maya to visualize the final result. --- ### **6. Optional: Live Link Between Substance Painter and Maya** - Use the **Substance Plugin for Maya** to establish a live link between Substance Painter and Maya. This allows you to see texture updates in real-time without manually exporting and importing textures. - Install the Substance Plugin from the Adobe website or Autodesk App Store. - Follow the plugin's instructions to sync your Substance Painter project with Maya. --- ### **Tips for a Smooth Workflow** - **Consistent Naming**: Use consistent naming conventions for textures and materials to avoid confusion. - **Texture Resolution**: Ensure texture resolutions match your project requirements. - **Test Renders**: Perform test renders in Maya to verify the textures look correct under different lighting conditions. By following this workflow, you can efficiently create and apply high-quality textures to your 3D models in Maya using Substance Painter.

    Sat, 22 Feb 2025

    ZBrush User Interface Overview
    ZBrush User Interface Overview
    ### ZBrush User Interface OverviewZBrush has a unique and highly customizable user interface (UI) designed to streamline the digital sculpting process. While it may seem overwhelming at first, understanding the layout and key components will help you navigate and use ZBrush efficiently. Below is a breakdown of the ZBrush user interface:---### **Main Components of the ZBrush Interface**#### **1. Canvas**- The central area where you sculpt and interact with your 3D models.- You can rotate, pan, and zoom the canvas using:  - **Rotate:** Click and drag with the mouse.  - **Pan:** Hold **Alt** + click and drag.  - **Zoom:** Hold **Alt** + click and release (without dragging).#### **2. Top Menu Bar**- Contains global menus like **File**, **Edit**, **Light**, **Render**, and **Preferences**.- Key options:  - **File:** Open, save, and import/export projects.  - **Preferences:** Customize ZBrush settings, including UI, hotkeys, and performance.#### **3. Left and Right Shelves**- **Left Shelf:** Contains commonly used tools like brushes, strokes, and alphas.- **Right Shelf:** Includes navigation tools, viewport options, and display settings.#### **4. Tool Palette**- Located on the right side of the screen.- Contains all the tools (e.g., brushes, meshes, and primitives) you can use in ZBrush.- Key tools:  - **Brush:** Select different sculpting brushes.  - **Stroke:** Define how the brush interacts with the model.  - **Alpha:** Apply textures or patterns to your brush strokes.  - **Material:** Choose surface materials for your model.#### **5. SubTool Palette**- Located under the **Tool** menu.- Allows you to manage multiple parts of your model (e.g., body, clothing, accessories).- Use **Append** to add new Subtools to your project.#### **6. Transforms Palette**- Located at the top of the screen.- Contains tools for moving, scaling, and rotating your model.- Key options:  - **Move (W), Scale (E), Rotate (R):** Standard transform tools.  - **Activate Symmetry (X):** Enable symmetry for sculpting.#### **7. Brush Palette**- Contains all the sculpting brushes.- Popular brushes:  - **Standard:** Basic sculpting brush.  - **Move:** Adjust the shape of your model.  - **ClayBuildup:** Add volume to your model.  - **DamStandard:** Create sharp details like cracks or wrinkles.#### **8. Layers Palette**- Allows you to work non-destructively by adding details on separate layers.- Useful for experimenting with different sculpting ideas.#### **9. Geometry Palette**- Contains tools for managing your model's topology.- Key options:  - **Divide:** Increase the polygon count for finer details.  - **Dynamesh:** Recalculate topology dynamically.  - **ZRemesher:** Automatically generate clean topology.#### **10. Light and Render Palettes**- **Light Palette:** Adjust lighting for your scene.- **Render Palette:** Control rendering settings for creating final images.#### **11. Quick Access Buttons**- Located at the top of the canvas for easy access to common actions:  - **Draw (Q):** Enter sculpting mode.  - **Edit (T):** Enter edit mode to manipulate the model.  - **Undo (Ctrl+Z):** Undo the last action.---### **Customizing the Interface**ZBrush allows you to customize the UI to suit your workflow:1. **Move Palettes:**   - Drag and drop palettes to rearrange them.2. **Save Custom UI:**   - Go to **Preferences > Config > Store Config** to save your custom layout.3. **Hotkeys:**   - Assign custom hotkeys under **Preferences > Hotkeys**.---### **Key Tips for Navigating the UI**- **Hide/Show UI:** Press **Ctrl+Shift** to hide the UI and focus on your model. Press it again to restore the UI.- **Pop-Up Menus:** Right-click on the canvas to access quick menus for brushes, alphas, and materials.- **Custom Menus:** Create custom menus for frequently used tools under **Preferences > Customize UI**.---### **Learning the Interface**- **Practice:** Spend time exploring each palette and tool to understand their functions.- **Tutorials:** Watch beginner tutorials to see the UI in action.- **Documentation:** Refer to the official ZBrush documentation for detailed explanations.---By familiarizing yourself with the ZBrush user interface, you’ll be able to work more efficiently and unlock the full potential of this powerful sculpting tool.

    Fri, 21 Feb 2025

    All blogs