Created by - Anil Chauhan
Light
Light is a form of electromagnetic radiation that is visible to the human eye. It consists of photons—tiny packets of energy that travel in waves. Light has both wave-like and particle-like properties, a concept known as wave-particle duality in physics.Key Properties of Light: Speed – Light travels at approximately 299,792,458 meters per second (c) in a vacuum. Wavelength & Frequency – Determines the color of visible light. The visible spectrum ranges from violet (shorter wavelength, higher frequency) to red (longer wavelength, lower frequency). Reflection & Refraction – Light can bounce off surfaces (reflection) or bend when passing through different materials (refraction). Absorption – Materials can absorb light, converting it into heat or other forms of energy. Polarization – Light waves can vibrate in specific directions. Types of Light: Visible Light – The small range of electromagnetic radiation that human eyes can see (roughly 400-700 nm). Infrared (IR) & Ultraviolet (UV) – Invisible to the naked eye but detectable with special equipment. X-rays & Gamma Rays – High-energy light waves used in medical imaging and radiation treatments. Microwaves & Radio Waves – Lower-energy waves used in communication and heating. ShadowsA shadow is a dark area formed when an object blocks a light source, preventing light from reaching a surface behind it. Shadows have different characteristics depending on the light source and object:Types of Shadows: Umbra – The darkest part where light is completely blocked. Penumbra – The lighter, blurred edge where some light is partially blocked. Antumbra – Appears when an object is smaller than the light source, creating a halo effect. Factors Affecting Shadows: Light Source – A small light creates sharp shadows, while a large one makes soft shadows. Distance – The farther the object from the surface, the softer the shadow edges. Transparency – Semi-transparent objects create faint or partial shadows. Lighting is essential in both real-world photography and CGI (3D rendering). Here’s a structured guide covering basic to advanced lighting tips:???? Basic Lighting Tips (Fundamentals)1. Understand Light Types Natural Light – Sunlight or moonlight, varies with time & weather. Artificial Light – Bulbs, LEDs, neon, spotlights, etc. Directional Light – Mimics sunlight, parallel rays, no falloff. Point Light – Emits light in all directions from a single point (like a bulb). Spotlight – Focused beam of light with falloff. Area Light – Soft, diffused light from a surface (like a window). 2. Three-Point Lighting (Common Setup) Key Light – The main source of illumination. Fill Light – Reduces shadows, softens contrast. Rim/Back Light – Separates subject from the background. 3. Color Temperature & Mood Warm Light (Yellow/Orange, 3000K-4500K) – Cozy, inviting. Cool Light (Blue/White, 5000K-7000K) – Modern, clean, sometimes eerie. ⚡ Intermediate Lighting Techniques4. Light Intensity & Falloff Adjust brightness and use inverse square law for realistic falloff. Use soft lights for natural diffusion. 5. Shadows & Contrast Hard shadows = high contrast (harsh lighting). Soft shadows = diffused, natural look. Use ambient occlusion for contact shadows in CGI. 6. Reflections & Specular Highlights Reflections add realism (especially in glass, metal, and water). Adjust specular intensity for proper highlight control. 7. Light Bouncing (Global Illumination) Real-world light bounces off surfaces, affecting color and exposure. Use radiosity & GI (Global Illumination) in rendering for realism. ???? Advanced Lighting Techniques8. Volumetric & Atmospheric Lighting Fog & Haze create depth and realism. Use God Rays for dramatic sunlight effects. 9. HDRI Lighting (Image-Based Lighting) High Dynamic Range Images (HDRI) provide realistic reflections & ambient lighting. Great for outdoor & studio renders. 10. Light Animation & Dynamic Effects Flickering lights for realism (like fire or neon). Moving lights for interactive scenes in gaming. 11. Cinematic & Storytelling Lighting Rembrandt Lighting – Classic portrait lighting style. Split & Loop Lighting – Used in character lighting. Silhouettes & Rim Lighting – Enhances drama. Final Tip: Experiment & Observe! Study real-world lighting (photography & film). Use reference images & test different setups in your projects. Adjust exposure, balance, and post-processing for the best results. Would you like specific tips for 3D rendering, architecture, or gaming lighting? ????
More detailsPublished - Thu, 30 Jan 2025
Created by - Anil Chauhan
What is Composition
What is Composition?Composition is the arrangement of visual elements in an image, scene, or frame to create balance, harmony, and focus. It helps guide the viewer’s eye and enhances storytelling.???? Basic Composition Principles Rule of Thirds – Divide the frame into a 3x3 grid and place key elements along the lines or intersections. Balance – Symmetrical (formal) or asymmetrical (dynamic) balance for visual harmony. Leading Lines – Use natural lines (roads, shadows, beams) to direct attention to a focal point. Framing – Use objects like windows, doorways, or trees to frame the subject and add depth. Contrast & Emphasis – Light vs. dark, color contrast, or focus to highlight the main subject. Negative Space – Leaving empty areas to create breathing room and focus. Depth & Layering – Foreground, midground, and background elements create a 3D feel. ⚡ Advanced Composition Techniques Golden Ratio (Fibonacci Spiral) – A natural, aesthetically pleasing composition rule. Dynamic Composition – Diagonal lines, curves, and asymmetry create movement. Color Composition – Using complementary or analogous colors for mood and storytelling. Silhouettes & High Contrast – Strong subject definition using light and shadow. Visual Weight – Larger, brighter, or more detailed elements attract attention first. Would you like composition tips for 3D design, photography, or cinematography? ????
More detailsPublished - Thu, 30 Jan 2025
Created by - Anil Chauhan
Color Theory
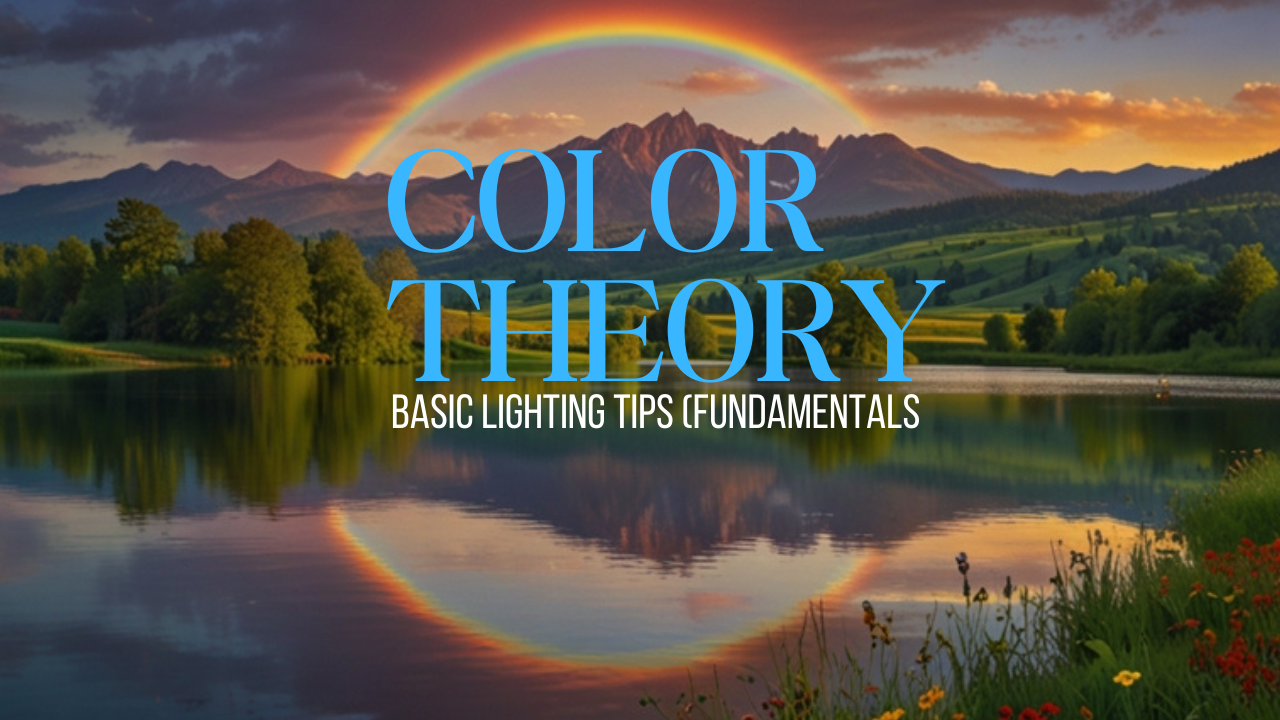
What is Color?Color is the perception of light wavelengths by the human eye. It is a visual property that depends on how objects absorb, reflect, and emit light.???? Scientific Explanation Color comes from light – White light contains all colors (visible spectrum). Objects appear colored because they absorb some wavelengths and reflect others. A red apple absorbs all colors except red, which it reflects. Different wavelengths = Different colors Short wavelengths (400 nm) → Violet, Blue Medium wavelengths (500-600 nm) → Green, Yellow Long wavelengths (700 nm) → Red ???? Properties of Color Hue – The name of a color (e.g., red, blue, yellow). Saturation – Intensity or purity of a color. High saturation = Vivid colors Low saturation = Muted or pastel tones Brightness (Value) – How light or dark a color is. ???? Types of Colors Primary Colors – Red, Blue, Yellow (cannot be made by mixing other colors). Secondary Colors – Green, Orange, Purple (made by mixing two primary colors). Tertiary Colors – A mix of a primary and a secondary color (e.g., Blue-Green). ???? Psychological Effects of Color Red – Energy, passion, danger. Blue – Calm, trust, professionalism. Green – Nature, growth, freshness. Yellow – Happiness, warmth, caution. Purple – Luxury, mystery, creativity. Black & White – Contrast, minimalism, power. What is Color Theory?Color theory is the study of how colors interact, how they affect emotions, and how they can be combined to create visually appealing designs. It is widely used in art, design, photography, film, and 3D rendering to enhance storytelling and aesthetics.???? Basic Color Concepts Primary Colors – Red, Blue, Yellow (cannot be made by mixing other colors). Secondary Colors – Green, Orange, Purple (made by mixing two primary colors). Tertiary Colors – Made by mixing a primary and a secondary color (e.g., Red-Orange). ???? Color Harmony (Color Schemes)1. Complementary Colors ???? Colors opposite each other on the color wheel (e.g., Blue & Orange). Creates strong contrast and visual interest. Common in film and gaming (e.g., teal & orange color grading). 2. Analogous Colors ???? Colors next to each other on the wheel (e.g., Blue, Blue-Green, Green). Creates harmony and a natural look. 3. Triadic Colors ???? Three colors evenly spaced on the wheel (e.g., Red, Yellow, Blue). Vibrant but balanced combinations. 4. Split-Complementary Colors ???? A base color + two adjacent to its complement (e.g., Blue, Yellow-Orange, Red-Orange). Softer contrast than complementary schemes. 5. Monochromatic Colors ????️ Different shades, tints, and tones of the same color (e.g., Light Blue, Blue, Dark Blue). Elegant and minimalistic. 6. Tetradic Colors (Double Complementary) ???? Two complementary pairs (e.g., Blue & Orange + Green & Red). Dynamic but requires balance. ???? Advanced Color Theory Concepts1. Color Psychology (Emotions & Meanings) Red – Passion, energy, danger. Blue – Calm, trust, professionalism. Green – Nature, growth, freshness. Yellow – Happiness, warmth, caution. Purple – Luxury, mystery, creativity. Orange – Energy, enthusiasm, warmth. Black & White – Minimalism, contrast, power. 2. Warm vs. Cool Colors Warm Colors (Red, Orange, Yellow) – Energizing and vibrant. Cool Colors (Blue, Green, Purple) – Calming and relaxing. 3. Contrast & Readability High contrast (light text on dark background) improves visibility. Low contrast can be stylish but harder to read. 4. Saturation & Brightness High saturation = Bold, vibrant colors. Low saturation = Soft, muted, pastel tones. ???? Color in Different Fields Film & Games – Color grading (e.g., cyberpunk neon tones, warm vintage filters). 3D Rendering – Lighting and materials affect color perception. Graphic Design – Branding and UI/UX color psychology. Architecture & Interior Design – Mood and spatial perception. Here’s the color sequence for VIBGYOR:VIBGYOR stands for the colors of the visible spectrum in the order they appear in a rainbow: V – Violet I – Indigo B – Blue G – Green Y – Yellow O – Orange R – Red Each of these colors corresponds to a specific range of wavelengths within the visible light spectrum. Would you like more information on VIBGYOR or color mixing? ????
More detailsPublished - Thu, 30 Jan 2025
Created by - Anil Chauhan
Maya Lighting
In Autodesk Maya, Standard Lighting refers to the basic lighting setup using Maya’s built-in lights. These lights are useful for previewing scenes before using advanced rendering engines like Arnold, Redshift, or V-Ray.Types of Standard Lights in Maya: Ambient Light Provides uniform lighting across the scene. Lacks directionality, so it flattens shadows and depth. Useful for filling in dark areas. Directional Light Simulates sunlight with parallel rays. Shadows remain consistent across objects. Great for outdoor scenes. Point Light Emits light in all directions, like a bare lightbulb. Good for simulating small light sources. Spot Light Emits light in a conical shape. Useful for focused lighting like flashlights or stage lighting. Area Light A rectangular light source that emits soft, realistic lighting. Useful for soft shadows and realistic indoor lighting. Volume Light Emits light within a defined 3D volume (sphere, cube, etc.). Useful for atmospheric effects. Key Settings for Standard Lighting: Intensity: Controls brightness. Decay Rate: Simulates realistic light falloff (None, Linear, Quadratic, Cubic). Shadows: Enable Ray Traced Shadows or Depth Map Shadows for realism. Color & Temperature: Adjust light color for mood and atmosphere. Viewport 2.0 vs. Rendering Viewport 2.0: Displays basic lighting but lacks realism. Software Renderer: Can use Maya's standard lights but is outdated. Arnold Renderer: Requires converting standard lights to Arnold lights for proper rendering. In Maya, lights have various properties that define their behavior, appearance, and effect on a scene. Below are the basic properties of lights in Maya:1. Basic Light Properties➤ Intensity Controls the brightness of the light. Higher values make the light stronger; lower values make it dimmer. Can be set above 1 for extra brightness. ➤ Color Defines the light’s color. Affects the scene’s mood and realism. Can be adjusted using the color picker or connected to textures. ➤ Decay Rate (Falloff of Light Intensity) Controls how light fades over distance. Options: None: Light remains constant over distance (unrealistic). Linear: Light fades linearly with distance. Quadratic (Realistic): Light follows real-world physics (e.g., sunlight). Cubic: Light falls off very quickly. 2. Shadow Properties➤ Shadows Enable/Disable Allows turning shadows on or off for a light source. Helps control scene complexity and performance. ➤ Shadow Type Depth Map Shadows: Faster but less accurate. Works well for soft shadows. Ray Traced Shadows: More accurate but slower. Allows soft shadows by adjusting light radius and shadow rays. ➤ Shadow Color Allows adjusting shadow darkness or tint. Useful for artistic effects or semi-transparent shadows. 3. Advanced Light Properties➤ Light Angle (Spot Lights & Area Lights) Controls the spread of the light beam. Penumbra Angle: Softens the edges of a spotlight. ➤ Cone Angle (Spot Light Only) Adjusts the width of the spotlight cone. Larger values spread the light wider. ➤ Emit Specular & Emit Diffuse Emit Diffuse: Affects the brightness of objects. Emit Specular: Controls how the light interacts with shiny surfaces. Can be disabled for certain lighting effects. ➤ Fog & Glow Effects Light Fog: Creates atmospheric fog around the light. Glow: Adds a glow effect to the light source. 4. Light Linking (Controlling Which Objects Receive Light) Light Linking Editor allows lights to affect only specific objects. Useful for cinematic lighting where you need precise control. In Autodesk Maya, shadows enhance realism by simulating how light is blocked by objects. Maya offers two main types of shadows:1. Depth Map Shadows (Soft but Less Accurate)✅ Pros: Fast, good for soft shadows. ❌ Cons: Less accurate, may produce artifacts.➤ Key Features: Uses a shadow map (a grayscale image) to store shadow information. Best for soft shadows and non-ray-traced renders. Can be adjusted for blur softness and resolution. ➤ Important Settings: Resolution: Higher values give sharper shadows but use more memory. Filter Size: Controls shadow softness. Bias: Helps avoid shadow artifacts (but too much can cause floating shadows). ???? Used in: Maya Software Renderer, Viewport 2.0.2. Ray Traced Shadows (Accurate but Slower)✅ Pros: Physically accurate, supports transparency. ❌ Cons: Slower, requires more rendering time.➤ Key Features: Uses ray tracing to calculate shadows pixel by pixel. Works best for hard shadows and realistic lighting. Supports transparent shadows (e.g., stained glass). ➤ Important Settings: Light Radius: Controls softness (higher values = softer shadows). Shadow Rays: More rays = smoother shadows but increases render time. Ray Depth Limit: Controls how many times light rays bounce (important for glass objects). ???? Used in: Arnold Renderer, Maya Software, Mental Ray (legacy).Comparison Table: Feature Depth Map Shadows Ray Traced Shadows Speed Faster Slower Accuracy Less accurate More realistic Soft Shadows Yes Yes (adjustable with Light Radius) Transparency Support No Yes Memory Usage Low High 3. Arnold Shadows (for Arnold Renderer)If you’re using Arnold Renderer, it primarily uses Ray Traced Shadows, but you can adjust: Soft Shadows: Increase Light Radius and Shadow Samples. Noise Reduction: Increase Shadow Samples for cleaner shadows. Transparency Support: Works with AI Standard Surface materials. Which Shadow Type to Use? For fast renders & soft shadows → Use Depth Map Shadows. For realistic & transparent shadows → Use Ray Traced Shadows. For Arnold renders → Use Ray Traced Shadows with soft settings. Do you need help setting up shadows for a specific scene? ????
More detailsPublished - Fri, 31 Jan 2025
Created by - Anil Chauhan
Introduction To Lighting
Light and shadow define how we perceive the world. They shape objects, create depth, and influence mood. In the real world, light interacts with surfaces in various ways—absorbing, reflecting, refracting, or diffusing—creating shadows that help us understand spatial relationships.How Light Creates Shadows Direct Light Sources – The sun, a lamp, or a flashlight casts sharp, well-defined shadows. Diffuse Light – Overcast skies or indirect lighting soften shadows, making them less distinct. Multiple Light Sources – These can create overlapping shadows or shadows of varying intensity. Types of Shadows Umbra – The darkest part where light is completely blocked. Penumbra – A softer, partially lit shadow caused by light partially reaching the area. Antumbra – A shadow that appears when the object is smaller than the light source, seen in certain eclipses. Effects of Light and Shadow Depth & Perspective – Shadows help us perceive three-dimensional space. Time Indicator – Sundials and natural shadows shift based on time and sun position. Mood & Atmosphere – Soft shadows create a calm setting, while harsh shadows can add drama or mystery. Light and shadow are essential in art, photography, architecture, and even psychology, affecting how we feel and interact with spaces. Would you like to explore their effects in a specific context?In Autodesk Maya, understanding direct vs. indirect (global) illumination is key to achieving realistic lighting in 3D rendering. Here’s how they differ and how they function in Maya:1. Direct Illumination Definition: Light that travels in a straight line from a light source and directly illuminates objects. Examples: A spotlight casting a shadow. A directional light simulating the sun. An area light illuminating a surface. Rendering Considerations: It creates sharp, well-defined shadows. Doesn't account for how light bounces off surfaces. Used in real-time engines for faster performance. 2. Indirect Illumination (Global Illumination - GI) Definition: Light that bounces off surfaces, indirectly illuminating other parts of the scene. Examples: Light reflecting off a wall and subtly illuminating nearby objects. Sunlight bouncing off the ground, brightening shaded areas. Rendering Techniques in Maya: Global Illumination (GI): Simulates light bouncing using photon mapping. Final Gathering: Samples light bounces for softer, more natural shading. Radiosity: Calculates color bleeding (e.g., red walls tinting nearby objects). Path Tracing (Arnold Renderer): Uses Monte Carlo ray tracing for physically accurate lighting. Comparison Feature Direct Illumination Indirect Illumination (GI) Light Source Comes directly from lights Comes from light bounces Shadows Sharp, well-defined Soft, diffuse Realism Less realistic, but fast More realistic, but slower Performance Faster Computationally expensive Use Case Games, stylized art Photorealistic rendering, VFX Optimizing Indirect Lighting in Maya Use Arnold Renderer with Ray Depth settings to control bounces. Adjust Light Samples to balance noise and render speed. Use AI Denoisers (NVIDIA OptiX) to reduce noise in indirect lighting. Bake indirect lighting into lightmaps for game engines. Would you like a workflow example for setting up GI in Arnold or Redshift?Direct Light Source in MayaA Direct Light Source is any light in Autodesk Maya that emits rays in a straight path without bouncing off surfaces (unless explicitly set to do so). These lights create sharp, well-defined shadows and are computationally efficient compared to indirect lighting.Types of Direct Lights in MayaMaya provides several types of lights that act as direct sources:1. Directional Light ???? Acts like the Sun (parallel rays). Casts strong, consistent shadows across the scene. Shadows do not get larger with distance. Best for outdoor lighting. 2. Spot Light ???? Projects light in a cone shape. Adjustable intensity, falloff, and spread. Supports volumetric lighting (light fog). Best for stage lighting, flashlights, or focused highlights. 3. Point Light ???? Omnidirectional (emits light in all directions). Like a bare light bulb. No built-in directional control. Best for candles, lamps, or small area lighting. 4. Area Light ???? Emulates real-world light panels. Soft, diffused shadows with realistic falloff. More expensive to render than Spot or Point lights. Best for soft lighting (windows, photography setups, softboxes). 5. Volume Light ????️ Light only within a defined shape (cube, sphere, etc.). Used for atmospheric effects. Less common in modern workflows. Direct Lighting in ArnoldIf you're using Arnold Renderer, you can use: Arnold Area Light (best for realistic soft lighting). Quad Lights (for soft light panels). Distant Light (similar to Maya’s Directional Light). Shadows in Direct Lighting Ray-Traced Shadows (more realistic, uses Arnold Renderer). Depth Map Shadows (faster, but less realistic). Adjust shadow softness using light radius (for Arnold). Best Practices for Direct Lighting✔️ Use Directional Lights for outdoor scenes. ✔️ Use Spot Lights for controlled highlights. ✔️ Use Area Lights for soft natural lighting. ✔️ Reduce light intensity and adjust falloff for realism. ✔️ Enable Shadows & Raytracing for depth. Would you like a step-by-step guide for setting up lighting in Arnold or Redshift? ????Absorption, Reflection & Refraction of LightLight interacts with materials in different ways, affecting how we see objects and how light behaves in the real world. The three primary interactions are absorption, reflection, and refraction.1. Absorption of Light ????Definition: When light hits a surface and is absorbed rather than reflected or transmitted. The energy from light is converted into heat or another form of energy.Key Points: Dark objects absorb more light and convert it into heat (e.g., black surfaces in sunlight). Light-colored or reflective surfaces absorb less and reflect more light. Different materials absorb different wavelengths, which is why objects have colors (e.g., a red apple absorbs all light except red). Used in solar panels, thermal insulation, and light filters. Example: A black t-shirt on a hot day absorbs more sunlight and feels warmer. Green leaves absorb red and blue light for photosynthesis, reflecting green light. 2. Reflection of Light ????Definition: When light bounces off a surface instead of being absorbed or transmitted. The angle of reflection equals the angle of incidence (Law of Reflection).Types of Reflection: Specular Reflection – Light reflects in a single direction from a smooth surface (e.g., mirrors, calm water). Diffuse Reflection – Light scatters in many directions from a rough surface (e.g., paper, walls). Retroreflection – Light is reflected back to its source (e.g., road signs, cat eyes). Example: A mirror reflects light in a predictable way. A white wall scatters light, making it visible from all angles. 3. Refraction of Light ????➡️Definition: When light passes through a material and bends due to a change in speed. The degree of bending depends on the refractive index of the material.Key Points: Light slows down in denser mediums (e.g., water, glass). A higher refractive index bends light more (e.g., diamond refracts light more than water). Lenses use refraction to focus light (glasses, microscopes, cameras). Example: A straw in a glass of water looks bent due to refraction. A prism splits white light into a rainbow by refracting different wavelengths at different angles. Comparison Table Property Absorption Reflection Refraction Definition Light energy is absorbed and converted to heat Light bounces off a surface Light bends as it passes through a medium Effect Darkens objects, increases heat Creates mirrors, visibility Changes direction of light Examples Black surfaces, solar panels Mirrors, white walls Glasses, prisms, water bending light Real-World Use Solar energy, insulation Optics, cameras, safety signs Lenses, optical fibers, telescopes Would you like details on how these apply in 3D rendering or Maya lighting? ????Light Decay (Attenuation)Light decay, also known as attenuation, refers to the gradual decrease in light intensity as it travels away from its source. This phenomenon is crucial in both real-world physics and 3D rendering to achieve realistic lighting.Understanding Light Decay ????1. Inverse Square LawThe most common form of light decay follows the Inverse Square Law:Intensity∝1Distance2\text{Intensity} \propto \frac{1}{\text{Distance}^2} Intensity decreases proportionally to the square of the distance from the light source. Example: If you double the distance, the light intensity becomes one-quarter. 2. Types of Light Decay in 3D RenderingIn 3D software like Autodesk Maya, different light decay types can be simulated:a. No Decay (Constant Decay) Intensity remains constant regardless of distance. Unrealistic for most scenarios—useful for stylized or technical lighting. b. Linear Decay Light intensity decreases linearly with distance. Intensity falls off slowly, maintaining brightness over longer distances than realistic. Formula: Intensity=1Distance\text{Intensity} = \frac{1}{\text{Distance}} c. Quadratic Decay (Inverse Square) Mimics real-world behavior—physically accurate. Intensity drops quickly, creating natural shadows and highlights. Formula: Intensity=1Distance2\text{Intensity} = \frac{1}{\text{Distance}^2} Ideal for most photorealistic scenes. d. Cubic Decay Intensity decreases even faster. Rarely used—creates dramatic drop-offs in light, useful for special effects. Light Decay in MayaSetting Light Decay in Maya: Select a Light Source (e.g., Point Light, Spot Light). Attribute Editor > Decay Rate: None: No decay. Linear: Light falls off linearly. Quadratic: Inverse square falloff (default for realism). Cubic: Rapid falloff. Intensity Adjustment: Increase the light’s intensity to compensate for decay effects. Practical Tips: Quadratic Decay for realism, especially with small, bright sources like lamps. Linear Decay when you want a gentle falloff (e.g., area lights in large scenes). Combine Decay with Falloff Curves for custom light behavior. Visual Impact of Light Decay Realism: Proper light decay simulates how light behaves naturally, adding depth and believability to scenes. Mood and Atmosphere: Adjusting decay can control how dramatic or subtle the lighting appears. Performance: Physically accurate decay can be more computationally intensive but delivers better results. Would you like to see how to set up light decay in a specific renderer like Arnold or Redshift? Or perhaps a visual example to illustrate these concepts?In Autodesk Maya, "phone" likely refers to Phong, which is a shading model, and Blinn, which refers to the Blinn shading model. Both are used to create different types of surface appearances in 3D rendering.Phong vs. Blinn in Maya Phong Shader Provides a smooth and glossy surface with strong specular highlights. Good for simulating shiny surfaces like plastic, metal, and glass. Can produce sharper highlights but may have issues with realism at glancing angles. Blinn Shader A variation of the Phong shader but improves on handling specular highlights. More physically accurate and better at simulating surfaces like metal, polished stone, and skin. Handles highlights at glancing angles better, making it preferred for animation. When to Use Which? Use Phong when you need sharper, more defined highlights (e.g., car paint, wet surfaces). Use Blinn when you need a more physically accurate, smoother transition of light across surfaces. Would you like a step-by-step guide on how to apply and adjust these materials in Maya? ????
More detailsPublished - Fri, 07 Feb 2025
Created by - Anil Chauhan
Techniques of Lighting in maya
Techniques of Lighting in maya 1. Set up a direct light source 2. Shadows 3. Lighting Nodes 4. Troubleshoot LightingLighting in Autodesk Maya plays a crucial role in defining the mood, depth, and realism of a scene. Here’s a breakdown of the techniques you listed:1. Set Up a Direct Light Source Types of Lights in Maya: Directional Light: Mimics sunlight, casting parallel rays. Point Light: Emits light equally in all directions (like a bulb). Spotlight: Projects a focused beam with falloff, useful for highlights. Area Light: Soft, natural-looking light from a surface (good for interiors). Volume Light: Light that emits from a specific shape (cube, sphere, etc.). Adjusting Intensity & Color: Modify in the Attribute Editor to match the desired scene ambiance. Three-Point Lighting Setup (common for character lighting): Key Light: Main light source. Fill Light: Softens shadows. Rim Light: Adds a highlight along the edges. 2. Shadows Ray Traced Shadows (sharp, physically accurate, more render-intensive). Depth Map Shadows (softer, faster, but sometimes less accurate). Shadow Parameters: Adjust shadow resolution, filter size, and bias to avoid artifacts. Light Linking: Control which objects cast or receive shadows. 3. Lighting Nodes Arnold Lights (preferred for realistic rendering): aiAreaLight (soft shadows, good for realistic illumination). aiSkyDomeLight (HDRI-based environment lighting). aiMeshLight (turn any object into a light source). Maya’s Default Lights (basic but useful for quick setups). Light Falloff: Controls how light intensity diminishes over distance. 4. Troubleshoot Lighting Black Render Issues? Check if: No light is present (Maya defaults to no lights in Arnold). Light intensity is too low. The camera has “Exposure” settings enabled (especially with Arnold). Noise in Shadows? Increase shadow samples or use denoising in Arnold. Light Not Affecting Objects? Ensure proper light linking. Overexposure? Reduce intensity or use exposure controls in the Render View. Would you like a more detailed guide on a specific lighting scenario, like interior lighting or product rendering? ????
More detailsPublished - Mon, 10 Feb 2025
Created by - Anil Chauhan
Lighting Effects and adjustments
Lighting Effects and adjustments1. Light Grouping and effects2. Light Adjustments3. Determining the Light's area of Illumination4. Light Linking5. Light SelectionHere's an overview of Lighting Effects and Adjustments in Maya:1. Light Grouping and Effects Group multiple lights to control them collectively. Use light sets for easy manipulation of specific scene lighting. Apply different light effects like intensity variation, color blending, and shadow control. 2. Light Adjustments Modify intensity, color, and exposure for realistic lighting. Adjust decay rate to mimic natural light falloff. Fine-tune specular and diffuse contributions for better material interaction. 3. Determining the Light's Area of Illumination Use light falloff settings to define how far a light source affects objects. Enable light decay (None, Linear, Quadratic, or Cubic) to simulate realistic illumination. Utilize barn doors or gobos to shape light projections. 4. Light Linking Control which objects a light affects using Light Linking Editor. Exclude or include specific objects for better artistic and technical control. Optimize performance by preventing unnecessary lighting calculations. 5. Light Selection Easily select lights using Outliner or Light Editor. Use Viewport Filters to isolate and adjust selected lights. Select light shape nodes for direct attribute modifications. Would you like a more detailed breakdown on any of these topics?
More detailsPublished - 9 Days Ago
Created by - Anil Chauhan
Introduction to Rendering in Maya
Maya Rendering introduction,1.Rendering a scene### Introduction to Rendering in MayaRendering is the process of generating a 2D image or animation from a 3D scene. In Autodesk Maya, rendering involves calculating the lighting, shading, textures, and other visual elements to produce the final output. Maya offers several rendering options, including the built-in **Arnold** renderer, as well as support for third-party renderers like **V-Ray**, **Redshift**, and **RenderMan**.---### 1. Rendering a Scene in MayaHere’s a step-by-step guide to rendering a scene in Maya:---#### **Step 1: Set Up Your Scene**- Ensure your 3D scene is complete with models, textures, lighting, and cameras.- Position the camera to frame the shot you want to render.- Adjust lighting to achieve the desired mood and shadows.---#### **Step 2: Choose a Renderer**- Maya’s default renderer is **Arnold** (since Maya 2017).- To select a renderer: 1. Go to the **Render Settings** window (`Window > Rendering Editors > Render Settings`). 2. Under the **Render Using** dropdown, choose your preferred renderer (e.g., Arnold, Maya Software, etc.).---#### **Step 3: Configure Render Settings**- Open the **Render Settings** window.- Set the following parameters: - **Image Size**: Define the resolution (e.g., 1920x1080 for HD). - **File Output**: Specify the file format (e.g., .png, .jpg, .exr) and output directory. - **Frame Range**: Set the start and end frames for animations. - **Quality**: Adjust sampling and ray depth for better quality (Arnold: AASamples, Camera AA).---#### **Step 4: Add Materials and Textures**- Assign materials to your objects using the **Hypershade** editor (`Window > Rendering Editors > Hypershade`).- Use Arnold materials like **aiStandardSurface** for realistic shading.- Apply textures to the material attributes (e.g., color, roughness, bump maps).---#### **Step 5: Set Up Lighting**- Add lights to your scene (`Create > Lights`).- Use Arnold lights (e.g., `aiAreaLight`, `aiSkyDomeLight`) for compatibility with Arnold rendering.- Adjust light intensity, color, and shadows to enhance the scene.---#### **Step 6: Test Render**- Perform a test render to check the scene: 1. Open the **Render View** window (`Window > Rendering Editors > Render View`). 2. Click the **Render** button (or use `IPR` for interactive rendering in Arnold).- Make adjustments to lighting, materials, or camera angles as needed.---#### **Step 7: Render the Final Image or Animation**- Once satisfied with the test render, render the final output: 1. In the **Render Settings**, ensure all parameters are correct. 2. Go to `Render > Render Sequence` (for animations) or `Render > Render Image` (for single frames). 3. Maya will render the scene and save the output to the specified directory.---#### **Step 8: Post-Processing (Optional)**- Use compositing software like **Adobe After Effects** or **Nuke** to enhance the rendered images or animations.- Adjust color grading, add effects, or composite multiple layers.---### Tips for Efficient Rendering- **Optimize Geometry**: Reduce polygon count where possible.- **Use Render Layers**: Separate objects into layers for better control.- **Enable GPU Rendering**: If using a renderer like Arnold or Redshift, enable GPU rendering for faster results.- **Batch Render**: For animations, use batch rendering to process multiple frames simultaneously.---By following these steps, you can successfully render a scene in Maya and achieve high-quality results. Experiment with different renderers and settings to find the best workflow for your project!
More detailsPublished - 2 Days Ago
Search
Popular categories
Adobe After Effects 2025
30Unreal Engine
15zbrush
10Maya Animation
8Light
8zbrush tutorial jewelry
7Latest blogs

Unreal Terrain Creation & Landscape Tools
9 Hours Ago
After Effects Color Correction
2 Days Ago
Introduction to Rendering in Maya
2 Days Ago
Write a public review