Published - Sat, 03 Feb 2024
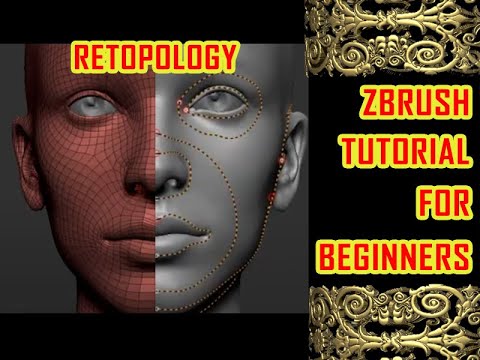
Retopology in ZBrush
Retopology in ZBrush is the process of creating a new, clean, and optimized mesh with a lower polygon count while preserving the details of a high-resolution mesh. This is often necessary for efficient modeling, animation, or game development. Here's a general guide on how to perform retopology in ZBrush:
1. **Import your High-Resolution Mesh:**
- Start by importing the high-resolution mesh into ZBrush.
2. **Prepare ZBrush Workspace:**
- Set up your workspace by adjusting the view and customizing the interface to make the retopology process more comfortable.
3. **Create a New Topology:**
- In the "Tool" palette, select "ZSphere" and draw it on the canvas.
- Use the "Edit Topology" button to start drawing new topology directly on the high-resolution mesh.
4. **Add and Connect ZSpheres:**
- Continue adding ZSpheres and connecting them to form the basic structure of your new topology.
- You can use the "Draw" mode to draw new ZSpheres and the "Move" and "Scale" modes to adjust their positions.
5. **Adapt Topology to High-Resolution Mesh:**
- Use the "Move," "Scale," and "Rotate" tools to adjust the ZSpheres to match the contours of the high-resolution mesh.
- Pay attention to the natural flow of the geometry and place ZSpheres where you need more detail.
6. **Convert ZSpheres to Topology:**
- Once you are satisfied with the basic structure, press the "Adaptive Skin" button to convert the ZSpheres into a new topology.
- Adjust the resolution and preview settings to control the density of the new mesh.
7. **Refine Topology:**
- After generating the adaptive skin, use the "ZRemesher" tool or other retopology tools in ZBrush to further refine and optimize the topology.
- Manually adjust vertices and edges to achieve the desired edge flow.
8. **Project Details:**
- Use the "Project" tools in ZBrush to transfer details from the high-resolution mesh to the new topology.
- This ensures that intricate details are preserved on the optimized mesh.
9. **Final Adjustments:**
- Make any final adjustments, fix any issues, and optimize the new mesh as needed.
- Use tools like "Smooth" and "Move" to refine the overall shape.
10. **Export:**
- Once you are satisfied with the retopologized mesh, you can export it for use in other 3D applications.
Remember that retopology is a skill that requires practice, and the exact steps may vary depending on the specific project and requirements. Experiment with different techniques and tools in ZBrush to find the workflow that works best for you.
Created by

Shavikant Chauhan
Welcome to my website! My name is Anil Chauhan, and I am a 3D modeling and animation expert with over 15 years of experience in the field. I have a passion for creating visually stunning 3D models, animations, and graphics, and I'm excited to share my expertise with you. Whether you're a beginner or an experienced artist, I can help you improve your skills in 3D modeling, texturing, lighting, animation, rigging, CG graphics, and VFX. Let's work together to bring your creative ideas to life!
Welcome to my website! My name is Shavikant Chauhan, and I am a 3D modeling and animation expert with over 15 years of experience in the field. I have always had a passion for creating visually stunning 3D models, animations, and graphics, and my work has been featured in a variety of industries including film, television, advertising, and video games.
Throughout my career, I have had the opportunity to work on a wide range of projects, from small independent films to large-scale productions. This has given me a diverse set of skills and a deep understanding of the 3D animation process from start to finish. I have expertise in complete 3D modeling, texturing, lighting, animation, rigging, CG graphics, and VFX, and I'm always eager to take on new and exciting challenges.
As a tutor, I am dedicated to sharing my knowledge and experience with aspiring artists and professionals alike. I believe that everyone has the potential to create amazing 3D models and animations, and I'm committed to helping my students achieve their goals. Whether you're a beginner looking to get started in the world of 3D animation, or an experienced artist looking to take your skills to the next level, I can provide personalized training and guidance to help you achieve your creative vision.
Comments (0)
Search
Popular categories
Adobe After Effects 2025
30Unreal Engine
15zbrush
10Light
10Maya Animation
8zbrush tutorial jewelry
7Latest blogs
Introduction to Arnold in Maya
4 Days Ago
Substance to Maya Workflow
6 Days Ago
ZBrush User Interface Overview
6 Days Ago
Write a public review