Created by - Shavikant Chauhan
Unreal Interface
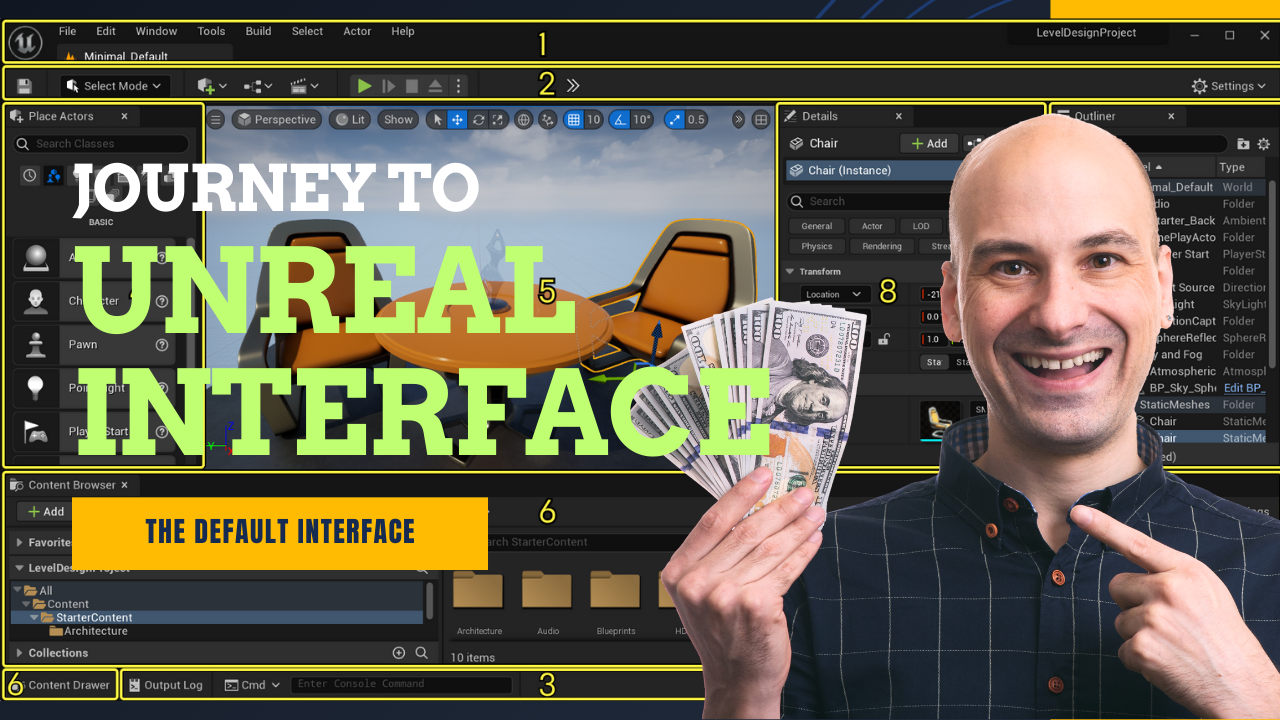
Tab Bar and Menu BarToolbarButtom ToolbarPlace Actor / ModesViewportsContent Browser / Content DrawerOutlinerDetailsIn Unreal Engine, the Tab Bar, Menu Bar, and various panels like Toolbar, Content Browser, and Outliner provide the primary interface components for interacting with the editor and managing your game or project. Below is a breakdown of each component you mentioned, explaining their purpose and function within the Unreal Engine user interface:1. Tab Bar and Menu Bar Tab Bar: Located at the top of the editor window, the Tab Bar is used to organize and switch between different open tabs or panels (e.g., the Content Browser, Blueprint Editor, Level Editor, Outliner, and more). It helps you quickly navigate between different tools and views in Unreal Engine. Menu Bar: Positioned directly above the Tab Bar, the Menu Bar provides access to the core editor functions. It includes menus for File, Edit, Window, Help, and more. From here, you can manage projects, settings, preferences, and invoke various editor features. 2. ToolbarThe Toolbar is typically located just below the Menu Bar and offers quick access to frequently used editor actions. Common tools in the Toolbar include: Play / Simulate buttons for testing your game. Save options. Build tools for compiling and baking. Viewport Navigation tools for adjusting how you view the 3D environment (e.g., moving around the scene, toggling grid visibility). Quick Add buttons for creating new assets like actors, blueprints, materials, and more. 3. Button ToolbarThe Button Toolbar is a streamlined version of the Toolbar, often consisting of just the most essential tools you need to interact with the editor. This toolbar is generally used for quick actions like: Transform tools (move, rotate, scale) for manipulating actors in the scene. Snapping controls for grid and rotation snapping, allowing precise placement of objects. Viewport camera controls, like selecting camera modes or focusing on the active camera. 4. Place Actor / Modes PanelThe Place Actor panel (sometimes called the Modes Panel) is a sidebar that allows you to quickly drag and drop actors, assets, and components into the scene. It’s typically divided into several categories: Place Actors: Includes common actor types like meshes, lights, cameras, volumes, and more. Painting Tools: Options for adding things like foliage or landscape brushes. Landscape: Tools for creating and editing terrains. Geometry: Adding and manipulating basic geometry (e.g., cubes, spheres). Modes: Allows switching between editing modes like Landscape Mode, Foliage Mode, Painting Mode, etc. 5. ViewportsViewports are the windows where you can see and interact with the 3D environment in Unreal Engine. You can have multiple viewports open, each showing different perspectives of the level. Each viewport has the following functionality: Perspective View: The default 3D view of your scene. Orthographic Views: Top, front, left, right, etc., for precise placement and editing. Camera View: When in play mode, the viewport can display the view from the player's camera. Viewport Navigation: Tools for panning, zooming, and rotating the scene to view from different angles. 6. Content Browser / Content DrawerThe Content Browser is a panel where all the assets (textures, models, materials, blueprints, animations, etc.) used in your project are stored and managed. This is where you: Search for and organize assets. Import new assets into the project. Create new folders or assets (e.g., materials, blueprints). Preview assets by clicking on them. The Content Drawer is similar to the Content Browser, but it can be docked to the bottom of the screen, allowing it to remain visible while you work in other parts of the editor.7. OutlinerThe Outliner is a hierarchical view of all the actors (objects) currently in your scene. It provides a structured list of all objects in the level, making it easy to: Select and organize actors. Group actors together into folders for easier navigation. Hide or show specific objects in the scene without deleting them. Search for specific actors in a complex level. 8. Details PanelThe Details Panel displays the properties of the currently selected actor or object in the scene. For example, if you select a mesh, the Details Panel will show options for transforming, scaling, and modifying the mesh’s properties (materials, collisions, etc.). Key functions of the Details Panel include: Adjusting properties: Change values like position, rotation, scale, and custom settings of the selected actor. Component details: View and adjust properties of components attached to the selected actor (e.g., a camera, light, or mesh). Adding components: Add new components to an actor directly from the Details Panel. 9. Tab Bar (Recap)The Tab Bar, as mentioned earlier, is where you can see and switch between different editor panels (like Outliner, Content Browser, Blueprint Editor, etc.). It helps organize your workspace and keeps your active panels easily accessible.SummaryIn Unreal Engine, the Tab Bar, Toolbar, Content Browser, Outliner, Details Panel, and other UI components form the backbone of your development environment. They help manage the flow of your project, whether you're placing actors, adjusting settings, working with assets, or navigating through the scene. Mastering the Unreal Engine interface helps improve workflow efficiency and makes game development more intuitive. If you'd like more detailed guidance on any specific panel or function, feel free to ask!
More detailsPublished - Tue, 21 Jan 2025
Created by - Shavikant Chauhan
Substance to Unreal Workflow
The Substance to Unreal Engine workflow is a popular process for creating and importing high-quality textures and materials for 3D assets in Unreal Engine. Here's a step-by-step guide to streamline your workflow:1. Create Materials in Substance Painter or Designer Substance Painter: Use this for painting textures on your models. It’s especially useful for PBR (Physically Based Rendering) workflows. Import your 3D model (ensure it's UV-unwrapped). Apply materials, masks, and layers as needed. Use smart materials and procedural tools for realistic textures. Substance Designer: Use this for creating procedural materials and textures from scratch. Generate tileable textures, height maps, and normal maps. Export the material as an SBSAR file or baked textures. 2. Export Textures For Unreal Engine, export your textures in a format it supports (e.g., TGA, PNG, or EXR). Use the Unreal Engine Packed configuration in the Substance export settings, which typically combines: Base Color Normal Map Roughness, Metallic, and Ambient Occlusion into a single texture (RGB channels). Recommended export settings for Unreal Engine: Base Color: sRGB Normal Map: Non-color data Packed Map (Roughness/Metallic/Ambient Occlusion): Non-color data 3. Import into Unreal Engine Install the Substance Plugin for Unreal Engine (optional but useful): Go to the Unreal Marketplace and install the Substance in Unreal Engine plugin. This plugin allows you to import SBSAR files directly and tweak parameters in real time. Without the Plugin: Import the exported texture maps (Base Color, Normal, Packed) into Unreal. Create a new Material in Unreal Engine. Assign the textures to the appropriate inputs in the material editor: Base Color → Base Color input Normal Map → Normal input Roughness (R), Metallic (G), Ambient Occlusion (B) → Their respective inputs using a Packed Map. 4. Optimize the Material Use Material Instances to tweak settings like roughness or metallic values without duplicating the base material. Adjust tiling, UV coordinates, and other settings to ensure the texture looks correct on your model. 5. Test and Iterate Place your textured model in your Unreal Engine scene. Adjust lighting and post-processing settings to see how your material reacts to different environments. Refine as necessary (either in Substance or Unreal). Tips for Efficiency SBSAR Workflow: If you’re using the Substance plugin, importing SBSAR files allows for dynamic adjustments in Unreal without going back to Substance Painter/Designer. Performance: Use texture resolution and channel packing wisely to optimize performance without compromising quality. UV Layout: Ensure your UV layout is clean and non-overlapping for better results. Let me know if you'd like a deeper dive into any specific part of this workflow!
More detailsPublished - Thu, 23 Jan 2025
Created by - Shavikant Chauhan
Objective: Familiarize with Unreal Engine 5.5 interface and tools
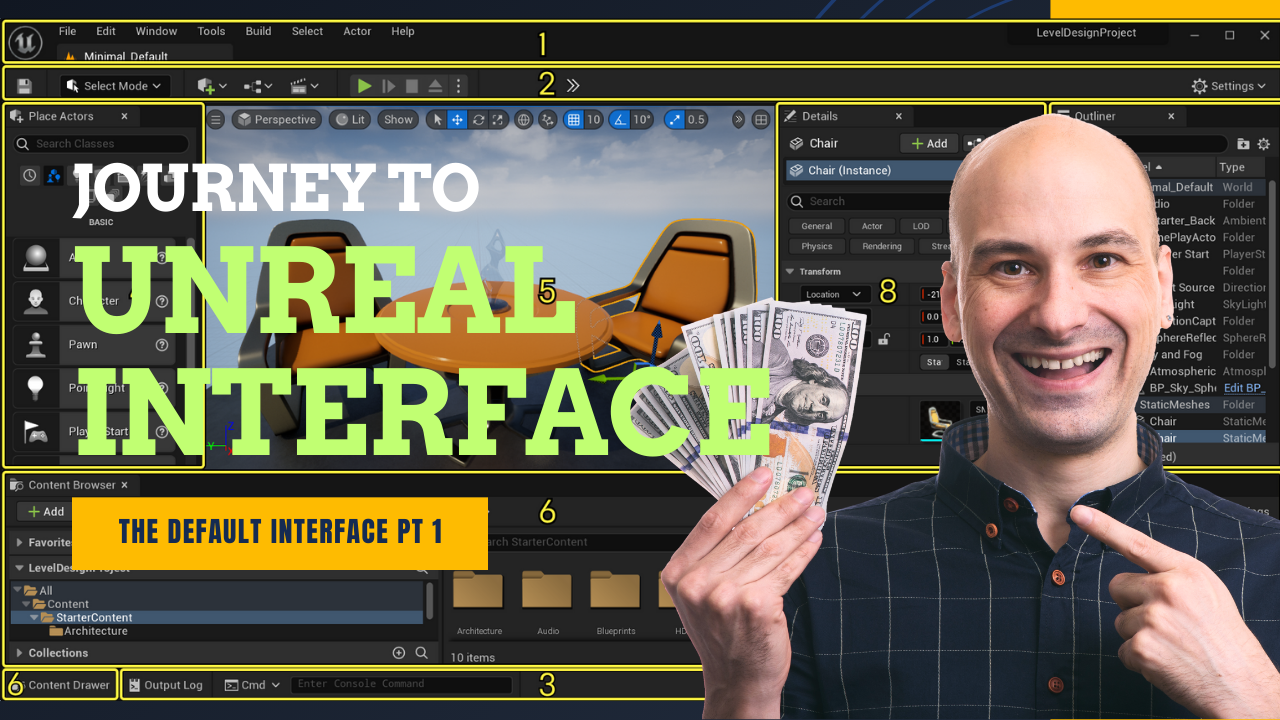
Objective: Familiarize with Unreal Engine 5 Interface and Tools1. Opening and Exploring the Editor Launch Unreal Engine 5: Open the Epic Games Launcher, navigate to Unreal Engine, and click Launch. Choose a Template: Select a project template (e.g., First-Person, Third-Person, or Blank) or create a new project. Once the editor loads, familiarize yourself with the layout. 2. Key Components of the UE5 Interface Content Browser: Located at the bottom by default. Manages assets such as textures, models, blueprints, and materials. Use the folder structure to stay organized. Viewport: The main area where you interact with your scene. Navigate using mouse and keyboard (WASD keys to move, Right-Click + Drag to look around). World Outliner: Found on the right. Displays all objects in your level (e.g., lights, meshes, cameras). Useful for selecting and organizing level elements. Details Panel: Located below the World Outliner. Shows properties of the selected object (e.g., scale, position, material settings). 3. Setting Up the Project Structure Create a folder structure for assets: Examples: Assets/: For imported models and textures. Blueprints/: For gameplay logic. Maps/: For levels. Materials/: For custom shaders and textures. Use clear naming conventions (e.g., "SM_Tree" for static meshes, "BP_Player" for blueprints). 4. Introduction to Different Project Types First-Person: Best for shooter or exploration games. Includes a pre-configured player character and controls. Third-Person: Ideal for adventure or RPG( Role- Playing Game) games. Includes a character model and third-person camera setup. Blank: No pre-built setup. Suitable for experienced developers or custom projects.Opening and exploring the EditorUnreal Engine 5, Opening the Editor, exploring Unreal Editor, UE5 interface, Unreal Engine setup, Epic Games Launcher, project templates, Unreal Engine workspace, Unreal Engine navigation, beginner UE5 guide
More detailsPublished - Sat, 25 Jan 2025
Created by - Shavikant Chauhan
Unreal Navigating & Basic Object Manipulation
Navigating the 3D Viewport & Basic Object Manipulation in Unreal EngineMastering viewport navigation and object manipulation in Unreal Engine is crucial for efficiently building and editing environments. Below is a guide covering the essential controls and techniques.1. Viewport Navigation ControlsUnreal Engine’s 3D viewport allows you to move around freely. You can navigate using either the mouse + keyboard or a gamepad.Mouse + Keyboard Controls: Action Keyboard/Mouse Shortcut Pan Hold Right Mouse Button (RMB) + move Zoom Scroll Mouse Wheel Rotate View Hold Right Mouse Button (RMB) + move mouse Move (Fly Mode) Hold RMB + use WASD keys Increase/Decrease Speed Use Mouse Wheel while holding RMB Alternative Controls: F key: Focuses on the selected object. Shift + F: Switches between fly mode and normal view. Alt + Left Mouse Button: Orbit around an object. 2. Object Manipulation (Move, Rotate, Scale)In Unreal Engine, objects can be moved, rotated, and scaled using transformation tools.Transformation Tools: Action Shortcut Key Description Move (Translate) W Moves an object along the X, Y, or Z axis Rotate E Rotates an object around its pivot point Scale R Increases or decreases object size Using the Gizmo: Click on an object to activate the gizmo. Drag the arrows (move), circles (rotate), or cubes (scale) to adjust the object. 3. Snapping, Grids, & Measuring DistancesFor precise placement of objects:Snapping Tools: Grid Snapping: Aligns objects to a fixed grid for accuracy. Toggle with G or adjust in the toolbar. Angle Snapping: Ensures objects rotate in fixed increments. Enable/disable in the Rotation Settings. Scaling Snapping: Adjusts scaling increments. Can be modified in Editor Preferences. Measuring Distances: Use the Measuring Tool (under the Modeling Tools) to check distances between objects. 4. Placing & Moving Assets in the WorldTo add assets to the scene: Drag and drop objects from the Content Browser into the viewport. Use transformation tools (Move, Rotate, Scale) to adjust their position. Enable snapping for precise alignment. Final Tips: Use "F" to focus on selected objects quickly. Ctrl + Z to undo mistakes. Hold Shift while transforming to duplicate an object instantly. Would you like a more detailed tutorial on any of these topics? ????
More detailsPublished - Sat, 01 Feb 2025
Created by - Shavikant Chauhan
Introduction to Level Design Through Blocking in Unreal Engine
Introduction to Level Design Through Blocking in Unreal EngineBlocking is a fundamental step in level design that helps establish the layout, scale, and flow of a game environment before adding detailed assets. In Unreal Engine, blocking involves using simple geometric shapes (like cubes and cylinders) to prototype levels efficiently.Key Concepts Covered:✅ Understanding Blocking: Learn why blocking is essential for level design. ✅ Basic Tools & Workflow: Explore Unreal Engine's BSP (Binary Space Partitioning) and Geometry tools. ✅ Gameplay Flow & Composition: Arrange spaces for smooth player movement and engagement. ✅ Iterating & Refining: Quickly test and adjust level layouts before adding assets.Blocking allows designers to focus on gameplay first, ensuring a solid foundation before polishing the visuals. Ready to build your first level? ???????? Let me know if you need tags or a more detailed guide! ????In Unreal Engine, a pivot point is the reference point around which an object rotates and scales. By default, the pivot is located at the center or bottom of an object, depending on how it was imported or created. However, sometimes you may need to adjust the pivot for better control during manipulation.???? How to Change the Pivot in Unreal Engine Temporarily Move the Pivot Select the object in the viewport. Hold ALT + Middle Mouse Button (MMB) and drag to reposition the pivot. This change is temporary and resets when you deselect the object. Permanently Set a New Pivot Select the object. Press Right Click → Pivot → Set as Pivot Offset. This change remains even after deselecting the object. Reset the Pivot to Default Right-click the object. Select Pivot → Reset to return it to its original position. ???? Alternative Methods for Pivot Adjustment Use the Modeling Tools Editor (Unreal 5) If you have a static mesh, go to Modeling Mode and use the pivot tools. Modify the Pivot in a 3D Modeling Software (Blender, Maya, 3ds Max) If your asset was imported, adjust the pivot in your 3D software and re-import it. Would you like help with a specific pivot issue in Unreal? ????Creating simple block-out levels in game design using basic shapes and volumes is an essential technique known as grey-boxing or blocking out. This phase allows designers to quickly prototype levels to focus on layout, player flow, and scale before adding detailed assets. Here's how you can approach it:1. Plan the Layout: Start with a rough idea of the level's flow. Sketch a basic floor plan or use reference images to help with inspiration. Think about how the player will move through the level. Are there pathways, obstacles, or areas of interest? 2. Use Basic Shapes: Use simple cubes, rectangles, and spheres to represent walls, floors, platforms, and other basic elements. In Unreal Engine or other game engines, you can use Static Meshes (like boxes) or the Geometry Tools for faster creation. 3. Positioning and Scaling: Place your shapes in a way that represents the spatial layout. Don’t worry about fine details—focus on the overall flow. Ensure your player character can move easily through the space. Test the scale of objects by walking the player through the environment. 4. Player Flow: Consider how the player moves through the environment. Create natural pathways that lead to objectives or challenges. Use large blocking shapes to outline areas such as rooms, corridors, or open spaces that will later be filled with detailed assets. 5. Experiment with Elevation and Obstacles: Add simple ramps or steps to test verticality and player movement. Use volumes (like cylinders or cones) to represent barriers or interactive elements. 6. Test and Iterate: Regularly test the level in its current form. Does the player move through the space comfortably? Is there a good challenge progression? Make adjustments to shapes and layout to improve the level’s flow. 7. Add Game Logic: Once the basic shape and layout are done, you can start adding triggers, interactions, and simple collision boxes to simulate gameplay. This phase helps you visualize how the player will interact with the space and ensures that the design is functional before you commit time to creating more complex assets.Blocking, or grey-boxing, is a critical phase in the game design process. It allows designers to lay out a basic, functional structure for the game world without focusing on art or fine details. Here’s why it's so important:1. Faster Iteration: Quick Prototyping: Grey-boxing allows for rapid testing of level ideas and gameplay mechanics. It’s much faster to block out a level with simple shapes than to create detailed environments. Designers can iterate quickly based on playtests or feedback. Easy Changes: Since the design is made with basic shapes, it’s simple to make large-scale changes. You can rearrange areas, add new pathways, or resize structures without worrying about art assets. 2. Focus on Core Gameplay: Player Flow and Interaction: Grey-boxing helps you focus on the layout and flow of the level. You can test how the player navigates the environment, how obstacles interact with gameplay, and where critical elements, like objectives or enemies, should go. Identifying Issues Early: By blocking out the level early in the design process, you can identify problems such as bad player flow, confusing layouts, or unbalanced areas, before adding the complexity of detailed art assets. 3. Efficient Collaboration: Clear Communication: Grey-boxing provides a clear, tangible representation of the level for team members. Artists, programmers, and level designers can all see and discuss the same basic version of the level and can easily identify areas needing work. Cross-Discipline Feedback: It allows non-designers (e.g., programmers or artists) to give input, leading to more well-rounded feedback early in the design process. Artists can visualize the potential scale of areas, while programmers can begin to implement basic game mechanics. 4. Gameplay and Environment Balance: Visualizing Scale and Space: Grey-boxing ensures the scale of environments feels right for the player. It helps with things like perspective, distances between objects, and the general space of the environment. Testing Game Mechanics: It's easier to test things like jumping, movement, line-of-sight, and combat spaces in a grey-boxed level. You can adjust elements based on these tests before more complex systems are added. 5. Helps with Asset Planning: Identifying Asset Requirements: Once the level is blocked out, you’ll have a better idea of the types of art assets you’ll need—such as textures, models, or lighting setups—and can plan these resources effectively. Optimizing Workflow: By having a solid plan in place, the art and asset teams can focus on creating the necessary details only after confirming that the core design works. 6. Cost-Effective: Low-Cost Testing: Grey-boxing is a low-cost, low-risk phase that ensures the design is on the right track before committing significant resources to creating art, animations, and other high-cost elements. If the gameplay or level design isn’t working, it’s much cheaper to fix at this stage. In summary, grey-boxing helps prioritize functionality, gameplay, and layout over visuals early in the design process, making it an invaluable tool for creating solid, enjoyable game environments.Layout planning for player flow, environment scaling, and game design logic is an essential part of level design in game development. Here's how you can approach each aspect effectively:1. Player Flow: Goal: The player should be guided through the environment in a way that feels natural and intuitive, with clear progression from one area to the next. Pathways: Design the layout with logical paths that the player will follow. These paths should lead to important areas, objectives, or challenges. Make sure the player isn’t confused about where to go next. Linear Paths: For more straightforward games, you might have one primary path that the player follows from start to finish. Non-linear Paths: In open-world or exploration-based games, multiple pathways or hidden areas can encourage discovery and replayability. Landmarks: Use large, visually distinct objects or structures (e.g., towers, statues, or buildings) to serve as visual landmarks, helping players orient themselves within the environment. Obstacles & Challenges: Use obstacles or challenges to slow the player down or force them to engage with the environment. These can be physical (walls, pits), combat-related (enemies), or puzzles. Flow Control: Ensure that the flow isn’t too rushed or too slow. Adjust pacing by creating areas of tension (combat or tight spaces) followed by areas of relief (open spaces, exploration). 2. Environment Scaling: Size and Proportions: The environment must be scaled in a way that makes sense for both the player and the design of the game. Objects and spaces should feel appropriately sized in relation to the player character. For example, in a first-person game, doors should be large enough for the player to pass through comfortably. In platformers, jumps should be scaled to match the player’s movement abilities. Verticality: Consider how vertical space impacts the environment. Platforms, cliffs, and drop-offs can add depth to the level design, affecting both player movement and visual interest. Distance and Perspective: Scaling affects the sense of distance. If the player feels too far from important objectives, you might want to bring them closer or make them more visible to improve navigation and gameplay. Consistency: The scale of objects and spaces should remain consistent to avoid confusing the player. If one section of a level feels huge, while another feels cramped without reason, it could break immersion. Navigation Aids: To ensure players don’t feel lost, give them cues that help with scale and direction, such as using light sources, environmental changes, or sound effects. 3. Game Design Logic: Gameplay Goals: The layout and scaling of the environment should always support the core gameplay goals. For instance, in an action game, narrow hallways and open spaces may create opportunities for combat or stealth. In a puzzle game, the level might need to provide different layers of interaction and logic. Progression and Difficulty: Plan the layout so that the player experiences a gradual increase in difficulty. This can involve more complex puzzles, tougher enemies, or more intricate platforming as the player advances. Tutorial Areas: Early levels or areas should introduce basic mechanics and give the player time to understand them. As the game progresses, challenges can get more difficult, requiring the player to apply what they've learned in creative ways. Player Rewards and Exploration: Include areas that reward players for exploration. Hidden paths, collectibles, or Easter eggs can make the player feel like their effort is rewarded and encourage them to explore beyond the main path. Dynamic Interactions: If your game allows for interactions with the environment, think about how the player can use or change the environment. For example, destructible objects, movable platforms, or interactable switches that open doors or alter the environment’s layout. Pacing and Breaks: Design the environment to have areas of tension followed by moments of calm or relief. After an intense battle or difficult section, provide the player with a break to explore or collect items before the next challenge. Narrative Support: If your game has a story, the environment should reflect and support it. The setting can convey the tone, history, and context of the narrative, making the player feel more immersed in the world. Combining All Three Aspects:When you plan the layout of a level, these three elements—player flow, environment scaling, and game design logic—must work together harmoniously to create an enjoyable and functional experience. Here's a basic approach to integrate them: Start with Player Flow: Map out the path the player will take through the level, ensuring it feels intuitive and natural. Add Environment Scaling: Ensure the size and layout of the world are appropriate to the player and game type. Think about how different spaces will feel and how the player will experience them. Apply Game Design Logic: Layer in the gameplay mechanics, challenges, and narrative elements to make the environment not only functional but fun, immersive, and engaging. By thoughtfully planning these aspects, you can create levels that feel cohesive, balanced, and exciting for players.
More detailsPublished - Tue, 04 Feb 2025
Created by - Shavikant Chauhan
Unreal Terrain Creation & Landscape Tools
Unreal Engine provides a robust set of tools for terrain creation and landscape manipulation, allowing developers to create vast, detailed, and immersive environments. These tools are part of the **Landscape System**, which is designed for creating outdoor terrains, such as mountains, valleys, forests, and more. Below is an overview of the key features and tools for terrain creation and landscape editing in Unreal Engine:---### **1. Landscape Creation**- **Landscape Tool**: This is the primary tool for creating terrains. You can generate a new landscape by defining its size, resolution, and shape. - **Create Mode**: Allows you to generate a new landscape from scratch. - **Import Mode**: Lets you import heightmaps (grayscale images) to create terrains based on real-world data or pre-designed maps. - **Component Size**: Controls the resolution and size of the landscape. Larger components allow for more detailed terrains but may impact performance.---### **2. Landscape Sculpting**- **Sculpting Tools**: These tools allow you to manually shape the terrain. - **Sculpt**: Raises or lowers the terrain to create hills, valleys, and other landforms. - **Smooth**: Evens out rough areas for a more natural look. - **Flatten**: Levels the terrain to a specific height. - **Erosion**: Simulates natural erosion effects for realistic terrain features. - **Hydro Erosion**: Adds water flow simulation to create riverbeds and eroded landscapes.---### **3. Landscape Painting**- **Paint Tools**: These tools let you apply materials and textures to the terrain. - **Layer System**: You can create multiple layers for different terrain materials (e.g., grass, rock, sand) and blend them together. - **Weight-Blended Materials**: Allows for smooth transitions between materials. - **Foliage Painting**: Automatically places foliage (trees, grass, bushes) on the terrain based on painted areas.---### **4. Landscape Splines**- **Spline Tools**: Used to create paths, roads, rivers, or other linear features on the terrain. - Automatically adjusts the terrain to follow the spline. - Can be used to create raised or lowered paths with customizable widths and shapes.---### **5. Landscape Materials**- **Material Creation**: You can create custom materials for the terrain using Unreal's Material Editor. - **Landscape Layer Blending**: Combines multiple textures (e.g., grass, dirt, snow) based on painted layers. - **Height-Based Blending**: Automatically blends materials based on terrain height. - **Slope-Based Blending**: Blends materials based on the angle of the terrain.---### **6. Landscape Foliage**- **Foliage Tool**: Allows you to paint or place vegetation (trees, grass, shrubs) directly onto the terrain. - **Procedural Placement**: Randomizes placement for a natural look. - **Collision Handling**: Ensures foliage doesn't clip through the terrain or other objects.---### **7. Landscape Lighting**- **Lighting Tools**: Unreal Engine's lighting system works seamlessly with landscapes. - **Dynamic Lighting**: Real-time lighting and shadows for immersive environments. - **Lightmass**: Baked lighting for static landscapes to improve performance and visual quality.---### **8. Landscape Optimization**- **LOD (Level of Detail)**: Automatically reduces the complexity of the terrain at a distance to improve performance.- **Nanite Virtualized Geometry**: (In Unreal Engine 5) Allows for highly detailed landscapes without significant performance hits.- **Landscape Proxy**: Used to split large terrains into smaller sections for better performance and streaming.---### **9. Landscape Streaming**- **World Partition**: (Unreal Engine 5) Automatically divides large terrains into manageable sections that stream in and out as the player moves, optimizing performance for open-world games.---### **10. Third-Party Integration**- Unreal Engine supports integration with external tools like **World Machine**, **Quixel Megascans**, and **Houdini** for advanced terrain creation and procedural generation.---### **Use Cases**- **Open-World Games**: Create vast, seamless environments.- **Simulations**: Build realistic terrains for training or architectural visualization.- **Cinematics**: Design detailed landscapes for film or animation.---Unreal Engine's terrain and landscape tools are highly flexible and scalable, making them suitable for both small projects and large, open-world environments. With the addition of Unreal Engine 5 features like Nanite and Lumen, terrains can now be more detailed and visually stunning than ever before.
More detailsPublished - Thu, 20 Feb 2025
Search
Popular categories
Adobe After Effects 2025
30Unreal Engine
15zbrush
10Light
10Maya Animation
8zbrush tutorial jewelry
7Latest blogs
Introduction to Arnold in Maya
Mon, 24 Feb 2025
Substance to Maya Workflow
Sat, 22 Feb 2025
ZBrush User Interface Overview
Fri, 21 Feb 2025
Write a public review