Created by - Anil Chauhan
Previewing the Composition
In Adobe After Effects, previewing and working with compositions are essential parts of the workflow, allowing you to visualize and refine your animations and effects. Here’s a breakdown:Previewing in After EffectsPreviewing allows you to see your animation and effects in real time, ensuring everything works as intended. RAM Preview: Purpose: Plays back your composition from the timeline with all effects and animations. How to Use: Press the spacebar or click the Preview button to start playback. Settings: Adjust the Resolution (Full, Half, Quarter) to speed up the preview. RAM Cache: After the first preview, After Effects stores frames in RAM to improve playback speed. Play In/Out Range: Set the In Point (B) and Out Point (N) on the timeline to define a section for previewing. Previewing a Range: Playback will only occur between these points. Spacebar Playback: Quickly play/pause the preview by pressing the spacebar. The playback quality can be adjusted in the Preview panel for smoother performance. Frame Rate: Preview at a lower frame rate for faster feedback, adjusting it in the Preview panel under Frame Rate options. Skip Frames: If your composition is too complex, you can enable Skip Frames (in the Preview panel), reducing the preview quality to improve performance. Audio Preview: If your composition includes audio, click the Audio checkbox in the Preview panel to include audio during previews. Region of Interest: Use the Region of Interest tool to preview a specific part of the composition, reducing the amount of RAM needed for playback. Working with CompositionsCompositions (or comps) are the containers where you create your final animations and visual effects by combining various layers. Creating a Composition: Go to Composition > New Composition or press Ctrl + N (Windows) / Cmd + N (Mac). Set the dimensions, frame rate, duration, and background color. Composition Settings: Resolution: Choose from Full, Half, or Quarter resolution to optimize performance. Frame Rate: Define the frame rate to match the project or desired output (e.g., 24 fps, 30 fps). Duration: Set the composition duration to define the timeline length. Multiple Compositions: You can create nested compositions (comps within comps) by pre-composing layers (Ctrl + Shift + C / Cmd + Shift + C). Helps organize complex projects and can simplify working with multiple elements. Work Area: The Work Area is the section of the timeline that determines what is rendered during previews. Adjust the Work Area Bar to focus on a specific part of the composition. Render Queue: Once you’re satisfied with your composition, send it to the Render Queue to export it. The Composition > Add to Render Queue option enables this. Preview Panel Controls Loop: Enable looping to continuously preview a section. Resolution: Set it to Full, Half, or Quarter for faster previews. Skip: Allows you to skip frames for faster preview rendering. Audio: Toggle to preview audio with the composition. Best Practices Optimize for Performance: Use lower resolution for previews to ensure smooth playback. Keep your compositions simple during the preview stage by hiding or disabling complex layers. Use RAM Preview for accurate playback with effects and animations. Monitor Memory Usage: If After Effects runs slow, clear the Disk Cache or RAM Cache to free up space. Use Proxies: For heavy assets like high-res videos, use proxies (lower resolution versions) during previews. Would you like further details or help setting up your preview and compositions in After Effects?
More detailsPublished - Wed, 22 Jan 2025
Created by - Anil Chauhan
Region of Interest
In Adobe After Effects, the Region of Interest (ROI) tool is a powerful feature that helps you focus on a specific area of your composition during previews or renders, improving performance by processing only the selected portion of the composition.Purpose of Region of Interest Performance Boost: When working with large compositions, using the ROI helps speed up previews by limiting playback to a smaller area. Focus on Key Elements: It allows you to focus on specific parts of a composition without rendering or previewing the entire frame. How to Use Region of Interest Activating ROI: Select the Region of Interest tool from the Composition panel. You can activate it by clicking the Region of Interest button (located below the composition viewer) or by pressing Ctrl + Alt + I (Windows) or Cmd + Option + I (Mac). Defining the Area: Drag to create a box around the area of the composition you want to preview. The selected area will be highlighted by a dashed border. Adjusting the Region: Resize or reposition the box by dragging the corners or edges. Previewing the Selected Area: Once the ROI is set, your previews will be limited to that region. This reduces the rendering load, especially in complex compositions. Key Points to Remember Preview Limitation: After setting a Region of Interest, After Effects will only render and preview the selected area. This can speed up rendering, especially for large, high-resolution files. Effects on Renders: When rendering, if the ROI is active, only the selected region will be outputted. This is useful for testing or rendering specific parts of a composition. Disabling ROI: To disable the ROI and render the full composition, uncheck the Region of Interest box or click the button again. Uses in Complex Projects: ROI is very useful for heavy compositions that contain lots of elements, animations, or effects that don't need to be rendered or previewed in their entirety. Best Practices Quick Previews: Use ROI when previewing a section of your composition for fine-tuning animation or effects. Optimize Performance: Especially with large compositions, ROI helps with managing system resources for faster rendering. Fine-Tuning Specific Areas: Perfect for refining animations or transitions in a specific part of the frame without waiting for a full composition render. Would you like further clarification or specific use cases for ROI?
More detailsPublished - Wed, 22 Jan 2025
Created by - Anil Chauhan
Snapshots
In Adobe After Effects, snapshots refer to the ability to capture and save the state of a composition or a specific frame at a given time, so you can easily compare different stages of your project or revert to previous versions of your work.Purpose of Snapshots in After Effects Quick Comparisons: Snapshots allow you to compare different versions of your composition or specific frames within the same project. Non-Destructive Workflow: You can revert to a previous snapshot if needed, ensuring flexibility in your editing process. Track Changes: Snapshots help you track progress and visualize changes as you make adjustments to your layers, effects, and keyframes. How to Take a Snapshot Open the Snapshot Panel: Go to Window > Snapshot to open the Snapshot panel. Taking a Snapshot: While in the Composition or Layer panel, click the Take Snapshot button at the bottom of the panel (represented by a camera icon). This will capture the current view of the composition or the selected layer and store it in the Snapshot panel. Previewing Snapshots: After taking a snapshot, click on any snapshot in the Snapshot panel to preview it. You can view how your composition looked at the time the snapshot was taken. Clearing Snapshots: To clear a snapshot, simply click the Delete button in the Snapshot panel (trash can icon). Using Snapshots for Comparison Side-by-Side Comparison: You can open multiple snapshots and quickly compare different frames or versions of the composition to assess changes in animation or effects. Reverting to Previous States: If you’re not satisfied with changes made after taking a snapshot, you can return to that specific snapshot and continue working from that point. Best Practices Use Snapshots for Key Points: Take snapshots at key milestones or significant changes, like after applying a major effect or completing a portion of your animation. Keep Snapshots Organized: Label or number your snapshots to keep track of different versions or stages. Compare with New Changes: Use snapshots to compare your current progress with earlier states, helping you spot improvements or issues. Limit Snapshot Use: While snapshots are great for comparison, be mindful not to overload your project with too many saved versions to keep your workspace clean and organized. Would you like more detailed information about specific use cases for snapshots in After Effects?
More detailsPublished - Wed, 22 Jan 2025

Created by - Anil Chauhan
Graphics and Illustrations part 1
Subject : Computer Fundamentals & ConceptsSubject Code :BAFD0101 of Graphics and IllustrationsTime : 90 Minutes Sem : 1Total Marks : 50Instruction:Attempt any five questions out of seven questions.Make suitable assumptions wherever necessary.Figures to the right indicate full marks.Q.1 (A) Fill in the blanks (2)The full form of JPEG is ___Joint Photographic Experts Group__________________________________________________GIF, PNG, BMP, TIFF, TGA, and JPEG 2000_______ file format can give us transparent background.(B) Explain about cool colors. Give any 2 color names which are known as cool color.ans. blue, green, and purple (3)(C) Explain 5 differences between raster & vector.ans. Here are five key differences between raster and vector graphics:1. File CompositionRaster: Made up of pixels (tiny squares of color) arranged in a grid.Vector: Comprised of paths defined by mathematical equations (lines, shapes, curves).2. ScalabilityRaster: Loses quality and becomes pixelated when scaled up.Vector: Can be resized infinitely without any loss of quality.3. File SizeRaster: Typically larger due to storing information for every individual pixel.Vector: Usually smaller, as it stores mathematical formulas instead of pixel data.4. Best Use CasesRaster: Ideal for detailed and complex images like photos.Vector: Perfect for logos, icons, and graphics that require scalability.5. File FormatsRaster: Common formats include .jpg, .png, .gif, .bmp.Vector: Common formats include .svg, .ai, .eps, .pdf. (5)Q.2 (A) Fill in the blanks (2)A ___Point_______ is the smallest and most basic design element.____Line______ represents a single dimension, length.(B) True and false (3)Red color is known as primary color. > true / false (True)The intensity of a color is described as saturation. > true / false (True)The color range of RGB is from 0% to 100%. > true / false (False)(C) Explain 5 differences between RGB & CMYK color modes.ans. Here are five key differences between RGB and CMYK color modes:1. Color ModelRGB: An additive color model where colors are created by combining red, green, and blue light.CMYK: A subtractive color model where colors are created by combining cyan, magenta, yellow, and black inks.2. Primary UseRGB: Used for digital screens and electronic displays, such as monitors, TVs, and smartphones.CMYK: Used for printing purposes, such as posters, brochures, and books.3. Color RangeRGB: Has a wider color gamut, allowing for more vibrant and bright colors.CMYK: Has a narrower color gamut, which may result in less vibrant colors compared to RGB.4. Color RepresentationRGB: Values range from 0 to 255 for each color (e.g., 255, 0, 0 for pure red).CMYK: Values are represented as percentages (e.g., 100% cyan, 0% magenta, 0% yellow, 0% black for pure cyan).5. OutputRGB: Designed for light-based devices, so it appears brighter on screens.CMYK: Designed for ink-based media, so colors may look duller when printed compared to their digital (5)Q.3 (A) Fill in the blanks (2)___Circle_______ is considering as Basic shape.Shapes can be ____organic______ or geometric.(B) What kind of information a Visiting card can hold?ans. A visiting card, also known as a business card, typically contains the following information:Essential InformationName: The individual’s full name.Job Title: The designation or role of the individual.Company Name: The name of the organization or business.Logo: The company logo for branding purposes.Contact Information: Phone number, email address, and website URL.Optional InformationAddress: Office or business address.Social Media Handles: Links to professional profiles (e.g., LinkedIn, Instagram).Tagline/Slogan: A short, catchy phrase representing the business.QR Code: Links to additional information, portfolio, or digital contacts.Fax Number: If applicable, for traditional communication.Design ElementsColor Scheme: Reflecting the company’s branding.Background Design: Patterns, textures, or minimalist designs. (3)(C) What is DPI? Explain the concept of resolution. ans.What is DPI?DPI stands for Dots Per Inch and refers to the number of individual dots of ink or pixels that can fit into a one-inch space. It is commonly used to measure the resolution of printed images or digital screens.Higher DPI: Produces sharper and more detailed images (e.g., 300 DPI for high-quality printing).Lower DPI: Results in lower-quality images that may appear pixelated or blurry when printed or enlarged.Concept of ResolutionResolution defines the level of detail in an image and determines its clarity and sharpness. It is influenced by the number of pixels or dots that make up the image. Resolution is typically measured in:Pixels per Inch (PPI):Used for digital displays and images.Higher PPI means more pixels per inch, resulting in finer details.Dots per Inch (DPI):Used for printed materials.Higher DPI ensures crisp and detailed prints.Relationship Between DPI and ResolutionDigital Media: Resolution refers to the total pixel dimensions (e.g., 1920 x 1080).Printed Media: Resolution is determined by DPI, as it dictates how the digital image translates into physical dots on paper.For example:A 72 DPI image is suitable for web use, where screen resolution is lower.A 300 DPI image is ideal for professional printing to achieve high-quality results.
More detailsPublished - Wed, 22 Jan 2025
Created by - Anil Chauhan
Graphics and Illustrations part 2
More details
Published - Wed, 22 Jan 2025

Created by - Anil Chauhan
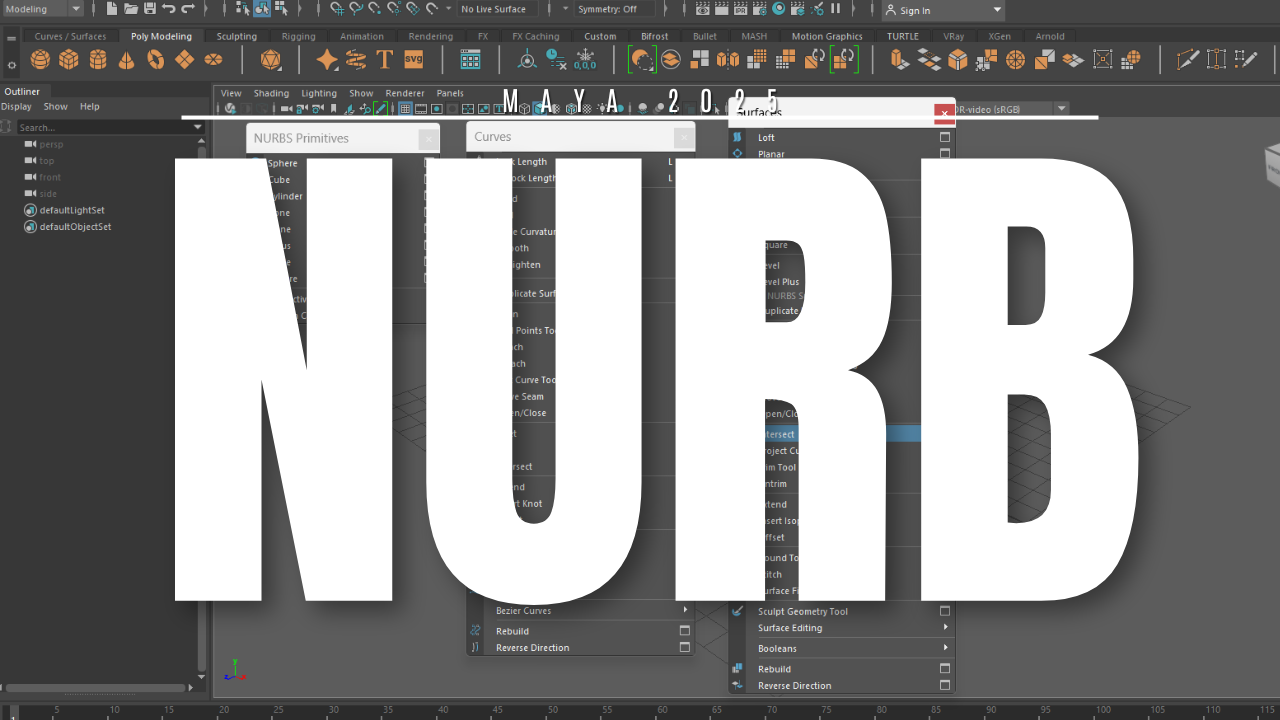
NURBS
NURBSNURBS (Non-Uniform Rational B-Splines) are mathematical representations used extensively in computer graphics, computer-aided design (CAD), and computer-aided manufacturing (CAM). They offer a powerful and flexible way to model curves and surfaces, providing high precision and smoothness.Key Concepts of NURBS1. NURBS Curves A NURBS curve is defined by: Control Points: These determine the shape of the curve. The curve does not necessarily pass through all control points but is influenced by them. Degree (Order): The degree of the polynomial basis functions used to define the curve. Common degrees are linear (1), quadratic (2), and cubic (3). Knots: A sequence of parameter values that determine how the basis functions blend. The sequence can be uniform or non-uniform. Weights: These allow for greater flexibility, enabling the representation of conic sections (e.g., circles, ellipses). Formula for a NURBS Curve: C(u)=∑i=0nNi,p(u)wiPi∑i=0nNi,p(u)wiC(u) = \frac{\sum_{i=0}^{n} N_{i,p}(u) w_i P_i}{\sum_{i=0}^{n} N_{i,p}(u) w_i} Where: C(u)C(u): The curve point at parameter uu Ni,p(u)N_{i,p}(u): The ii-th B-spline basis function of degree pp wiw_i: The weight of the ii-th control point PiP_i: The ii-th control point 2. NURBS Surfaces A NURBS surface extends the concept of NURBS curves to two parameters, uu and vv. Defined by: A grid of control points. Degree in the uu- and vv-directions. Knot vectors for each direction. Weights for each control point. Formula for a NURBS Surface: S(u,v)=∑i=0n∑j=0mNi,p(u)Mj,q(v)wi,jPi,j∑i=0n∑j=0mNi,p(u)Mj,q(v)wi,jS(u, v) = \frac{\sum_{i=0}^{n} \sum_{j=0}^{m} N_{i,p}(u) M_{j,q}(v) w_{i,j} P_{i,j}}{\sum_{i=0}^{n} \sum_{j=0}^{m} N_{i,p}(u) M_{j,q}(v) w_{i,j}} Where: S(u,v)S(u, v): Surface point at parameters uu and vv Ni,p(u)N_{i,p}(u), Mj,q(v)M_{j,q}(v): Basis functions in uu and vv directions wi,jw_{i,j}: Weight of control point Pi,jP_{i,j} Advantages of NURBS Flexibility: Can represent a wide range of shapes, from simple lines to complex freeform surfaces. Precision: Supports exact representations of standard geometric entities (e.g., circles, ellipses, parabolas). Smoothness: Provides smooth and continuous surfaces, ideal for CAD and 3D modeling. Compactness: Efficiently represents complex models with fewer data points compared to alternatives like meshes. Applications Automotive and Aerospace Design: Designing smooth and aerodynamic surfaces. Animation and 3D Modeling: Creating realistic characters and objects. Architectural Design: Modeling intricate curves and surfaces. Medical Imaging: Representing anatomical shapes. NURBS primitivesNURBS primitives are basic shapes or components that can be defined using NURBS representations. These primitives are the building blocks for more complex models and surfaces in applications like CAD, 3D modeling, and animation. The main components of NURBS primitives are:1. Control Points (Vertices) Definition: Points in 2D or 3D space that define the shape of the NURBS curve or surface. Role: The curve or surface is influenced by these points but does not necessarily pass through them. Moving a control point alters the overall shape. Grid Layout: For surfaces, control points are arranged in a grid, creating a control net. 2. Knot Vector Definition: A sequence of parameter values that define how control points influence the curve or surface. Types: Uniform Knot Vector: Knots are evenly spaced. Simplifies the blending functions but limits flexibility. Non-Uniform Knot Vector: Knots are not evenly spaced, providing more control over the curve or surface. Clamped Knot Vector: Ensures that the curve or surface starts and ends at the first and last control points. Purpose: Determines how basis functions blend. Affects the smoothness and continuity of the curve or surface. 3. Weights Definition: Scalar values associated with each control point. Role: Adjust the influence of a control point on the curve or surface. Higher weights pull the curve or surface closer to the corresponding control point. Enable the representation of conic sections like circles, ellipses, and parabolas. 4. Basis Functions Definition: Mathematical functions (B-splines) that define how control points influence the curve or surface. Characteristics: Controlled by the degree of the NURBS (e.g., linear, quadratic, cubic). Basis functions ensure local control, meaning changes to a control point affect only a portion of the curve or surface. 5. Degree Definition: The degree of the polynomial basis functions. Common Degrees: Linear (11): Straight-line segments. Quadratic (22): Parabolic segments. Cubic (33): Smooth curves widely used in design. Role: Higher degrees result in smoother and more flexible curves or surfaces. 6. Parameter Domain Definition: The range of parameter values (uu for curves; u,vu, v for surfaces) over which the curve or surface is evaluated. Role: Used for evaluating points on the curve or surface. NURBS Primitive Examples NURBS Curves: Open Curve: Does not form a loop. Closed Curve: Forms a loop but is not necessarily continuous. Periodic Curve: A closed curve with continuous derivatives. NURBS Surfaces: Plane: Flat, rectangular surface. Cylinder: Surface generated by sweeping a circle along a straight line. Sphere: Surface defined by rotating a circular arc. Would you like further details on any of these components or examples of how they work in practice?
More detailsPublished - Wed, 22 Jan 2025

Created by - Anil Chauhan
Substance to Unreal Workflow
The Substance to Unreal Engine workflow is a popular process for creating and importing high-quality textures and materials for 3D assets in Unreal Engine. Here's a step-by-step guide to streamline your workflow:1. Create Materials in Substance Painter or Designer Substance Painter: Use this for painting textures on your models. It’s especially useful for PBR (Physically Based Rendering) workflows. Import your 3D model (ensure it's UV-unwrapped). Apply materials, masks, and layers as needed. Use smart materials and procedural tools for realistic textures. Substance Designer: Use this for creating procedural materials and textures from scratch. Generate tileable textures, height maps, and normal maps. Export the material as an SBSAR file or baked textures. 2. Export Textures For Unreal Engine, export your textures in a format it supports (e.g., TGA, PNG, or EXR). Use the Unreal Engine Packed configuration in the Substance export settings, which typically combines: Base Color Normal Map Roughness, Metallic, and Ambient Occlusion into a single texture (RGB channels). Recommended export settings for Unreal Engine: Base Color: sRGB Normal Map: Non-color data Packed Map (Roughness/Metallic/Ambient Occlusion): Non-color data 3. Import into Unreal Engine Install the Substance Plugin for Unreal Engine (optional but useful): Go to the Unreal Marketplace and install the Substance in Unreal Engine plugin. This plugin allows you to import SBSAR files directly and tweak parameters in real time. Without the Plugin: Import the exported texture maps (Base Color, Normal, Packed) into Unreal. Create a new Material in Unreal Engine. Assign the textures to the appropriate inputs in the material editor: Base Color → Base Color input Normal Map → Normal input Roughness (R), Metallic (G), Ambient Occlusion (B) → Their respective inputs using a Packed Map. 4. Optimize the Material Use Material Instances to tweak settings like roughness or metallic values without duplicating the base material. Adjust tiling, UV coordinates, and other settings to ensure the texture looks correct on your model. 5. Test and Iterate Place your textured model in your Unreal Engine scene. Adjust lighting and post-processing settings to see how your material reacts to different environments. Refine as necessary (either in Substance or Unreal). Tips for Efficiency SBSAR Workflow: If you’re using the Substance plugin, importing SBSAR files allows for dynamic adjustments in Unreal without going back to Substance Painter/Designer. Performance: Use texture resolution and channel packing wisely to optimize performance without compromising quality. UV Layout: Ensure your UV layout is clean and non-overlapping for better results. Let me know if you'd like a deeper dive into any specific part of this workflow!
More detailsPublished - Thu, 23 Jan 2025
Created by - Anil Chauhan
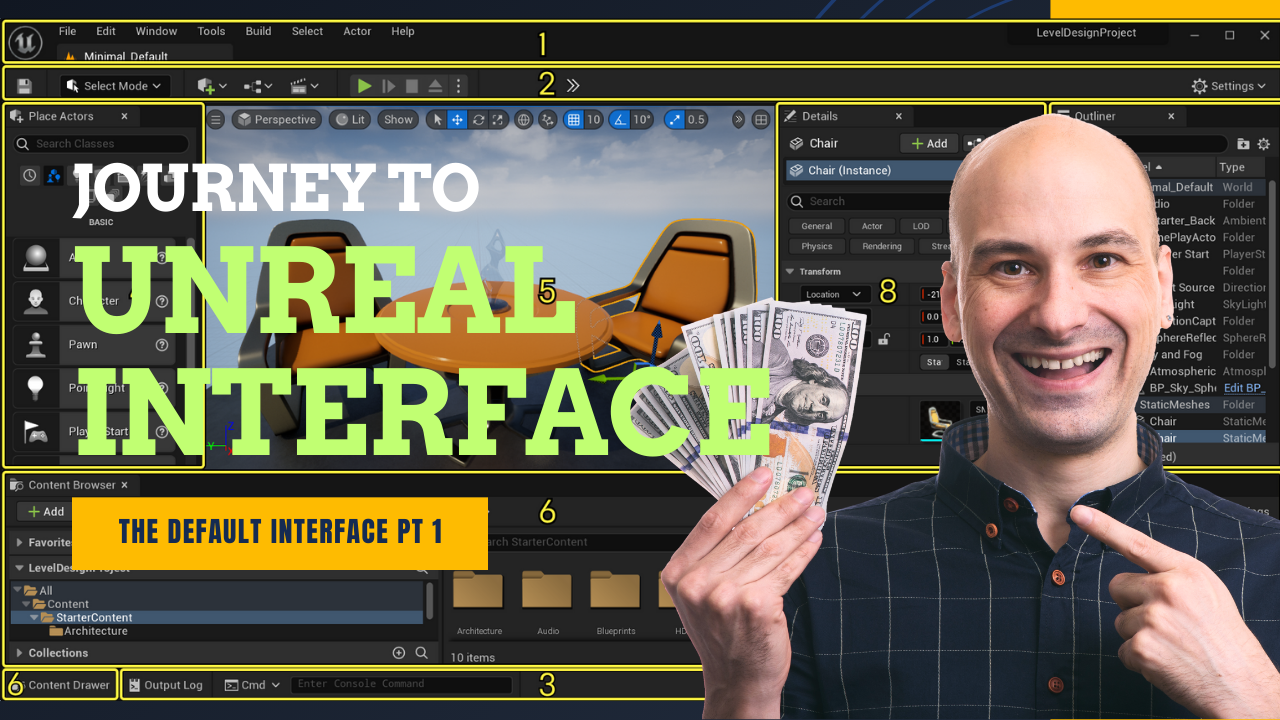
Objective: Familiarize with Unreal Engine 5.5 interface and tools
Objective: Familiarize with Unreal Engine 5 Interface and Tools1. Opening and Exploring the Editor Launch Unreal Engine 5: Open the Epic Games Launcher, navigate to Unreal Engine, and click Launch. Choose a Template: Select a project template (e.g., First-Person, Third-Person, or Blank) or create a new project. Once the editor loads, familiarize yourself with the layout. 2. Key Components of the UE5 Interface Content Browser: Located at the bottom by default. Manages assets such as textures, models, blueprints, and materials. Use the folder structure to stay organized. Viewport: The main area where you interact with your scene. Navigate using mouse and keyboard (WASD keys to move, Right-Click + Drag to look around). World Outliner: Found on the right. Displays all objects in your level (e.g., lights, meshes, cameras). Useful for selecting and organizing level elements. Details Panel: Located below the World Outliner. Shows properties of the selected object (e.g., scale, position, material settings). 3. Setting Up the Project Structure Create a folder structure for assets: Examples: Assets/: For imported models and textures. Blueprints/: For gameplay logic. Maps/: For levels. Materials/: For custom shaders and textures. Use clear naming conventions (e.g., "SM_Tree" for static meshes, "BP_Player" for blueprints). 4. Introduction to Different Project Types First-Person: Best for shooter or exploration games. Includes a pre-configured player character and controls. Third-Person: Ideal for adventure or RPG( Role- Playing Game) games. Includes a character model and third-person camera setup. Blank: No pre-built setup. Suitable for experienced developers or custom projects.Opening and exploring the EditorUnreal Engine 5, Opening the Editor, exploring Unreal Editor, UE5 interface, Unreal Engine setup, Epic Games Launcher, project templates, Unreal Engine workspace, Unreal Engine navigation, beginner UE5 guide
More detailsPublished - Sat, 25 Jan 2025
Created by - Anil Chauhan
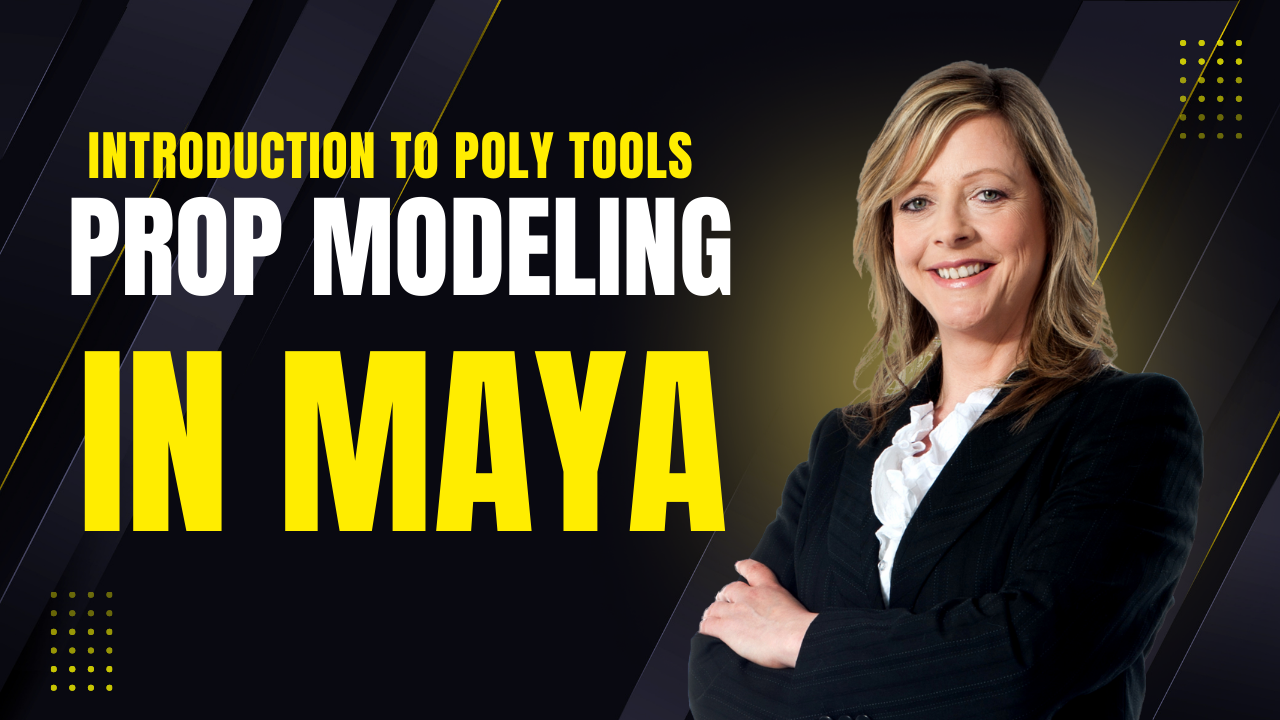
NURBS Curves,Components &,Surfaces
Maya's NURBS (Non-Uniform Rational B-Splines) system is a powerful way to create smooth and mathematically precise 3D surfaces. It is widely used in industrial design, animation, and visual effects.1. NURBS CurvesNURBS curves are the foundation of NURBS modeling in Maya. They are used to create and edit surfaces.Types of NURBS Curves in Maya: CV Curve Tool – Draws a curve by placing control vertices (CVs). EP Curve Tool – Creates curves based on edit points (EPs), which define the shape. Bezier Curve Tool – Uses Bezier handles to control the curve shape. Editing Curves Control Vertices (CVs) – Points that control the curve’s shape. Edit Points (EPs) – Points on the curve that define its structure. Curve Degree – Determines smoothness (Degree 1 = straight lines, Degree 3 = smooth curves). Rebuild Curve – Reconstructs curves for better uniformity. 2. NURBS ComponentsNURBS surfaces in Maya are made up of several key components: Control Vertices (CVs): Define the shape of the surface. Isoparms: Visual lines running along the U and V directions of a surface. Hulls: Groups of CVs that help in adjusting the surface as a whole. Surface Normals: Indicate the surface’s direction (useful for shading/rendering). 3. NURBS SurfacesNURBS surfaces are created using various techniques:Surface Creation Methods Loft: Creates a surface between two or more curves. Revolve: Spins a profile curve around an axis to create a surface (e.g., a vase). Extrude: Extends a curve along a path. Planar: Fills a closed curve with a flat surface. Birail: Uses two rail curves and a profile curve to create a surface. Editing NURBS Surfaces Trim Tool: Cuts out sections of a NURBS surface. Attach/Detach Surfaces: Combines or splits NURBS surfaces. Rebuild Surface: Adjusts the resolution and smoothness of a surface. Convert NURBS to Polygons: Useful for game engines and further detailing. When to Use NURBS✅ Ideal for smooth, organic shapes (cars, aircraft, bottles). ✅ Used in high-end modeling workflows for animation & product design. ✅ Provides precise control over curvature and topology.???? Not great for detailed sculpting or hard surface modeling (polygons are preferred). ???? More complex to UV map compared to polygons. Would you like help with a specific NURBS modeling task in Maya? ????
More detailsPublished - 7 Days Ago
Search
Popular categories
Adobe After Effects 2025
28Unreal Engine
14zbrush
10Maya Animation
8zbrush tutorial jewelry
7Maya 2025
6Latest blogs
Mesh |Edit Mesh|Mesh Tools
5 Hours Ago

Advanced Editing Techniques
14 Hours Ago

Introduction to Level Design Through Blocking in Unreal Engine
2 Days Ago
Write a public review