Created by - Anil Chauhan
Light
Light is a form of electromagnetic radiation that is visible to the human eye. It consists of photons—tiny packets of energy that travel in waves. Light has both wave-like and particle-like properties, a concept known as wave-particle duality in physics.Key Properties of Light: Speed – Light travels at approximately 299,792,458 meters per second (c) in a vacuum. Wavelength & Frequency – Determines the color of visible light. The visible spectrum ranges from violet (shorter wavelength, higher frequency) to red (longer wavelength, lower frequency). Reflection & Refraction – Light can bounce off surfaces (reflection) or bend when passing through different materials (refraction). Absorption – Materials can absorb light, converting it into heat or other forms of energy. Polarization – Light waves can vibrate in specific directions. Types of Light: Visible Light – The small range of electromagnetic radiation that human eyes can see (roughly 400-700 nm). Infrared (IR) & Ultraviolet (UV) – Invisible to the naked eye but detectable with special equipment. X-rays & Gamma Rays – High-energy light waves used in medical imaging and radiation treatments. Microwaves & Radio Waves – Lower-energy waves used in communication and heating. ShadowsA shadow is a dark area formed when an object blocks a light source, preventing light from reaching a surface behind it. Shadows have different characteristics depending on the light source and object:Types of Shadows: Umbra – The darkest part where light is completely blocked. Penumbra – The lighter, blurred edge where some light is partially blocked. Antumbra – Appears when an object is smaller than the light source, creating a halo effect. Factors Affecting Shadows: Light Source – A small light creates sharp shadows, while a large one makes soft shadows. Distance – The farther the object from the surface, the softer the shadow edges. Transparency – Semi-transparent objects create faint or partial shadows. Lighting is essential in both real-world photography and CGI (3D rendering). Here’s a structured guide covering basic to advanced lighting tips:???? Basic Lighting Tips (Fundamentals)1. Understand Light Types Natural Light – Sunlight or moonlight, varies with time & weather. Artificial Light – Bulbs, LEDs, neon, spotlights, etc. Directional Light – Mimics sunlight, parallel rays, no falloff. Point Light – Emits light in all directions from a single point (like a bulb). Spotlight – Focused beam of light with falloff. Area Light – Soft, diffused light from a surface (like a window). 2. Three-Point Lighting (Common Setup) Key Light – The main source of illumination. Fill Light – Reduces shadows, softens contrast. Rim/Back Light – Separates subject from the background. 3. Color Temperature & Mood Warm Light (Yellow/Orange, 3000K-4500K) – Cozy, inviting. Cool Light (Blue/White, 5000K-7000K) – Modern, clean, sometimes eerie. ⚡ Intermediate Lighting Techniques4. Light Intensity & Falloff Adjust brightness and use inverse square law for realistic falloff. Use soft lights for natural diffusion. 5. Shadows & Contrast Hard shadows = high contrast (harsh lighting). Soft shadows = diffused, natural look. Use ambient occlusion for contact shadows in CGI. 6. Reflections & Specular Highlights Reflections add realism (especially in glass, metal, and water). Adjust specular intensity for proper highlight control. 7. Light Bouncing (Global Illumination) Real-world light bounces off surfaces, affecting color and exposure. Use radiosity & GI (Global Illumination) in rendering for realism. ???? Advanced Lighting Techniques8. Volumetric & Atmospheric Lighting Fog & Haze create depth and realism. Use God Rays for dramatic sunlight effects. 9. HDRI Lighting (Image-Based Lighting) High Dynamic Range Images (HDRI) provide realistic reflections & ambient lighting. Great for outdoor & studio renders. 10. Light Animation & Dynamic Effects Flickering lights for realism (like fire or neon). Moving lights for interactive scenes in gaming. 11. Cinematic & Storytelling Lighting Rembrandt Lighting – Classic portrait lighting style. Split & Loop Lighting – Used in character lighting. Silhouettes & Rim Lighting – Enhances drama. Final Tip: Experiment & Observe! Study real-world lighting (photography & film). Use reference images & test different setups in your projects. Adjust exposure, balance, and post-processing for the best results. Would you like specific tips for 3D rendering, architecture, or gaming lighting? ????
More detailsPublished - 6 Days Ago
Created by - Anil Chauhan
What is Composition
What is Composition?Composition is the arrangement of visual elements in an image, scene, or frame to create balance, harmony, and focus. It helps guide the viewer’s eye and enhances storytelling.???? Basic Composition Principles Rule of Thirds – Divide the frame into a 3x3 grid and place key elements along the lines or intersections. Balance – Symmetrical (formal) or asymmetrical (dynamic) balance for visual harmony. Leading Lines – Use natural lines (roads, shadows, beams) to direct attention to a focal point. Framing – Use objects like windows, doorways, or trees to frame the subject and add depth. Contrast & Emphasis – Light vs. dark, color contrast, or focus to highlight the main subject. Negative Space – Leaving empty areas to create breathing room and focus. Depth & Layering – Foreground, midground, and background elements create a 3D feel. ⚡ Advanced Composition Techniques Golden Ratio (Fibonacci Spiral) – A natural, aesthetically pleasing composition rule. Dynamic Composition – Diagonal lines, curves, and asymmetry create movement. Color Composition – Using complementary or analogous colors for mood and storytelling. Silhouettes & High Contrast – Strong subject definition using light and shadow. Visual Weight – Larger, brighter, or more detailed elements attract attention first. Would you like composition tips for 3D design, photography, or cinematography? ????
More detailsPublished - 6 Days Ago
Created by - Anil Chauhan
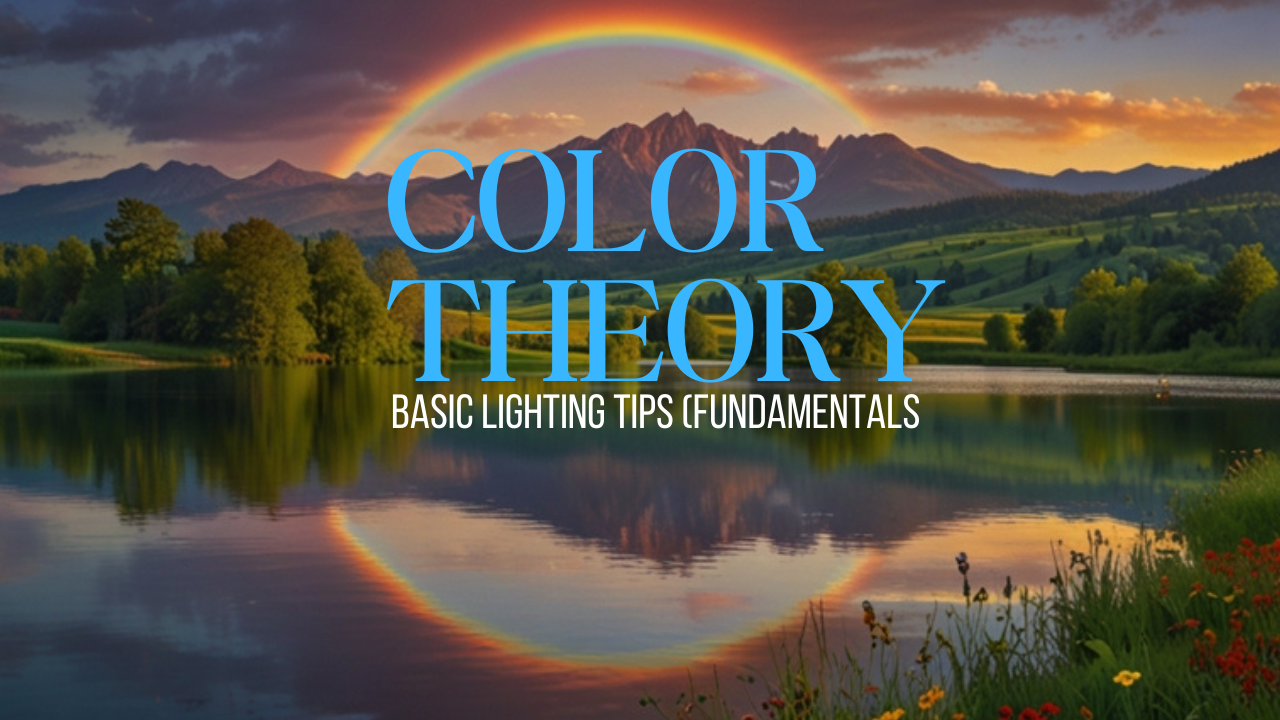
Color Theory
What is Color?Color is the perception of light wavelengths by the human eye. It is a visual property that depends on how objects absorb, reflect, and emit light.???? Scientific Explanation Color comes from light – White light contains all colors (visible spectrum). Objects appear colored because they absorb some wavelengths and reflect others. A red apple absorbs all colors except red, which it reflects. Different wavelengths = Different colors Short wavelengths (400 nm) → Violet, Blue Medium wavelengths (500-600 nm) → Green, Yellow Long wavelengths (700 nm) → Red ???? Properties of Color Hue – The name of a color (e.g., red, blue, yellow). Saturation – Intensity or purity of a color. High saturation = Vivid colors Low saturation = Muted or pastel tones Brightness (Value) – How light or dark a color is. ???? Types of Colors Primary Colors – Red, Blue, Yellow (cannot be made by mixing other colors). Secondary Colors – Green, Orange, Purple (made by mixing two primary colors). Tertiary Colors – A mix of a primary and a secondary color (e.g., Blue-Green). ???? Psychological Effects of Color Red – Energy, passion, danger. Blue – Calm, trust, professionalism. Green – Nature, growth, freshness. Yellow – Happiness, warmth, caution. Purple – Luxury, mystery, creativity. Black & White – Contrast, minimalism, power. What is Color Theory?Color theory is the study of how colors interact, how they affect emotions, and how they can be combined to create visually appealing designs. It is widely used in art, design, photography, film, and 3D rendering to enhance storytelling and aesthetics.???? Basic Color Concepts Primary Colors – Red, Blue, Yellow (cannot be made by mixing other colors). Secondary Colors – Green, Orange, Purple (made by mixing two primary colors). Tertiary Colors – Made by mixing a primary and a secondary color (e.g., Red-Orange). ???? Color Harmony (Color Schemes)1. Complementary Colors ???? Colors opposite each other on the color wheel (e.g., Blue & Orange). Creates strong contrast and visual interest. Common in film and gaming (e.g., teal & orange color grading). 2. Analogous Colors ???? Colors next to each other on the wheel (e.g., Blue, Blue-Green, Green). Creates harmony and a natural look. 3. Triadic Colors ???? Three colors evenly spaced on the wheel (e.g., Red, Yellow, Blue). Vibrant but balanced combinations. 4. Split-Complementary Colors ???? A base color + two adjacent to its complement (e.g., Blue, Yellow-Orange, Red-Orange). Softer contrast than complementary schemes. 5. Monochromatic Colors ????️ Different shades, tints, and tones of the same color (e.g., Light Blue, Blue, Dark Blue). Elegant and minimalistic. 6. Tetradic Colors (Double Complementary) ???? Two complementary pairs (e.g., Blue & Orange + Green & Red). Dynamic but requires balance. ???? Advanced Color Theory Concepts1. Color Psychology (Emotions & Meanings) Red – Passion, energy, danger. Blue – Calm, trust, professionalism. Green – Nature, growth, freshness. Yellow – Happiness, warmth, caution. Purple – Luxury, mystery, creativity. Orange – Energy, enthusiasm, warmth. Black & White – Minimalism, contrast, power. 2. Warm vs. Cool Colors Warm Colors (Red, Orange, Yellow) – Energizing and vibrant. Cool Colors (Blue, Green, Purple) – Calming and relaxing. 3. Contrast & Readability High contrast (light text on dark background) improves visibility. Low contrast can be stylish but harder to read. 4. Saturation & Brightness High saturation = Bold, vibrant colors. Low saturation = Soft, muted, pastel tones. ???? Color in Different Fields Film & Games – Color grading (e.g., cyberpunk neon tones, warm vintage filters). 3D Rendering – Lighting and materials affect color perception. Graphic Design – Branding and UI/UX color psychology. Architecture & Interior Design – Mood and spatial perception. Here’s the color sequence for VIBGYOR:VIBGYOR stands for the colors of the visible spectrum in the order they appear in a rainbow: V – Violet I – Indigo B – Blue G – Green Y – Yellow O – Orange R – Red Each of these colors corresponds to a specific range of wavelengths within the visible light spectrum. Would you like more information on VIBGYOR or color mixing? ????
More detailsPublished - 6 Days Ago
Created by - Anil Chauhan
Maya Lighting
In Autodesk Maya, Standard Lighting refers to the basic lighting setup using Maya’s built-in lights. These lights are useful for previewing scenes before using advanced rendering engines like Arnold, Redshift, or V-Ray.Types of Standard Lights in Maya: Ambient Light Provides uniform lighting across the scene. Lacks directionality, so it flattens shadows and depth. Useful for filling in dark areas. Directional Light Simulates sunlight with parallel rays. Shadows remain consistent across objects. Great for outdoor scenes. Point Light Emits light in all directions, like a bare lightbulb. Good for simulating small light sources. Spot Light Emits light in a conical shape. Useful for focused lighting like flashlights or stage lighting. Area Light A rectangular light source that emits soft, realistic lighting. Useful for soft shadows and realistic indoor lighting. Volume Light Emits light within a defined 3D volume (sphere, cube, etc.). Useful for atmospheric effects. Key Settings for Standard Lighting: Intensity: Controls brightness. Decay Rate: Simulates realistic light falloff (None, Linear, Quadratic, Cubic). Shadows: Enable Ray Traced Shadows or Depth Map Shadows for realism. Color & Temperature: Adjust light color for mood and atmosphere. Viewport 2.0 vs. Rendering Viewport 2.0: Displays basic lighting but lacks realism. Software Renderer: Can use Maya's standard lights but is outdated. Arnold Renderer: Requires converting standard lights to Arnold lights for proper rendering. In Maya, lights have various properties that define their behavior, appearance, and effect on a scene. Below are the basic properties of lights in Maya:1. Basic Light Properties➤ Intensity Controls the brightness of the light. Higher values make the light stronger; lower values make it dimmer. Can be set above 1 for extra brightness. ➤ Color Defines the light’s color. Affects the scene’s mood and realism. Can be adjusted using the color picker or connected to textures. ➤ Decay Rate (Falloff of Light Intensity) Controls how light fades over distance. Options: None: Light remains constant over distance (unrealistic). Linear: Light fades linearly with distance. Quadratic (Realistic): Light follows real-world physics (e.g., sunlight). Cubic: Light falls off very quickly. 2. Shadow Properties➤ Shadows Enable/Disable Allows turning shadows on or off for a light source. Helps control scene complexity and performance. ➤ Shadow Type Depth Map Shadows: Faster but less accurate. Works well for soft shadows. Ray Traced Shadows: More accurate but slower. Allows soft shadows by adjusting light radius and shadow rays. ➤ Shadow Color Allows adjusting shadow darkness or tint. Useful for artistic effects or semi-transparent shadows. 3. Advanced Light Properties➤ Light Angle (Spot Lights & Area Lights) Controls the spread of the light beam. Penumbra Angle: Softens the edges of a spotlight. ➤ Cone Angle (Spot Light Only) Adjusts the width of the spotlight cone. Larger values spread the light wider. ➤ Emit Specular & Emit Diffuse Emit Diffuse: Affects the brightness of objects. Emit Specular: Controls how the light interacts with shiny surfaces. Can be disabled for certain lighting effects. ➤ Fog & Glow Effects Light Fog: Creates atmospheric fog around the light. Glow: Adds a glow effect to the light source. 4. Light Linking (Controlling Which Objects Receive Light) Light Linking Editor allows lights to affect only specific objects. Useful for cinematic lighting where you need precise control. In Autodesk Maya, shadows enhance realism by simulating how light is blocked by objects. Maya offers two main types of shadows:1. Depth Map Shadows (Soft but Less Accurate)✅ Pros: Fast, good for soft shadows. ❌ Cons: Less accurate, may produce artifacts.➤ Key Features: Uses a shadow map (a grayscale image) to store shadow information. Best for soft shadows and non-ray-traced renders. Can be adjusted for blur softness and resolution. ➤ Important Settings: Resolution: Higher values give sharper shadows but use more memory. Filter Size: Controls shadow softness. Bias: Helps avoid shadow artifacts (but too much can cause floating shadows). ???? Used in: Maya Software Renderer, Viewport 2.0.2. Ray Traced Shadows (Accurate but Slower)✅ Pros: Physically accurate, supports transparency. ❌ Cons: Slower, requires more rendering time.➤ Key Features: Uses ray tracing to calculate shadows pixel by pixel. Works best for hard shadows and realistic lighting. Supports transparent shadows (e.g., stained glass). ➤ Important Settings: Light Radius: Controls softness (higher values = softer shadows). Shadow Rays: More rays = smoother shadows but increases render time. Ray Depth Limit: Controls how many times light rays bounce (important for glass objects). ???? Used in: Arnold Renderer, Maya Software, Mental Ray (legacy).Comparison Table: Feature Depth Map Shadows Ray Traced Shadows Speed Faster Slower Accuracy Less accurate More realistic Soft Shadows Yes Yes (adjustable with Light Radius) Transparency Support No Yes Memory Usage Low High 3. Arnold Shadows (for Arnold Renderer)If you’re using Arnold Renderer, it primarily uses Ray Traced Shadows, but you can adjust: Soft Shadows: Increase Light Radius and Shadow Samples. Noise Reduction: Increase Shadow Samples for cleaner shadows. Transparency Support: Works with AI Standard Surface materials. Which Shadow Type to Use? For fast renders & soft shadows → Use Depth Map Shadows. For realistic & transparent shadows → Use Ray Traced Shadows. For Arnold renders → Use Ray Traced Shadows with soft settings. Do you need help setting up shadows for a specific scene? ????
More detailsPublished - 6 Days Ago
Created by - Anil Chauhan
After Effect - Creating Animation Effect
In Adobe After Effects, you can create animation effects using keyframes, presets, and expressions. Here’s a step-by-step guide:1. Basic Animation Using Keyframes???? Step 1: Import your assets (image, text, shape, etc.). ???? Step 2: Select a layer and go to the Timeline Panel. ???? Step 3: Expand Transform Properties (Position, Scale, Rotation, Opacity). ???? Step 4: Click the Stopwatch ⏱️ to set a keyframe at the start. ???? Step 5: Move the playhead forward and change the property (e.g., move position). ???? Step 6: AE will automatically interpolate the animation.2. Using Animation Presets???? Step 1: Open the Effects & Presets Panel. ???? Step 2: Search for animation presets (e.g., "Bounce," "Fade," "Zoom"). ???? Step 3: Drag and drop the preset onto a layer. ???? Step 4: Adjust keyframes if needed.3. Smooth Animation with Easing???? Select keyframes and press F9 for Easy Ease. ???? Open Graph Editor (Edit Speed for smooth motion).4. Advanced Animation Using Expressions???? Hold Alt + Click on a property’s stopwatch to add an expression. ???? Examples: Wiggle Effect (random movement): wiggle(3, 20) // Frequency: 3, Amplitude: 20 Looping Animation: loopOut("cycle") 5. Adding Motion Blur for Realism???? Enable Motion Blur in the Timeline Panel for smoother animations.6. Exporting Your Animation???? Go to File > Export > Add to Render Queue. ???? Choose H.264 (MP4) or GIF for final output. Basic Animation in After Effects ????✨Adobe After Effects lets you create animations using keyframes, effects, and expressions. Here’s a beginner-friendly guide:1. Setting Up an Animation???? Step 1: Create a New Composition (Ctrl + N). ???? Step 2: Import assets (File > Import > Select Files). ???? Step 3: Drag assets into the Timeline Panel.2. Keyframe Animation (Foundation of Motion)???? Select a layer and press P (Position), S (Scale), R (Rotation), or T (Opacity). ???? Click the Stopwatch ⏱️ to set a keyframe. ???? Move the playhead forward and adjust the value (AE auto-animates).✅ Example: Move text from left to right using Position keyframes.3. Easing for Smooth Motion???? Select keyframes → Press F9 (Easy Ease) for a natural feel. ???? Open Graph Editor to refine motion speed.4. Motion Blur for Realism???? Enable Motion Blur for smoother, natural motion. ???? Click the Motion Blur icon in the Timeline Panel.5. Using Presets for Quick Animations???? Go to Effects & Presets Panel → Search for animations like Bounce, Fade, Zoom. ???? Drag & drop onto layers.6. Expressions for Advanced Animation???? Hold Alt + Click on the Stopwatch to add code-based animations. ???? Example: Wiggle (random movement)wiggle(3, 20) // Moves 3 times per second, 20 pixels range 7. Exporting the Animation???? Go to File > Export > Add to Render Queue. ???? Select H.264 (MP4) or GIF for best results.???? Quick Tips:✅ Use Easy Ease (F9) for better movement. ✅ Enable Motion Blur for realistic motion. ✅ Experiment with Effects & Presets for cool animations. Keyframes & Expressions in After Effects ????✨In Adobe After Effects, keyframes and expressions are essential for creating animations.1. What are Keyframes? ⏱️Keyframes mark changes in a property over time to create animation.How to Use Keyframes: Select a layer in the Timeline. Press P (Position), S (Scale), R (Rotation), T (Opacity) to reveal properties. Click the Stopwatch ⏱️ to add a keyframe. Move the playhead and change the property value (AE auto-animates). ✅ Example: Move an object from left to right using Position keyframes.Types of Keyframes: Linear Keyframe: Default, creates a basic motion. Easy Ease (F9): Smooths motion for a more natural look. Bezier & Graph Editor: Custom easing for precise motion control. 2. What are Expressions? ????️Expressions use code to create animations without setting multiple keyframes.How to Use Expressions: Hold Alt + Click the Stopwatch on a property. A text field appears—enter an expression. Click away to apply. ✅ Example: Automatic Bouncing Motionamp = 20; // Amplitude (height) freq = 3; // Frequency (speed) decay = 2; // How fast it slows down n = time * freq; value + [0, amp * Math.sin(n) / Math.exp(n / decay)]; ???? This makes an object bounce naturally!3. Popular Expressions:Wiggle (Random Movement)wiggle(3, 20) // Moves 3 times per second, 20 pixels range ???? Great for flickering lights or shaky camera effects.Looping AnimationloopOut("cycle") // Repeats keyframes infinitely ???? Useful for looping rotations or blinking effects.Time-Based Rotationtime * 50 // Rotates 50 degrees per second ???? Great for rotating clock hands or propellers.4. When to Use Keyframes vs. Expressions? Feature Keyframes Expressions Manual control ✅ Yes ❌ No Smooth motion ✅ Yes ✅ Yes Automate animation ❌ No ✅ Yes Works without keyframes ❌ No ✅ Yes ???? Tip: Use keyframes for manual control and expressions for automation. Graph Editor in After Effects ????????The Graph Editor in Adobe After Effects gives you precise control over animation speed and motion curves. Instead of simple linear movements, you can smooth out animations and create natural motion.1. How to Open the Graph Editor????? Select your animated property (e.g., Position, Scale, Opacity). ???? Click the Graph Editor icon ???? in the Timeline (shortcut: Shift + F3).2. Types of Graphs in After EffectsThere are two types of graphs in AE’s Graph Editor:A. Value Graph ???? (Property Changes Over Time) Shows the exact values (e.g., position, scale). Helps create bouncing, overshoot, or elastic effects. B. Speed Graph ⚡ (Speed Over Time) Shows how fast an object moves between keyframes. Useful for smooth easing and acceleration effects. 3. Using the Graph Editor for Smoother AnimationA. Easy Ease (Smooth Start & Stop) Select keyframes → Press F9 (Easy Ease). Open Graph Editor. Drag the curve handles to smooth out motion. B. Custom Speed Adjustments Select the Speed Graph. Grab the handle before a keyframe → Pull left for a slow start. Grab the handle after a keyframe → Pull right for a smooth stop. C. Overshoot & Bounce Effects Use the Value Graph to create an "overshoot" motion (e.g., bouncing ball). Adjust handles for an elastic effect. 4. Tips for Using the Graph Editor Effectively✅ Use Speed Graph for smooth acceleration & deceleration. ✅ Use Value Graph for precise movement control. ✅ Adjust handles to create custom easing curves. ✅ Combine with expressions for dynamic motion (e.g., wiggle()).Graph Editor in After Effects ???????? The Graph Editor in Adobe After Effects gives you precise control over animation speed and motion curves. Instead of simple linear movements, you can smooth out animations and create natural motion. 1. How to Open the Graph Editor? ???? Select your animated property (e.g., Position, Scale, Opacity). ???? Click the Graph Editor icon ???? in the Timeline (shortcut: Shift + F3). 2. Types of Graphs in After Effects There are two types of graphs in AE’s Graph Editor: A. Value Graph ???? (Property Changes Over Time) Shows the exact values (e.g., position, scale). Helps create bouncing, overshoot, or elastic effects. B. Speed Graph ⚡ (Speed Over Time) Shows how fast an object moves between keyframes. Useful for smooth easing and acceleration effects. 3. Using the Graph Editor for Smoother Animation A. Easy Ease (Smooth Start & Stop) Select keyframes → Press F9 (Easy Ease). Open Graph Editor. Drag the curve handles to smooth out motion. B. Custom Speed Adjustments Select the Speed Graph. Grab the handle before a keyframe → Pull left for a slow start. Grab the handle after a keyframe → Pull right for a smooth stop. C. Overshoot & Bounce Effects Use the Value Graph to create an "overshoot" motion (e.g., bouncing ball). Adjust handles for an elastic effect. 4. Tips for Using the Graph Editor Effectively ✅ Use Speed Graph for smooth acceleration & deceleration. ✅ Use Value Graph for precise movement control. ✅ Adjust handles to create custom easing curves. ✅ Combine with expressions for dynamic motion (e.g., wiggle()). ???? Want help with a specific effect in the Graph Editor? Let me know! ????
More detailsPublished - 6 Days Ago
Created by - Anil Chauhan
Unreal Navigating & Basic Object Manipulation
Navigating the 3D Viewport & Basic Object Manipulation in Unreal EngineMastering viewport navigation and object manipulation in Unreal Engine is crucial for efficiently building and editing environments. Below is a guide covering the essential controls and techniques.1. Viewport Navigation ControlsUnreal Engine’s 3D viewport allows you to move around freely. You can navigate using either the mouse + keyboard or a gamepad.Mouse + Keyboard Controls: Action Keyboard/Mouse Shortcut Pan Hold Right Mouse Button (RMB) + move Zoom Scroll Mouse Wheel Rotate View Hold Right Mouse Button (RMB) + move mouse Move (Fly Mode) Hold RMB + use WASD keys Increase/Decrease Speed Use Mouse Wheel while holding RMB Alternative Controls: F key: Focuses on the selected object. Shift + F: Switches between fly mode and normal view. Alt + Left Mouse Button: Orbit around an object. 2. Object Manipulation (Move, Rotate, Scale)In Unreal Engine, objects can be moved, rotated, and scaled using transformation tools.Transformation Tools: Action Shortcut Key Description Move (Translate) W Moves an object along the X, Y, or Z axis Rotate E Rotates an object around its pivot point Scale R Increases or decreases object size Using the Gizmo: Click on an object to activate the gizmo. Drag the arrows (move), circles (rotate), or cubes (scale) to adjust the object. 3. Snapping, Grids, & Measuring DistancesFor precise placement of objects:Snapping Tools: Grid Snapping: Aligns objects to a fixed grid for accuracy. Toggle with G or adjust in the toolbar. Angle Snapping: Ensures objects rotate in fixed increments. Enable/disable in the Rotation Settings. Scaling Snapping: Adjusts scaling increments. Can be modified in Editor Preferences. Measuring Distances: Use the Measuring Tool (under the Modeling Tools) to check distances between objects. 4. Placing & Moving Assets in the WorldTo add assets to the scene: Drag and drop objects from the Content Browser into the viewport. Use transformation tools (Move, Rotate, Scale) to adjust their position. Enable snapping for precise alignment. Final Tips: Use "F" to focus on selected objects quickly. Ctrl + Z to undo mistakes. Hold Shift while transforming to duplicate an object instantly. Would you like a more detailed tutorial on any of these topics? ????
More detailsPublished - 4 Days Ago
Created by - Anil Chauhan
Motion Path,Motion Blur and Puppet Tools
In Adobe After Effects, a motion path is the trajectory an object follows over time when animated with position keyframes. Here’s how to work with motion paths effectively:1. Creating a Motion Path Select a layer (e.g., a shape, text, or image). Press P to reveal the Position property. Click the stopwatch icon next to Position to create the first keyframe. Move the playhead forward in the timeline. Move the object to a new location → This automatically creates a second keyframe. The object will now follow the path between the keyframes. 2. Editing a Motion Path After adding position keyframes, a motion path appears in the composition. Select the layer and use the Selection Tool (V) to adjust the curve by dragging points. If you want a smooth curved path, right-click a keyframe → Keyframe Interpolation → Change to Bezier. Use the Pen Tool (G) to adjust handles and refine the path. 3. Creating a Custom Path with the Pen Tool Use the Pen Tool (G) to draw a shape or path. Copy (Ctrl/Cmd + C) the path from the Shape Layer’s Path property. Select the Position property of another layer and paste (Ctrl/Cmd + V) → The object follows the path. 4. Adjusting Motion Path Speed Use the Graph Editor (Shift + F3) to adjust the speed for a more natural motion. Right-click a keyframe → Easy Ease (F9) for smooth acceleration and deceleration. Drag the speed curve handles to control motion dynamics. 5. Parenting to a Motion Path Use the Null Object technique: Create a Null Object (Layer > New > Null Object). Animate the Null Object’s position along the desired path. Parent other layers to the Null using the Pick Whip. 6. RotoBezier for Smoother Curves Select the motion path → Right-click keyframe → RotoBezier for automatic smooth curves. Motion Blur in After EffectsMotion blur makes moving objects appear more natural by simulating the blur effect seen in real-world motion. It helps add realism to animations, especially for fast-moving objects.1. Enabling Motion Blur for a Layer Locate the Timeline Panel. Find the Motion Blur Toggle (three overlapping circles) at the top of the layer panel. Enable Motion Blur for your desired layers by clicking the checkbox under the Motion Blur column. Activate Motion Blur for the entire composition by clicking the Master Switch (same three-circle icon at the top of the layer stack). 2. Adjusting Motion Blur SettingsFor more control over the blur effect: Go to Composition > Composition Settings > Advanced tab. Adjust: Shutter Angle (default is 180°; increasing it creates more blur). Shutter Phase (controls blur offset relative to movement). Samples Per Frame (higher values result in smoother blur but increase render time). 3. Using Motion Blur with Effects Some effects (e.g., Transform Effect) do not inherit motion blur automatically. To force motion blur, use the CC Force Motion Blur effect: Select the layer. Go to Effect > Time > CC Force Motion Blur. Adjust Motion Blur Samples for smoother results. 4. Alternative: RSMB (ReelSmart Motion Blur) If you need more advanced blur, the ReelSmart Motion Blur (RSMB) plugin can generate blur from motion vectors, even if no actual movement occurs in the animation. 5. Motion Blur for 3D Layers Motion blur works for 2D and 3D layers. For 3D layers, ensure that the Camera Settings also have a proper Shutter Angle. When to Use Motion Blur✅ Fast-moving objects (text, shapes, particles, etc.) ✅ Camera movements (panning, zooming, rotation, etc.) ✅ Character animation for smoother motion ✅ Creating a cinematic feel Animating with Puppet Tools in After Effects ????????The Puppet Tool in Adobe After Effects allows you to animate still images, shapes, or characters by creating deformable joints. It’s perfect for character animation, organic motion, or adding subtle movements to objects.1. Setting Up the Puppet Tool Import or Create Your Layer Works best with PNG images with transparency, shape layers, or solid layers. If using an image, convert it to a Rasterized Layer (Layer > Auto-Traced for vector images). Select the Puppet Tool Choose the Puppet Pin Tool (Ctrl + P / Cmd + P). Click on your object to place pins (like joints). 2. Types of Puppet Tools???? Puppet Pin Tool (Default) – Places basic deformation points. ???? Puppet Starch Tool – Prevents unwanted deformation (adds rigidity). ???? Puppet Overlap Tool – Controls depth (which part appears in front). ???? Puppet Advanced Pin Tool – Adds rotation, scale, and bend controls.3. Animating with Puppet Pins Set Keyframes After placing pins, go to the Timeline Panel. Open the layer’s “Effects” > Puppet > Mesh > Deform to see all pins. Move the playhead to a new time position and drag a pin → AE automatically creates keyframes. Refine the Motion Adjust the keyframes in the Graph Editor for smoother movement. Use Easy Ease (F9) for a more natural feel. 4. Advanced Puppet Tool (Newer AE Versions)New versions of After Effects introduce Puppet Engine Options: Legacy (Old method, good for simple animation). Advanced (Better deformation control). Rigid (Maintains shape better). To change this: ???? Go to Mesh Options → Select the preferred Puppet Engine.5. Adding Secondary MotionFor realistic movement, try: ✅ Overlap & Follow-through: Add extra keyframes for delayed limb movements (e.g., hair sways after the head moves). ✅ Squash & Stretch: Slightly scale/stretch elements for cartoony motion. ✅ Parental Rigging: Parent parts (e.g., hands to arms) to create linked movement. Extra Tip: Rigging with Duik for Advanced ControlIf you need bone-based rigging (for characters), try the free Duik Bassel plugin for more advanced animation controls.When to Use Puppet Tool?✅ Animating characters or creatures ✅ Making objects "breathe" or wiggle ✅ Giving life to still images ✅ Subtle organic motion in graphics Would you like help with a specific puppet animation style? ????
More detailsPublished - 3 Days Ago
Created by - Anil Chauhan
Advanced Editing Techniques in After Effects
Advanced Editing Techniques in After Effects ????If you want to take your After Effects skills to the next level, here are some advanced editing techniques to enhance your motion graphics, VFX, and compositing.1. Advanced Keyframing & Animation???? Graph Editor for Smooth Animation Use the Graph Editor (Shift + F3) to fine-tune speed and motion. Adjust Speed Graph and Value Graph for natural easing. Apply Easy Ease (F9) or manually adjust curves for smooth movement. ???? Expressions for Automation Add expressions by holding Alt (Win) / Option (Mac) + Clicking a Stopwatch. Common expressions: Wiggle (random motion): wiggle(3,50) (3 times per second, 50-pixel variation) Looping animation: loopOut("cycle") (Repeats animation infinitely) Time-based animation: time*50 (Moves automatically over time) 2. Masking & Rotoscoping???? Advanced Masking Use Bezier Handles for precise mask control. Feather masks for smoother edges (F key to adjust). Apply Track Matte for creative transparency effects. ???? Rotoscoping with Roto Brush Select a layer and use Roto Brush Tool (Alt/Option + W). Refine edges in the Refine Edge Matte panel. Freeze roto when satisfied to avoid re-tracking. 3. Motion Tracking & Stabilization???? 2D Motion Tracking Use Tracker Panel → Track motion → Attach Null Object. Parent text or graphics to the Null Object for realistic movement. ???? 3D Camera Tracking Effect > Perspective > 3D Camera Tracker. After analysis, select a point and create Text or Solid. Great for placing objects in real-world footage. ???? Warp Stabilizer Effect > Distort > Warp Stabilizer to smooth shaky footage. Adjust Smoothness (10–30%) for natural results. 4. 3D Animation & Camera Work???? Creating a 3D Scene Toggle the 3D Layer Switch (cube icon) on your layers. Adjust X, Y, Z rotation for depth. Use Depth of Field for cinematic blur. ???? Advanced Camera Controls Create a Camera Layer (Layer > New > Camera). Use a Null Object to control the camera easily. Enable Orbit, Track XY, and Zoom tools for dynamic movement. 5. Advanced Effects & Compositing???? Displacement Mapping Effect > Distort > Displacement Map to create glitch and ripple effects. Use a grayscale map to control distortion strength. ???? Parallax & Depth Effects Use multiple layers in 3D space to create depth. Animate the Camera Position for a parallax effect. ???? Light and Shadows in 3D Create a Light Layer (Layer > New > Light). Adjust Layer Material Options to cast shadows and interact with light. 6. Time Manipulation Techniques???? Speed Ramping with Time Remapping Right-click the layer → Enable Time Remapping. Add keyframes and adjust speed in Graph Editor. ???? Frame Blending for Smooth Motion Click the Frame Blending Toggle (wave-like icon). Use Pixel Motion for smooth interpolation. ???? Time Freeze & Reverse Effect > Time > Time Freeze to pause motion. Use Time-Reverse Keyframes to play footage backward. 7. Green Screen & Keying???? Keying Out Green Screens Effect > Keying > Keylight (1.2). Select the green color with the Eyedropper tool. Adjust Screen Gain and Clip Black/White for a clean key. Add a Spill Suppressor to remove green edges. 8. Advanced Color Grading & Glow Effects???? Color Correction Use Lumetri Color for cinematic grading. Adjust Curves, Exposure, and Vibrance for rich colors. ???? Glow & Light Effects Effect > Stylize > Glow for soft light effects. Use Optical Flares (Video Copilot plugin) for realistic lens flares. 9. Advanced Rendering & Optimization???? Optimize Performance Use Proxies (Right-click > Create Proxy) for smooth playback. Enable Fast Draft Mode in the preview panel. Purge memory (Edit > Purge > All Memory & Disk Cache). ???? Best Render Settings Use Adobe Media Encoder for better compression. Export with H.264 (MP4) at 10-20 Mbps for web use. Use ProRes or Cineform for high-quality exports. ???? Bonus: Must-Know Plugins for Advanced Editing✅ Element 3D (Video Copilot) – For advanced 3D graphics ✅ Red Giant Trapcode Suite – For particle effects ✅ ReelSmart Motion Blur (RSMB) – Advanced motion blur ✅ Deep Glow – High-quality glow effect ✅ Saber (Free Plugin by Video Copilot) – Light and energy effects Motion Stabilization in After Effects ???????? Motion stabilization helps smooth out shaky footage and create a more polished look. After Effects offers powerful tools for stabilizing video, including Warp Stabilizer and Point Tracking Stabilization. 1. Using Warp Stabilizer (Quick & Automatic) The Warp Stabilizer is the easiest way to remove camera shake. Steps: 1️⃣ Select your shaky footage in the Timeline. 2️⃣ Go to Effect > Distort > Warp Stabilizer. 3️⃣ The effect will automatically analyze your footage. 4️⃣ Adjust Stabilization Settings (see below for best settings). Best Warp Stabilizer Settings: Result: Smooth Motion (if you want to retain camera movement) OR No Motion (for a locked-off look). Smoothness: Start with 50% (lower if too much distortion). Method: Try Position, Scale, Rotation first. If still shaky, switch to Subspace Warp. Crop Less, Smooth More: Adjust this slider for better results. Advanced > Rolling Shutter Reduction: Helps with distortion from DSLRs or smartphones. ⚠️ Pro Tip: If you notice a wobbly or jelly effect, lower the Smoothness or change the Method to "Position, Scale, and Rotation." 2. Stabilizing with Motion Tracking (Manual Control) For more control, you can use Point Tracking to stabilize a specific part of your footage. Steps: 1️⃣ Select your video layer. 2️⃣ Open the Tracker Panel (Window > Tracker). 3️⃣ Click Track Motion and check Position (and optionally, Rotation & Scale). 4️⃣ Place the tracking point on a high-contrast feature (e.g., a window corner, road sign). 5️⃣ Click Analyze Forward ▶ to track motion. 6️⃣ Click Edit Target → Choose the same video layer → Apply (X and Y). 7️⃣ Enable Motion Stabilization by inverting the movement of the tracked points. Pros: ✔️ More control than Warp Stabilizer. ✔️ Works well for locked shots (e.g., talking head footage). Cons: ❌ Doesn't work well for complex shakes or rolling shutter issues. 3. Advanced Stabilization: Combining Both Methods Sometimes, Warp Stabilizer alone doesn’t work perfectly. In such cases: First, apply Motion Tracking Stabilization. Then, apply Warp Stabilizer for finer smoothing. ???? Tip: Pre-compose (Ctrl + Shift + C) your stabilized layer before applying Warp Stabilizer to avoid errors. 4. When to Use Motion Stabilization? ✅ Handheld footage that needs smoothing. ✅ Footage shot without a tripod or gimbal. ✅ Tracking a specific object while keeping it stable. ✅ Reducing motion sickness effects in videos. Need help stabilizing a specific type of footage? Let me know! ????✨Motion Tracking in After Effects ???????? Motion Tracking allows you to attach graphics, text, or effects to moving objects in your footage. It’s widely used for object tracking, screen replacements, and stabilizing shaky footage. 1. Types of Motion Tracking in After Effects ???? Single-Point Tracking – Tracks one point for basic motion. ???? Two-Point Tracking – Tracks position, rotation, and scale. ???? Planar Tracking (Corner Pin Tracking) – Used for screen replacements. ???? 3D Camera Tracking – Used for integrating 3D elements into live footage. 2. Single-Point Motion Tracking (Basic Tracking) Used for attaching objects to a moving subject. Steps: 1️⃣ Import your footage and place it in the timeline. 2️⃣ Select the video layer and open the Tracker Panel (Window > Tracker). 3️⃣ Click Track Motion → Enable Position (default). 4️⃣ In the Layer Panel, place the tracker box over a high-contrast area (e.g., a logo, object, or face). 5️⃣ Click Analyze Forward ▶ to track motion. 6️⃣ Click Edit Target → Select the layer to apply tracking. 7️⃣ Click Apply (choose X & Y). 8️⃣ The object or text will now follow the tracked motion! Pro Tip: ✔️ Use Adjust Track if tracking drifts off. ✔️ Increase the search region if the track fails. 3. Two-Point Motion Tracking (Position, Scale & Rotation) Used when objects change size or rotate (e.g., tracking a moving billboard). Steps: 1️⃣ Follow the Single-Point Tracking Steps above. 2️⃣ Enable Rotation & Scale in the Tracker Panel. 3️⃣ Place two tracking points on opposite sides of the object. 4️⃣ Track the motion and apply it to a Null Object. 5️⃣ Parent your graphic or text to the Null Object for smooth tracking. 4. Corner Pin Tracking (Planar Tracking) Used for screen replacements (e.g., adding a new image on a phone or TV screen). Steps: 1️⃣ Select your footage and open the Tracker Panel. 2️⃣ Click Track Motion → Enable Perspective (Corner Pin). 3️⃣ Adjust the four tracking points to match the corners of the screen. 4️⃣ Track the motion and apply it to your replacement layer. 5️⃣ Use Effect > Distort > Corner Pin to fine-tune placement. Pro Tip: If tracking fails, use Mocha AE (Effect > Boris FX Mocha) for better planar tracking. 5. 3D Camera Tracking (Adding 3D Text or Objects) Used for tracking movement in a 3D scene to integrate text, graphics, or 3D objects. Steps: 1️⃣ Select the footage and go to Effect > Perspective > 3D Camera Tracker. 2️⃣ Wait for analysis (check the status in the Effects panel). 3️⃣ Click on a tracked point (small colored dots will appear). 4️⃣ Right-click → Create Text and Camera (or Solid/Null for other elements). 5️⃣ Adjust the text or object to match the perspective. Pro Tip: ✔️ Works best with stable footage (avoid extreme motion blur). ✔️ Use Shadows & Lights for realistic 3D integration. 6. Motion Tracking with Expressions For automated tracking effects, use expressions: Attach an object to a tracked Null with: thisComp.layer("Null 1").position Use wiggle() for shaky effects: wiggle(3,10) (shakes 3 times per second by 10 pixels) 7. When to Use Motion Tracking? ✅ Attaching text/logos to moving objects. ✅ Replacing screens (phones, TVs, billboards). ✅ Stabilizing handheld shots. ✅ Adding 3D objects into real-world scenes. ✅ Creating VFX (e.g., HUD displays, holograms, and light effects). Need help with a specific tracking effect? Let me know! ????????Face Tracking in After Effects ???????? Face Tracking in After Effects allows you to track facial features and apply effects like face replacement, digital makeup, expressions tracking, and more. 1. Types of Face Tracking in After Effects ???? Basic Face Tracking (Outline Only) – Tracks face movement without detailed facial features. ???? Detailed Face Tracking (Feature Points) – Tracks eyes, nose, mouth, chin, and brows for advanced effects like face distortion or motion capture. 2. How to Use Face Tracking in After Effects???? Basic Face Tracking (Outline Tracking) Used to track a person's face movement (e.g., attaching objects like masks or effects). Steps: 1️⃣ Import your video and select the face layer. 2️⃣ Open the Tracker Panel (Window > Tracker). 3️⃣ Click "Track Face". 4️⃣ Choose "Face Tracking (Outline Only)". 5️⃣ Click "Analyze Forward ▶" to track the face movement. 6️⃣ Once tracking is complete, you can attach effects (e.g., a mask, text, or motion graphics). ✅ Best for: Applying effects to an entire face (like motion blur, color correction, or masks). ???? Detailed Face Tracking (Feature Points) Used to track facial features (eyes, nose, mouth, etc.) for more advanced effects like motion capture, face distortion, or expressions tracking. Steps: 1️⃣ Follow steps 1–4 from Basic Face Tracking. 2️⃣ Select "Face Tracking (Detailed Features)" instead. 3️⃣ Click "Analyze Forward ▶" to track all face features. 4️⃣ After tracking, you can see the face feature points in the layer properties (Effects > Face Tracking). ✅ Best for: ✔️ Applying eyewear, masks, or face paint. ✔️ Using motion capture for facial expressions. ✔️ Lip-sync animation for character animation. 3. Using Face Tracking for Effects???? Attaching Graphics or Text to a Face Create a Null Object (Layer > New > Null Object). Use Edit Target to apply the tracking data to the Null Object. Parent text, glasses, or effects to the Null Object (Pick Whip Tool). ???? Face Replacement (Deep Fake Style) Track the face using Detailed Face Tracking. Import a replacement face (PNG or another face video). Use Corner Pin or Mesh Warp (Effect > Distort > Mesh Warp) to fit the replacement face onto the tracked face. ???? Adding Digital Makeup Create a solid layer and mask areas (e.g., lips, eyes). Parent the masked layer to the face tracking data. Adjust opacity/blending modes for a natural effect. 4. When to Use Face Tracking? ✅ Adding glasses, masks, or face filters. ✅ Creating character animation using real facial expressions. ✅ Applying digital makeup or beauty retouching. ✅ Enhancing VFX for movies or ads. Need help with a specific face tracking effect? Let me know! ????????3D Camera Tracker in After Effects ???????? The 3D Camera Tracker allows you to analyze footage and extract camera movement, enabling you to place 3D objects, text, and effects into live-action scenes. This is useful for match-moving, set extensions, adding VFX, and compositing 3D elements. 1. How the 3D Camera Tracker Works The 3D Camera Tracker analyzes motion in the scene and reconstructs a virtual 3D camera, allowing you to place elements that move realistically with the footage. 2. How to Use 3D Camera Tracker???? Step-by-Step Guide 1️⃣ Import your footage and place it in the timeline. 2️⃣ Select the footage layer, then go to: Effect > Perspective > 3D Camera Tracker. 3️⃣ Wait for the Analysis Phase (this may take some time). The tracker will analyze motion and detect tracking points. 4️⃣ After analysis, hover over the footage to see tracking points. A red, yellow, or green target will appear, showing the plane where objects can be placed. 5️⃣ Select multiple tracking points that align with your desired surface. 6️⃣ Right-click and choose: ???? "Create Text and Camera" → Adds 3D text that matches the scene. ???? "Create Solid and Camera" → Adds a 3D plane for reference. ???? "Create Null and Camera" → Adds a tracking point for other objects. 7️⃣ Adjust the 3D object (scale, position, and rotation) to match the scene. ✅ Done! Your text or object will now move with the camera in 3D space. 3. Best Settings for 3D Camera Tracker???? Troubleshooting Tips ???? Tracking not working? → Make sure your footage is stable and has enough detail. ???? Points are jumping around? → Use "Detailed Analysis" in the effect settings. ???? No Trackable Features? → Use "Track Motion" instead for 2D tracking. ???? Camera Tracker Settings Shot Type: Auto-Detect Solve Method: Typical Track Points Size: Increase if needed for better visibility. Create Nulls or Solids: Helps in positioning objects precisely. 4. Creative Uses of 3D Camera Tracking ✅ Placing 3D text into live footage (text follows camera movement). ✅ Inserting digital billboards or posters into scenes. ✅ Adding objects like explosions, dust, or debris realistically. ✅ Reconstructing 3D environments for VFX. ✅ Set extensions (adding buildings, skies, or CGI elements). Need help with a specific effect? Let me know! ????????
More detailsPublished - 3 Days Ago
Created by - Anil Chauhan
Applying Effects Using Presets in After Effects
Applying Effects Using Presets in After Effects ????⚡Presets in After Effects allow you to quickly add animations, transitions, and effects to your layers without manually keyframing everything. These are great for text animation, motion graphics, color effects, and more!1. How to Apply Presets in After Effects???? Method 1: Using the Effects & Presets Panel1️⃣ Open After Effects and import your footage or text layer. 2️⃣ Go to the Effects & Presets panel (Window > Effects & Presets). 3️⃣ Search for a preset (e.g., "Fade In" or "Bounce"). 4️⃣ Drag and drop the preset onto your text, shape, or footage layer.???? Method 2: Using Animation Presets (Pre-Saved Effects)1️⃣ Open the Effects & Presets Panel. 2️⃣ Click on the "Animation Presets" folder. 3️⃣ Browse categories like: Text (e.g., Typewriter, Fade Up, 3D Spin) Transitions (e.g., Dissolves, Wipes) Behaviors (e.g., Wiggle, Float) 4️⃣ Drag a preset onto your layer to apply the effect. 2. Using Pre-Installed Animation Presets???? Text Animation Presets1️⃣ Select your Text Layer. 2️⃣ Open Effects & Presets → Animation Presets → Text. 3️⃣ Drag effects like Typewriter, Bounce, Fade, or 3D Rotate onto your text. 4️⃣ Adjust keyframes in the Timeline for speed control.✅ Popular Text Presets: Typewriter – Simulates typing letters one by one. Bounce In/Out – Makes text pop dynamically. Slide In/Out – Moves text smoothly into the frame. Blurred Reveal – Text appears with a blur effect. ???? Transition & Effects Presets1️⃣ Select your footage or shape layer. 2️⃣ Open Effects & Presets → Animation Presets → Transitions. 3️⃣ Apply effects like Fade In/Out, Wipe, or Zoom Blur.✅ Popular Transition Presets: Cross Dissolve – Smooth fade between clips. Zoom In/Out – Creates a cinematic zoom effect. Light Leaks – Adds a glowing film effect. Glitch – Creates a digital distortion look. 3. Saving & Importing Custom Presets???? How to Save Your Own Preset1️⃣ Apply effects and keyframes to your layer. 2️⃣ Select the modified effect(s) in the Effects Control Panel. 3️⃣ Go to Animation > Save Animation Preset. 4️⃣ Choose a location (Documents > Adobe > After Effects > User Presets). 5️⃣ Now, you can reuse it by searching in Effects & Presets.???? How to Import External Presets1️⃣ Download .ffx preset files. 2️⃣ Move them to: Documents > Adobe > After Effects > User Presets. 3️⃣ Restart After Effects and find them in the Effects & Presets Panel.4. When to Use Presets?✅ To speed up animation workflows. ✅ For quick text and transition effects. ✅ To maintain consistency in motion graphics. ✅ When you need professional results without manual keyframes. Need help finding a specific preset? Let me know! ????????Masks in After Effects ????✂️ Masks in After Effects allow you to selectively reveal or hide parts of a layer, create custom transitions, and add creative effects like shape reveals, cutouts, and animations. 1. How to Create a Mask???? Using Shape Tools (Ellipse, Rectangle, etc.) 1️⃣ Select your layer (video, text, or solid). 2️⃣ Choose a Shape Tool (Q for quick access). Ellipse (O), Rectangle (R), Polygon, etc. 3️⃣ Click and drag on the layer to create a mask. 4️⃣ The mask will cut out the selected area, making the rest invisible. ✅ Pro Tip: Hold Shift while dragging for a perfect circle or square. ???? Using the Pen Tool (Custom Shape Mask) 1️⃣ Select your layer. 2️⃣ Choose the Pen Tool (G). 3️⃣ Click points to draw a custom shape around the object. 4️⃣ Close the shape to complete the mask. ✅ Best for: Cutting out objects, creating complex shapes, or tracing edges. 2. Adjusting Mask Properties After creating a mask, open the Mask settings (M shortcut) under the layer. ???? Key Mask Settings: Mask Path – Edit the shape over time for mask animation. Mask Feather – Softens the edges (great for blending). Mask Opacity – Adjusts transparency. Mask Expansion – Expands or contracts the mask boundary. Mode (Add/Subtract/Intersect) – Controls mask visibility. ✅ Pro Tip: Press F to quickly adjust feathering. 3. Animating Masks (Mask Path) To animate a mask over time (e.g., for a revealing effect): 1️⃣ Select your Mask Path in the timeline. 2️⃣ Click the Stopwatch ⏱️ to enable keyframes. 3️⃣ Move the playhead and adjust the mask shape. 4️⃣ Repeat for smooth animation. ✅ Best for: Shape reveals, face tracking, or animated cutouts. 4. Track Mattes & Masks Instead of manually animating masks, you can use Track Mattes: Alpha Matte: Uses the shape of one layer to mask another. Luma Matte: Uses brightness values for masking. ???? How to Use a Track Matte 1️⃣ Place a mask layer (e.g., a shape) above your main layer. 2️⃣ In the TrkMat (Track Matte) dropdown, select: Alpha Matte (for shape-based masking). Luma Matte (for brightness-based masking). ✅ Best for: Text reveals, transitions, and creative cutouts. 5. Masking for Special Effects ✅ Face Blur (Censoring) → Create a mask & apply Gaussian Blur. ✅ Text Reveal (Handwriting Effect) → Animate a mask over text. ✅ Vignette Effect → Use a feathered ellipse mask for dark edges. ✅ Custom Transitions → Animate shapes to create smooth scene transitions. Need help with a specific masking effect? Let me know! ????✨Color Keying in After Effects ????✨ Color Keying is a powerful technique used to remove or replace specific colors in a video. It's commonly used for green screen effects or background removal. After Effects offers several tools for color keying, including Keylight, Color Range, and Color Key. 1. Keylight (Best for Green Screen Keying) Keylight is one of the most powerful and accurate keying tools available in After Effects. It’s ideal for removing a specific color (like green or blue) and replacing it with a new background. Steps for Using Keylight: 1️⃣ Select your video layer with the green screen or chroma key background. 2️⃣ Go to Effect > Keying > Keylight (1.2). 3️⃣ In the Effect Controls panel, use the Eyedropper tool to select the background color (e.g., green). 4️⃣ Adjust the Screen Gain and Screen Balance to fine-tune the key. 5️⃣ Use Screen Matte options (Clip Black and Clip White) to clean up edges. 6️⃣ Enable Despill Bias to remove any green or blue color spill on your subject. 2. Color Key (Simple Keying Tool) Color Key is a simpler tool for removing solid colors from your footage. It’s often used for more straightforward color removal (like isolating specific elements). Steps for Using Color Key: 1️⃣ Select your video layer. 2️⃣ Go to Effect > Keying > Color Key. 3️⃣ In the Effect Controls panel, click on the Color Key Color box to select the color you want to remove (e.g., green, blue). 4️⃣ Adjust the Color Tolerance slider to control how much of the color range is removed. 5️⃣ Use Edge Thin and Edge Feather to soften the edges and reduce harsh lines. Pros: ✅ Quick and simple for straightforward keying. ✅ Works well for backgrounds with solid colors. Cons: ❌ Less control compared to Keylight for complex keying. 3. Color Range (Advanced Color Selection) Color Range lets you select a specific color range based on the luminosity and saturation of the image, which is helpful for more complex backgrounds or partial color removal. Steps for Using Color Range: 1️⃣ Select your video layer. 2️⃣ Go to Effect > Color Correction > Color Range. 3️⃣ In the Effect Controls panel, use the eyedropper tool to pick the color you want to key out. 4️⃣ Adjust the Fuzziness slider to expand or narrow the color range. 5️⃣ Fine-tune using the Add To Sample or Subtract From Sample tools. 4. Cleaning up Keying (Spill, Matte, & Edge Refining) Once you’ve keyed out the background, it’s essential to refine the edges and clean up the matte for a more professional look. Refining Edges: 1️⃣ Screen Matte – Use Clip Black/White to tighten the matte around your subject. 2️⃣ Matte Choke – Adjust the matte edges by shrinking or expanding the mask. 3️⃣ Despill – Remove any color spill from the background that’s on your subject (commonly green spill on a person’s hair). 4️⃣ Edge Feather – Soften hard edges for a natural blend. 5. Common Uses of Color Keying ✅ Chroma Keying (Green Screen) – Replace green or blue backgrounds with virtual backgrounds. ✅ Color Isolation – Remove or change a specific color (e.g., changing sky color). ✅ VFX and Compositing – Add 3D objects into real-world footage using keying techniques. ✅ Text Effects – Create cool text animations by removing or changing background colors. Need help with a specific color keying effect? Let me know! ????????Working with Green Screen Footage in After Effects ???????? Green Screen (or Chroma Keying) is a technique where a green background is replaced with another image or video. After Effects provides several tools to achieve realistic and seamless results. Here's how to work with green screen footage effectively! 1. Importing Green Screen Footage 1️⃣ Import your footage into After Effects (File > Import > File). 2️⃣ Drag your footage to the timeline to begin editing. 2. Keying Out the Green Screen The keying process is where you remove the green background and replace it with your desired background. ???? Using Keylight (Best Tool for Green Screen) 1️⃣ Select your green screen footage layer. 2️⃣ Go to Effect > Keying > Keylight (1.2). 3️⃣ In the Effect Controls panel, use the Eyedropper tool to click on the green screen background in the composition. 4️⃣ Adjust Screen Gain and Screen Balance to fine-tune the key and remove the green background. Screen Gain: Controls the amount of color removed. Screen Balance: Helps correct color spill. ???? Adjusting the Key (Fine-Tuning the Keylight) 1️⃣ Screen Matte: Adjust Clip Black and Clip White sliders to remove any leftover green spill or noise. 2️⃣ Despill Bias: Use this option to remove any residual green edges on your subject. 3️⃣ Edge Thin/Feather: Soften the edges of your key to create a smoother transition between the subject and background. 3. Replacing the Green Screen Background After you’ve keyed out the green background, it’s time to add a new one! Steps to Add a New Background: 1️⃣ Import your background footage or image (e.g., a cityscape, space, or any scene). 2️⃣ Place the new background layer underneath your green screen footage layer in the timeline. 3️⃣ Adjust the position, scale, and rotation of your background to fit the scene. 4. Refining the Key (Cleaning Up the Edges) Sometimes, a clean green screen key needs extra tweaks for a seamless result. ???? Edge Refinement Tips: Add an Edge Matte (Masking): Create a mask around the subject to refine edges. Matte Choke: Use this effect to shrink or expand the mask. This helps remove any leftover green fringing. Feathering: Soften the mask edges to blend the subject more naturally with the new background. 5. Color Correction & Color Spill After green screening, you might notice color spill from the green background, especially around the edges of your subject. Here’s how to fix it: ???? Correcting Color Spill: 1️⃣ Add Effect > Color Correction > Spill Suppressor to your footage layer. 2️⃣ Adjust the Amount to Suppress slider to remove the green spill. ???? Color Grading: 1️⃣ Apply Effect > Color Correction > Lumetri Color for overall color grading. 2️⃣ Adjust Exposure, Contrast, and Saturation to match your subject with the new background. 6. Working with Shadows If your green screen footage has shadows that need to be adjusted for a more realistic look, you can use a few techniques: ???? Adding Fake Shadows: 1️⃣ Create a solid black layer (Layer > New > Solid) for shadow. 2️⃣ Place it under your subject layer and adjust the opacity and blur to create a realistic shadow effect. 3️⃣ Use a Mask to define the shadow area. 7. Finalizing the Composition Once your green screen effect is set up, there are a few more things to check: ???? Motion Tracking (If Needed) If your green screen footage is moving, apply motion tracking to your new background to match its movement. 1️⃣ Select the background layer and use 3D Camera Tracker to track the camera movement. 2️⃣ Attach the background to the tracked data. ???? Final Touches: Edge Blur: Add a slight Gaussian Blur to the edges for a more natural transition. Adjust the Lighting: Ensure lighting on the subject matches the lighting of the new background. 8. Common Challenges with Green Screen Footage ✅ Spill (Green Fringing): This is when the green color from the screen bleeds onto your subject. Use Spill Suppressor to fix it. ✅ Uneven Lighting: Make sure the green screen is evenly lit for better keying results. ✅ Wrinkles in the Green Screen: Wrinkles can cause shadows and uneven lighting. Always ensure the green screen is as smooth as possible. Need help with a specific green screen effect or challenge? Let me know! ????✨
More detailsPublished - 3 Days Ago
Search
Popular categories
Adobe After Effects 2025
28Unreal Engine
14zbrush
10Maya Animation
8zbrush tutorial jewelry
7Maya 2025
6Latest blogs
Mesh |Edit Mesh|Mesh Tools
5 Hours Ago
Advanced Editing Techniques
14 Hours Ago
Introduction to Level Design Through Blocking in Unreal Engine
2 Days Ago
Write a public review