Created by - Anil Chauhan
Motion Tracking in Adobe After Effects
Motion Tracking in Adobe After Effects is a powerful technique used to track the movement of an object in a video so that other elements (text, images, videos, or effects) can be synchronized with that motion. Here's how to perform motion tracking in After Effects:Basic Motion Tracking WorkflowStep 1: Import and Prepare Your Footage Import your video file into the project panel. Drag the footage to the timeline and create a new composition. Ensure your footage is properly trimmed and ready for tracking. Step 2: Open the Tracker Panel Select the footage layer in the timeline. Go to Window > Tracker to open the Tracker panel. Step 3: Start Tracking In the Tracker panel, click Track Motion. A Track Point will appear on the footage. This point has: Inner Box: Defines the feature to track. Outer Box: Defines the search area for that feature in subsequent frames. Step 4: Adjust the Track Point Move the track point to a feature in the video with high contrast and consistent visibility (e.g., a corner, logo, or object edge). Resize the inner and outer boxes for better accuracy: Smaller boxes: Faster tracking, but less accurate. Larger boxes: Slower tracking, but better for complex movements. Step 5: Analyze the Motion In the Tracker panel, click Analyze Forward ▶️ to track the motion frame-by-frame. If you need to adjust the tracking path, click Stop, reposition the track point, and continue tracking. Step 6: Apply the Tracking Data Create a Null Object: Go to Layer > New > Null Object. In the Tracker panel, click Edit Target and select the null object. Click Apply and choose whether to apply tracking data to the X, Y, or both axes.https://www.youtube.com/watch?v=8_MNyqfFp8U Attaching Elements to the Motion Add the element you want to follow the tracked motion (e.g., text, image, or layer). Parent the element to the null object by dragging the Pick Whip tool to the null object in the timeline. The attached element will now move in sync with the tracked motion.https://www.youtube.com/watch?v=1D8uE3bxVTk Tips for Better Motion Tracking High-Contrast Features: Choose a trackable feature with strong contrast and unique patterns. Stabilized Footage: If your footage is shaky, stabilize it before tracking for better results. Manual Adjustments: If tracking slips, adjust the track point manually for those frames. Track Options: Use Track Rotation for objects rotating. Use Track Scale for objects changing in size. Masks and Effects: Combine tracking with masks and effects for advanced compositions.https://www.youtube.com/watch?v=tV4iDQO0qlk Advanced Motion Tracking Corner Pin Tracking: For tracking planar surfaces (e.g., replacing a screen or billboard). 3D Camera Tracking: For tracking in 3D space to add objects to the scene realistically. Would you like detailed steps on a specific tracking method?
More detailsPublished - Thu, 09 Jan 2025
Created by - Anil Chauhan
Key Maps Baked in Substance Painter
In Substance Painter, "map baking" refers to the process of transferring information from a high-resolution 3D model (high poly) to a lower-resolution 3D model (low poly) in the form of texture maps. This technique is crucial for creating highly detailed textures and visual fidelity while keeping the model's geometry efficient for performance.Key Maps Baked in Substance Painter Normal Map: Represents surface details such as bumps, grooves, and scratches from the high poly to the low poly model without adding geometry. Essential for creating the illusion of complexity and depth. Ambient Occlusion (AO) Map: Captures shadows in crevices or areas where light is occluded. Adds realism by emphasizing depth and grounding the model in its environment. Curvature Map: Highlights edges and concave/convex areas. Useful for procedural texturing, such as adding wear and tear effects. Position Map: Encodes the object's position in 3D space. Facilitates gradient-based effects and advanced procedural workflows. Thickness Map: Shows the thickness of the model at each point. Used for subsurface scattering or translucency effects. World Space Normal Map: Captures the orientation of the model's surface in 3D space. Often used for directional effects, like dirt accumulation or weathering. ID Map: Encodes different parts of the model with unique colors based on material assignments or polygroups. Speeds up the texturing process by enabling quick mask creation for specific regions. Height Map: Stores height information, often derived from the high poly model. Useful for displacement or as part of creating a detailed normal map. 9.Opacity Map:Purpose: Controls the transparency of a material.How It Works: Grayscale values determine transparency:White: Fully opaque.Black: Fully transparent.Applications:Used for transparent or semi-transparent materials like glass, cloth, or decals.Essential for effects like frosted glass, lace patterns, or ghosted elements. 10.Bent Normals mapPurpose: A specialized map that encodes the average direction of light occlusion for each surface point.How It Works:Derived from the Ambient Occlusion map during baking.Bent normals point toward the areas most exposed to ambient light, differing from standard normals, which point perpendicularly to the surface.Applications:Improves lighting realism in global illumination and ambient light simulations.Used in advanced texturing workflows, especially for environment assets.Enhances effects like subtle dirt or light diffusion based on surface exposure.Example Use Case: Adding subtle light variations on a surface in shadow-heavy environments, such as underneath a roof or within dense foliage.How to Bake and Use Bent Normals in Substance PainterBake Bent Normals:Open Texture Set Settings and select Bake Mesh Maps.Enable Bent Normals in the baking options.Adjust the rays and sampling settings for high-quality results.Use Bent Normals:Apply the Bent Normals Map as a mask or generator input.Combine with AO or Curvature maps for advanced procedural texturing.Useful for subtle effects like soft dirt or lighting gradients. The Map Baking Process in Substance Painter Preparation: Ensure both the high poly and low poly models are properly aligned. Export the high poly model with sufficient detail and the low poly model optimized for performance. Setup in Substance Painter: Import the low poly model into Substance Painter. Assign the high poly model as the source for baking. Baking Process: Open the Baking Panel (Texture Set Settings > Bake Mesh Maps). Adjust parameters like output resolution, anti-aliasing, and cage distance to refine the bake. Bake each desired map (or all maps at once) and review the results. Post-Bake Refinements: Fix artifacts or errors by adjusting bake settings or tweaking the geometry. Combine baked maps into your texturing process, using them for base materials, masks, or procedural effects. Benefits of Map Baking Allows high detail without impacting performance. Enables realistic texturing by capturing subtle surface details. Provides essential inputs for procedural texturing workflows. Would you like more details on troubleshooting, best practices, or specific settings for baking in Substance Painter?
More detailsPublished - Fri, 10 Jan 2025
Created by - Anil Chauhan
Dynamic Links in Adobe After Effects
Dynamic Links in Adobe After Effects refer to the seamless integration between After Effects and other Adobe applications, primarily Premiere Pro, without the need for intermediate rendering. This allows you to update projects across software in real-time, maintaining a non-destructive workflow.Key Features of Dynamic Links: Non-Destructive Workflow: Edits in After Effects automatically update in Premiere Pro (or vice versa) without rendering. Efficiency: Saves time by avoiding the need to export files repeatedly. Keeps file sizes smaller by avoiding intermediate video exports. Flexibility: Allows you to fine-tune animations, effects, or edits dynamically across projects. Setting Up a Dynamic LinkFrom After Effects to Premiere Pro: Create a Composition in After Effects: Open After Effects and create a new composition or use an existing one. Import into Premiere Pro: In Premiere Pro, go to File > Adobe Dynamic Link > Import After Effects Composition. Navigate to the After Effects project file (.aep) and select the desired composition. Use the Composition: The After Effects composition appears in your Premiere Pro project panel and can be dragged onto the timeline. From Premiere Pro to After Effects: Select Clips in Premiere Pro: Highlight the clips or sequences you want to work on. Replace with After Effects Composition: Right-click and choose Replace with After Effects Composition. After Effects opens, creating a linked composition. Save the .aep file. Edit in After Effects: Any changes in After Effects automatically reflect in Premiere Pro. Managing Dynamic Links: Updating: Changes save and reflect instantly. Reconnecting: If the link breaks, relink by pointing Premiere Pro to the updated After Effects project. Rendering: When performance is slow, you can temporarily render and replace the dynamic link in Premiere Pro. Best Practices: Organize Files: Keep your .aep and Premiere Pro projects in the same directory. Optimize Performance: Use proxies if the dynamic link slows down playback. Version Compatibility: Ensure both After Effects and Premiere Pro are of the same version to avoid compatibility issues. Would you like assistance with a specific part of the Dynamic Link workflow?
More detailsPublished - Fri, 10 Jan 2025
Created by - Anil Chauhan
Working with Other Applications in After Effects
Working with Other Applications in After Effects is a powerful way to streamline your workflow, enhance creativity, and improve efficiency. After Effects integrates seamlessly with various Adobe applications and supports external plugins and software to expand its capabilities.Adobe Applications Integration Premiere Pro: Use Dynamic Link to seamlessly edit and update projects between Premiere Pro and After Effects without rendering. Export After Effects compositions directly into Premiere Pro timelines. Replace Premiere Pro clips with After Effects compositions for advanced effects or animations. Photoshop: Import PSD files with layers intact for animation or effects. Edit the original Photoshop file, and changes automatically update in After Effects. Use Photoshop to create custom textures, masks, or graphic elements for After Effects. Illustrator: Import AI files as individual layers or compositions to retain vector quality. Scale vector graphics without quality loss for animations or effects. Create detailed vector shapes in Illustrator for motion graphics in After Effects. Audition: Export After Effects projects to Adobe Audition for advanced audio editing and sound design. Sync audio effects and soundtracks to animations or visual elements. Media Encoder: Use Adobe Media Encoder to render After Effects compositions in multiple formats without interrupting your workflow. Batch render multiple compositions for efficient output. Other Applications and Tools 3D Software (e.g., Cinema 4D): After Effects includes Cinema 4D Lite, allowing you to create and edit 3D objects directly. Import 3D objects into After Effects for integration with 2D compositions. Export camera and lighting data between Cinema 4D and After Effects. Plugins and Extensions: Use third-party plugins like Red Giant, Video Copilot, and Trapcode for enhanced effects and tools. Explore scripts and extensions for automation and improved productivity. External Audio Software: Import soundtracks and effects created in tools like Audacity or Pro Tools for synchronization with animations. Stock Media Libraries: Access Adobe Stock or third-party libraries (like Envato Elements) for templates, images, and motion graphic assets. Best Practices for Cross-Application Workflow Organize Assets: Keep your project files well-structured for easy navigation between applications. Use Compatible Formats: Ensure that file formats are supported and optimized for After Effects (e.g., PNG, PSD, AI). Leverage Dynamic Updates: Modify assets in their native applications (e.g., Photoshop or Illustrator) to see real-time changes in After Effects. Optimize Performance: Use proxies and pre-rendering when working with heavy files across applications. Would you like guidance on a specific integration or workflow?
More detailsPublished - Fri, 10 Jan 2025
Created by - Anil Chauhan
Importing Digital Assets into After Effects
Importing Digital Assets into After Effects is a critical step in creating motion graphics, animations, or visual effects. After Effects supports a wide range of digital assets, including video, audio, images, 3D models, and even files from other Adobe software like Photoshop and Illustrator.Methods for Importing Digital Assets into After Effects Importing Video and Audio Files: Step 1: Go to File > Import > File or use the shortcut Ctrl + I (Windows) / Cmd + I (Mac). Step 2: Select the video or audio file (e.g., MP4, MOV, WAV, MP3) from your system. Step 3: Click Open to import. Video files are automatically interpreted as footage, and audio files will appear in the project panel. Importing Image Files: Supported formats: JPEG, PNG, TIFF, PSD (Photoshop), AI (Illustrator), and other formats. Step 1: Import using File > Import > File or drag the image directly into the project panel. Step 2: When importing Photoshop or Illustrator files, choose whether to import as Footage, Composition, or Composition - Retain Layer Sizes (for multi-layered files). Step 3: The image is added to the timeline, and you can adjust its properties. Importing Photoshop (PSD) Files: Step 1: Choose File > Import > File and select a PSD file. Step 2: After importing, After Effects offers options to preserve layers, layer sizes, and other settings. Step 3: If importing as a composition, After Effects will create a new composition with all the layers intact for animation. Importing Illustrator (AI) Files: Step 1: Use File > Import > File to select an AI file. Step 2: Choose between importing as Footage (flattened) or Composition (with layers). Step 3: After importing, the vector artwork can be scaled indefinitely without losing quality. Importing 3D Models (e.g., OBJ, FBX): Step 1: For 3D models, After Effects can integrate with Cinema 4D (included with After Effects). Step 2: Use File > Import > File to bring in 3D models and convert them into 3D layers within After Effects. Step 3: You can also use the Cineware plugin to work directly with 3D models within After Effects. Importing Fonts: Step 1: Use the Text Tool to type out your desired text. Step 2: Choose from the fonts installed on your system. Step 3: You can animate text layers using various built-in text animation presets or keyframes. Importing Motion Graphics Templates (MOGRT): Step 1: Go to Essential Graphics Panel and click on Import Motion Graphics Template. Step 2: Choose the MOGRT file from your system or Adobe Stock. Step 3: The template is imported into After Effects, allowing you to modify the content and animation. Using Adobe Stock Assets: Step 1: Open the Libraries Panel (Window > Libraries). Step 2: Browse or search for Adobe Stock assets directly from the panel. Step 3: Drag and drop assets (videos, images, music) directly into your project. Best Practices for Importing Digital Assets: Organize Assets: Create folders in the Project Panel to keep imported files organized by type (e.g., Video, Audio, Images). Maintain File Paths: Keep files organized in your file system so they remain linked when moving projects between machines. Pre-compose Layers: When working with many assets, pre-compose them for easier management and animation. File Formats: Choose the appropriate file format for your needs. For instance, use lossless formats (e.g., PNG, TIFF) for images or uncompressed audio for high-quality sound. Would you like help with a specific type of asset import, or have more questions about working with digital assets in After Effects?
More detailsPublished - Fri, 10 Jan 2025
Created by - Anil Chauhan
Introduction to Nuke
Nuke is a leading visual effects (VFX) and compositing software developed by Foundry. It is widely used in the film, television, and advertising industries to create high-quality visual effects and seamless compositing. Nuke’s node-based workflow, 3D environment, and advanced tools make it an industry standard for integrating CGI, live-action footage, and effects. Offering features like keying, roto-paint, deep compositing, and multi-channel support, Nuke provides professionals with the flexibility and power to handle complex VFX tasks. It is highly regarded for its ability to produce cinematic-quality results and is trusted by major studios globally.Understanding workflow of NukeThe workflow of Nuke revolves around its node-based compositing system, which allows for flexibility, organization, and efficient management of complex visual effects tasks. Here’s a step-by-step guide to understanding Nuke’s workflow:1. Importing Footage Input Nodes: Start by importing your assets (e.g., video footage, CGI renders, images). Use the Read Node to bring files into the project. Nuke supports multiple formats like EXR(Extended Dynamic Range), DPX(Digital Picture Exchange), MOV(Metal Oxide Varistor), and image sequences. 2. Node-Based Compositing What Are Nodes? Nodes are the building blocks of Nuke’s workflow. Each node performs a specific function (e.g., color correction, transformations). Nodes are connected to define the flow of operations. Node Graph: The Node Graph visually represents your project. It shows the connections and relationships between operations, making it easy to troubleshoot and adjust. 3. Basic Operations Transformations: Use transform nodes (like Scale, Rotate, Translate) to position and manipulate elements. Keying and Masking: Extract elements from green screens using tools like Keylight or Primatte. Rotoscoping tools allow manual masking for isolating elements. Color Correction: Adjust brightness, contrast, saturation, and grading using nodes like Grade, ColorCorrect, and HueShift. 4. Integration with CGI 3D Environment: Nuke supports a robust 3D workspace, where you can: Import 3D models or cameras from 3D software (e.g., Maya, Blender). Set up projections and lighting for better integration of CGI and live-action footage. Tracking and Stabilization: Use 2D Tracker, Planar Tracker, or 3D Camera Tracker to match the motion of elements in the footage. Deep Compositing: Combine elements with depth information to achieve realistic layering without manual z-depth work. 5. Refinements RotoPaint: Use the paint tool to remove unwanted elements or add details. Grain and Defocus: Add or match film grain and defocus effects to blend CGI with live-action seamlessly. Time Effects: Modify the timing of sequences using nodes like TimeWarp and FrameHold. 6. Reviewing and Iteration Proxy Mode: Work on lower-resolution versions of the footage for faster performance. Viewer Panel: Preview the results in real time using the Viewer. Collaborative Review: In Nuke Studio or Hiero, timelines can be managed, reviewed, and edited collaboratively. 7. Rendering Write Node: Use the Write Node to export your final output. Supports multiple formats and resolutions for delivery. 8. Integration with Pipelines Nuke is often part of a larger VFX pipeline, working seamlessly with software like Maya, Houdini, Blender, and After Effects. It supports scripts (Python and TCL) for automation and custom tools, enhancing productivity. Example Workflow in Action: Import live-action footage using a Read Node. Use a Keying Node to remove the green screen. Match CGI elements in the 3D space with the Camera Tracker. Add color corrections and visual effects using Grade and Blur Nodes. Export the final composition using a Write Node. This modular approach makes Nuke highly efficient and adaptable for both simple tasks and complex VFX projects. Would you like a deeper dive into any specific aspect of this workflow?https://www.youtube.com/watch?v=85CnpiplLgY&list=PLIi3DnFfUZQHVIhKAgs2xhODTDxjCeko_https://www.youtube.com/watch?v=85CnpiplLgY&list=PLIi3DnFfUZQHgabWS1vwQk-Kh-ELMeFYlhttps://www.youtube.com/watch?v=85CnpiplLgY&list=PLIi3DnFfUZQHVIhKAgs2xhODTDxjCeko_into Adobe After EffectsNuke WindowThe Nuke interface is designed to streamline the VFX and compositing workflow. It consists of multiple panels, each serving a specific purpose, allowing artists to efficiently interact with their projects. Here's a breakdown of the primary components of Nuke's main window:1. Viewer Panel Displays the output of your composition. Key features: Play Controls: Play, pause, and scrub through the timeline. Region of Interest (ROI): Focus on specific areas for faster previews. Color Channels: Toggle between RGB, alpha, depth, or custom channels. Overlays: View guides, grids, or trackers directly in the Viewer. 2. Node Graph The central workspace where you manage and connect nodes. Displays the flow of operations (e.g., importing footage, applying effects, rendering). Features: Node Connections: Shows how nodes are linked to process data. Organizational Tools: Group nodes, create backdrops, and label for clarity. 3. Properties Panel Displays editable parameters for the currently selected node. Allows fine-tuning of individual node settings (e.g., adjusting blur intensity, color values, or transformations). 4. Toolbar Located at the top of the interface. Provides quick access to commonly used tools and nodes, such as: Transform Nodes (Translate, Scale, Rotate) Keying Nodes (Keylight, Primatte) Color Correction Nodes (Grade, HueShift) 3D Tools (Cameras, Lights, Geometry) 5. Timeline Displays the project’s frame range and playback controls. Useful for scrubbing through your composition, setting in/out points, and managing animation keyframes. 6. Script Editor Found at the bottom of the interface. Used for scripting in Python or TCL to automate tasks and customize workflows. 7. 3D Viewer (Optional) Switch to the 3D Viewer to work within Nuke's 3D compositing environment. Used for navigating 3D cameras, geometry, and lights. 8. Panels Menu Access additional panels such as: Dope Sheet: Manage timing and keyframes visually. Curve Editor: Adjust animation curves for precise control. File Browser: Manage files and directories directly within Nuke. Customizing the Interface Panels can be docked, floated, or rearranged to suit your workflow. Save custom layouts for different tasks, like keying, rotoscoping, or 3D compositing. Would you like more details about a specific panel or advice on customizing your Nuke workspace?Nuke ToolbarThe Toolbar in Nuke provides quick access to commonly used nodes, tools, and functions for compositing and visual effects. It is located on the left side of the interface by default and can be customized to suit specific workflows. Here's an overview of its key sections:1. Common NodesThe toolbar includes shortcuts for frequently used nodes in compositing. Some of the primary categories are:Transform Nodes Transform: Adjust position, rotation, scale, and pivot. Reformat: Change the resolution or aspect ratio of an image. Crop: Define or limit the working area of an image. Merge Nodes Merge: Combine two or more images using operations like Over, Multiply, or Screen. Keymix: Mix two images based on an alpha or mask input. Keying Nodes Keylight: Remove green/blue screen backgrounds. Primatte: Advanced keying tool for refining mattes. IBK (Image-Based Keyer): Specialized tool for creating clean plates and keying. Color Correction Nodes Grade: Adjust brightness, contrast, gamma, and gain. ColorCorrect: Modify specific tonal ranges. HueCorrect: Shift or isolate colors. Saturation: Change color intensity. 2. Drawing and Masking Tools Roto: Create custom shapes for masking or animation. RotoPaint: Draw, paint, or clone directly on your footage. Bezier/Ellipse/Rectangle: Add basic geometric shapes for masks. 3. 3D Tools Camera: Add a virtual 3D camera. Light: Introduce lighting for 3D scenes. Geometry: Import or create 3D shapes (e.g., Sphere, Cube, Card). ScanlineRender: Convert 3D scenes into 2D renderable images. 4. Filter Nodes Blur: Soften details in an image. Sharpen: Enhance edges and textures. Defocus: Simulate lens defocus or depth of field. MotionBlur: Add motion blur based on movement or vectors. 5. Time Nodes TimeOffset: Adjust timing by shifting frames forward or backward. FrameHold: Freeze a specific frame. TimeWarp: Change the speed of footage with custom frame mapping. 6. Utilities Shuffle: Reassign or manipulate image channels. Expression: Create custom mathematical expressions to modify data. Switch: Alternate between multiple inputs dynamically. 7. Gizmos and Custom Nodes Gizmos are custom tools or scripts created by users or downloaded from external libraries. These often extend the functionality of Nuke and can be added to the toolbar for convenience. Customizing the Toolbar Adding Favorites: Drag commonly used nodes into a Favorites section for quick access. Scripts and Plug-ins: Integrate custom scripts or plug-ins for additional tools. Rearranging: Rearrange or add/remove categories as per your workflow preferences. The toolbar is an essential part of Nuke’s interface, allowing artists to efficiently access and implement tools while focusing on creativity. Would you like a deeper dive into any specific category of tools or guidance on customizing the toolbar?Nuke Menu BarThe Menu Bar in Nuke is located at the top of the interface and provides access to a wide range of commands, tools, and settings. It is organized into menus that cover different aspects of Nuke's functionality. Here's an overview of the key menus and their purposes:1. File New Script: Start a new project. Open Script: Load an existing Nuke script (.nk). Save/Save As: Save the current project. Render All Writes: Render all active Write nodes in the script. Export Project Settings: Save project-specific configurations. Script History: Access recently opened scripts. 2. Edit Undo/Redo: Revert or reapply recent actions. Cut/Copy/Paste: Standard clipboard operations for nodes. Preferences: Customize Nuke’s settings, such as cache, rendering, or interface behavior. Node Defaults: Set default properties for newly created nodes. 3. View Viewer Controls: Manage how the Viewer displays the composition (e.g., channel selection, zoom, overlays). Panels: Toggle panels like Node Graph, Properties, Dope Sheet, and Curve Editor. Layouts: Save and switch between custom interface layouts. 4. Render Render Current Frame: Render the frame currently displayed in the Viewer. Render All Frames: Process the entire timeline for selected Write nodes. Flipbook: Generate a temporary playback preview for quick review. Background Renders: Manage rendering tasks running in the background. 5. Script Script Editor: Open the Python or TCL scripting console for automation and custom tools. Run Script: Execute a pre-written script file. Reload Plug-ins: Refresh installed plug-ins or scripts. 6. Cache Clear Cache: Remove cached data to free up memory. Cache Settings: Configure caching for nodes and viewers. Playback Cache: Manage settings for real-time playback optimization. 7. Nodes Provides access to all available node categories: Image: Nodes like Read, Write, and Constant. Color: Color correction and grading tools. Filter: Blur, Sharpen, Defocus, and other image filters. 3D: Nodes for working with 3D cameras, geometry, and lights. Keyer: Keying tools like Keylight, Primatte, and IBK. 8. 3D Specific to Nuke’s 3D compositing environment: Create 3D Geometry: Add basic 3D shapes (e.g., cards, spheres, cubes). Import FBX: Load 3D scenes or camera data. Render Camera: Define camera projections and settings. Reset Camera: Revert camera positions or settings. 9. Window Floating Panels: Open new or existing panels as floating windows. Workspace Management: Save, load, or reset workspace layouts. Monitor Outputs: Manage display outputs for external monitoring. 10. Help Nuke Help: Access the official documentation. Release Notes: View updates and changes in the current Nuke version. Tutorials: Access training resources from Foundry. About Nuke: View license and version information. CustomizationThe Menu Bar in Nuke is customizable. You can add new menus or commands using scripting, making it adaptable to specific workflows. Would you like further details about any specific menu or guidance on customization?
More detailsPublished - Sat, 18 Jan 2025
Created by - Anil Chauhan
Bump map and displacement map
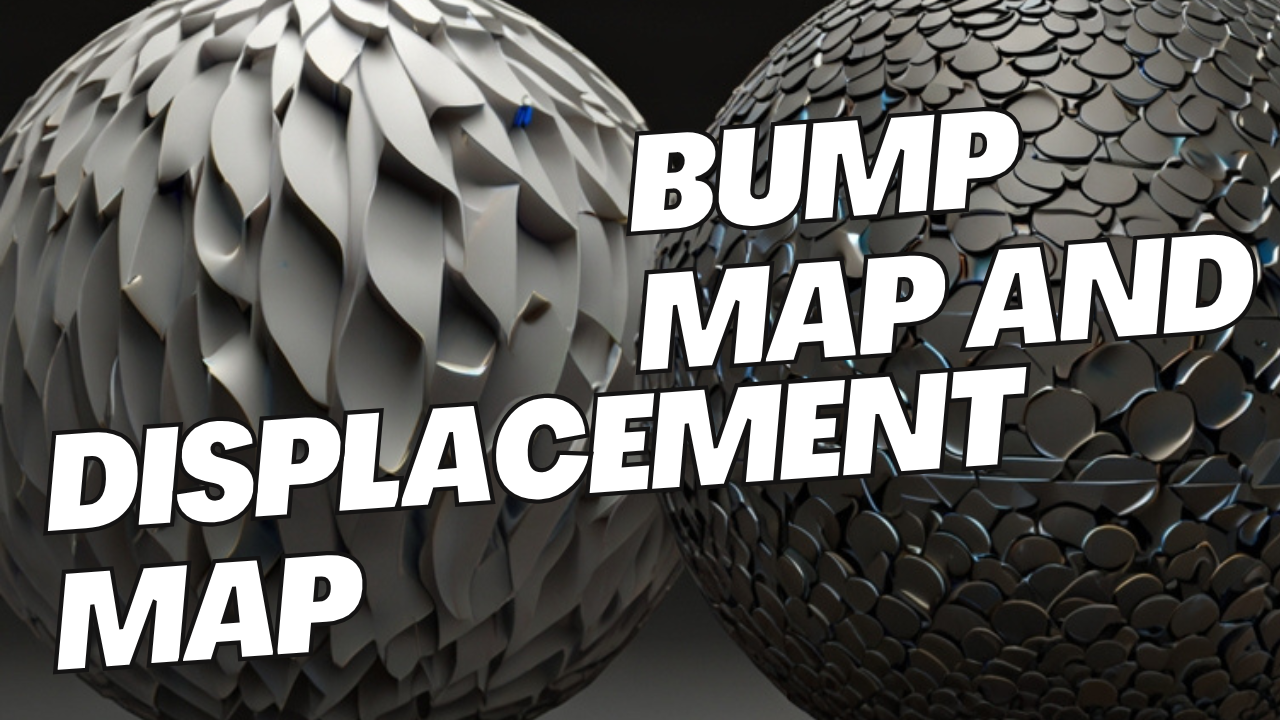
Bump maps and displacement maps are both techniques used in 3D rendering to add detail to a surface, but they work in fundamentally different ways and have distinct visual and computational implications. Here's a comparison:Bump Map Definition: A bump map uses grayscale values to simulate surface detail (like bumps or grooves) without actually modifying the geometry. How It Works: The grayscale values represent height information: White = high areas Black = low areas Effect: Alters how light interacts with the surface to create the illusion of depth. The geometry remains unchanged. Use Case: Best for adding fine surface detail when the geometry doesn't need to physically change (e.g., wood grain, small wrinkles). Performance: Low computational cost because it doesn’t modify the mesh. Limitations: No actual changes to the silhouette of the object. Details appear flat if viewed from sharp angles or in profile.https://www.youtube.com/watch?v=JwahGfOzxV0https://www.youtube.com/watch?v=obNSow8jXXkhttps://www.youtube.com/watch?v=DAb60QIpysAhttps://www.youtube.com/watch?v=Wp0-OevjCso&list=PLIi3DnFfUZQE488Dffjw70eCpGMTs9x8m Displacement Map Definition: A displacement map physically alters the geometry of a surface based on grayscale height information. How It Works: The grayscale values modify the actual position of vertices or tessellated subdivisions: White = pushed outward Black = pulled inward Effect: Creates real 3D detail, changing the shape and silhouette of the object. Use Case: Ideal for high-detail renders where the geometry's silhouette or structure needs to reflect the details (e.g., rocks, terrain, large-scale wrinkles). Performance: Higher computational cost because it requires extra geometry or tessellation to add detail. Limitations: Requires a dense mesh or tessellation to achieve smooth results. More demanding on memory and processing power. Key Differences Aspect Bump Map Displacement Map Geometry Changes No (illusion of depth only) Yes (modifies actual geometry) Silhouette Effect None Visible Performance Low impact Higher computational cost Ideal Usage Fine details with no silhouette impact High-quality close-ups requiring real 3D details In summary, use bump maps for subtle, high-performance effects and displacement maps when you need realistic geometry changes and are willing to invest in computational resources.
More detailsPublished - Mon, 20 Jan 2025
Created by - Anil Chauhan
projects and compositions
In Adobe After Effects, projects and compositions are core elements of the workflow, but they serve distinct purposes. Here's an explanation:1. Project in After Effects Definition: A project is the main file where all your work in After Effects is saved. It contains your imported assets, settings, compositions, and everything related to your work. File Format: Saved with the .aep (After Effects Project) extension. Purpose: It acts as a container for organizing and storing: Compositions Footage and media assets (images, videos, audio, etc.) Effects, keyframes, and animations Links to external files (footage remains linked, not embedded) Example: A single After Effects project might contain multiple compositions for different scenes in a video. 2. Composition in After Effects Definition: A composition is like a "canvas" or "timeline" where you create and assemble your animations, visual effects, and designs. Elements in a Composition: Layers: Each asset (video, image, text, etc.) is placed on a separate layer. Keyframes: Used for animating properties like position, scale, and opacity. Effects and Presets: Add visual flair or adjust elements. Timeline: Displays the duration of the composition and its layers. Purpose: It defines: The resolution (e.g., 1920x1080 for Full HD) The frame rate (e.g., 24fps, 30fps, or custom rates) The duration (e.g., 10 seconds, 1 minute) Example: A composition could be a single scene, a title animation, or a visual effect for your project. Relationship Between Projects and Compositions A project can contain multiple compositions. Compositions within a project can be nested (a composition used as a layer in another composition). The project links to external assets used in the compositions, so if you move or delete the source files, After Effects might lose the link. Practical Workflow Example Start a New Project: File → New → New Project Create a Composition: Composition → New Composition → Set resolution, duration, and frame rate. Add Assets to the Composition: Drag and drop files (videos, images, audio) into the composition timeline. Animate and Edit: Use keyframes, effects, and layers within the composition. Save Your Project: File → Save As → Choose a location and save with the .aep extension. Would you like help setting up a project or creating compositions?
More detailsPublished - Mon, 20 Jan 2025
Created by - Anil Chauhan
Importing Digital Assets into Adobe After Effects
Importing Digital Assets into Adobe After Effects is a crucial step in creating motion graphics and visual effects. Here's an overview:How to Import Digital Assets into After Effects Supported File Types: Video: MP4, MOV, AVI, etc. Images: JPEG, PNG, PSD, TIFF, GIF. Audio: MP3, WAV, AIFF. Other Formats: Illustrator files (AI), camera RAW, 3D files (via plugins), and more. Import Methods: Drag and Drop: Drag files directly from your computer into the Project Panel in After Effects. File Menu: Go to File → Import → File or Multiple Files. Shortcut: Use Ctrl+I (Windows) or Cmd+I (Mac) to open the import dialog box. Organizing Imported Assets: After importing, organize your assets into folders in the Project Panel for better workflow management (e.g., separate folders for videos, images, and audio). Working with Special File Types Photoshop Files (PSD): Import as: Composition: Retains layers for individual animation and editing. Merged Layers: Combines all layers into a single image. Choose Editable Layer Styles to maintain Photoshop effects. Illustrator Files (AI): Ensure "Create Outlines" is enabled in After Effects for scaling without losing quality. Import as footage or a composition to work with individual layers. Image Sequences: Select the first file in a sequence and check Image Sequence in the import dialog. Ideal for frame-by-frame animations. Video Files: Supported formats include MP4, MOV, and AVI. Use high-quality files to avoid compression artifacts. Audio Files: Add sound effects, music, or voiceovers. Use the Audio Waveform option in the timeline to visualize audio levels. Tips for Efficient Importing Link vs. Embed: After Effects links to the original files on your computer. Don’t move or delete source files to avoid "missing file" errors. File Organization: Keep your project files and assets in a dedicated folder to prevent broken links. Optimize File Sizes: Use high-quality assets but avoid unnecessarily large file sizes to maintain performance. Tags for This Topic:After Effects, importing digital assets, project workflow, PSD files, AI files, image sequences, video editing, motion graphics, animation, video assets, audio files, Adobe Creative Cloud, video production, file organization, timeline editing, After Effects tips, project setup, media management. Would you like a step-by-step guide for a specific type of asset?
More detailsPublished - Mon, 20 Jan 2025
Search
Popular categories
Adobe After Effects 2025
28Unreal Engine
14zbrush
10Maya Animation
8zbrush tutorial jewelry
7Maya 2025
6Latest blogs
Mesh |Edit Mesh|Mesh Tools
8 Hours Ago
Advanced Editing Techniques
17 Hours Ago

Introduction to Level Design Through Blocking in Unreal Engine
2 Days Ago
Write a public review