Where possibilities begin

We’re a leading marketplace platform for learning and teaching online. Explore some of our most popular content and learn something new.
Total 113 Blogs
VRay lights

Created by - Anil Chauhan

VRay lights

VRay lights are part of the VRay rendering engine, which is a popular software used for creating realistic computer-generated images and animations. VRay provides advanced rendering capabilities and is widely used in industries such as architecture, design, and entertainment. In the context of VRay lights, these are tools that allow you to simulate and control various lighting conditions in a virtual scene. Proper lighting is crucial for creating realistic and visually appealing renderings. VRay offers several types of lights that users can utilize to achieve different lighting effects. Here are some common VRay light types: 1.     VRay Dome Light: This light type is often used to simulate global illumination and environmental lighting. It's commonly used for creating realistic outdoor scenes or providing ambient lighting. 2.     VRay Sun and Sky: These lights work together to simulate the sun and sky in outdoor scenes. The VRay Sun is used to simulate direct sunlight, while the VRay Sky is responsible for the ambient lighting from the sky. 3.     VRay Rectangle Light: This is a versatile light source that can be shaped and positioned as needed. It's often used for area lighting and can simulate lights such as fluorescent tubes or LED panels. 4.     VRay IES Light: IES (Illuminating Engineering Society) lights allow users to use real-world photometric data for light distribution. This can be useful for accurately simulating the characteristics of specific light fixtures. 5.     VRay Spotlight: This is a directional light source that can be focused on a specific area. It's often used for creating spotlight effects. Each type of VRay light comes with various parameters and settings that allow users to control the intensity, color, and other properties of the light. VRay lights play a crucial role in achieving realistic lighting in virtual scenes and contribute significantly to the final quality of rendered images.  

More details

Published - Tue, 19 Dec 2023

Materials in Unreal Engine

Created by - Anil Chauhan

Materials in Unreal Engine

Certainly! Materials in Unreal Engine play a crucial role in defining the appearance of surfaces and objects in a virtual environment. They are a combination of textures, shaders, and other settings that determine how light interacts with a surface. Here's an overview of Unreal Engine materials:1. **Material Editor:**   - Unreal Engine provides a node-based Material Editor that allows artists and developers to create complex materials visually. It uses a graph-based system where nodes represent different operations and functions.2. **Basic Components of a Material:**   - **Textures:** These are 2D images that are applied to surfaces to simulate different properties like color, roughness, metallic, normal maps, and more.   - **Scalars and Vectors:** Values used to control various properties of the material, such as color, roughness, metallicness, etc.   - **Mathematical Operations:** Nodes for performing operations like addition, subtraction, multiplication, and more on scalar or vector values.   - **Functions and Shaders:** Specialized nodes for controlling complex visual effects, such as fresnel effects, displacement, and custom shaders.3. **Physically Based Rendering (PBR):**   - Unreal Engine uses a PBR approach to materials, which means that materials are designed to simulate real-world lighting and shading conditions. This includes properties like albedo (base color), metalness, roughness, and normal maps.4. **Material Instances:**   - Material Instances allow for the creation of variations of a base material without duplicating the entire material. They can be adjusted in real-time to achieve different looks or respond to dynamic changes in the game.5. **Material Functions:**   - Material Functions are reusable, self-contained graphs that can be embedded within other materials. They are useful for creating modular and easily maintainable material setups.6. **Dynamic Material Instances:**   - Unreal Engine allows for the creation of Dynamic Material Instances that can be modified at runtime. This enables dynamic changes to materials during gameplay, such as color changes, emissive effects, or texture swapping.7. **Material Expressions:**   - Material Expressions are nodes within the Material Editor that perform specific functions, such as texture sampling, normal map operations, or mathematical computations.8. **Material Parameters:**   - Parameters in materials are exposed properties that can be adjusted externally, allowing for easy customization of materials in different instances or variations.9. **Material Layers and Blend Modes:**   - Unreal Engine supports material layering, allowing the stacking of multiple materials with different blend modes to achieve complex visual effects. This is particularly useful for creating realistic surfaces with multiple layers, such as dirt on top of a base material.Understanding how to create and manipulate materials is essential for achieving realistic and visually appealing graphics in Unreal Engine projects. Artists and developers often spend significant time refining materials to achieve the desired look and feel for their virtual environments.

More details

Published - Wed, 20 Dec 2023

lights in Unreal Engine

Created by - Anil Chauhan

lights in Unreal Engine

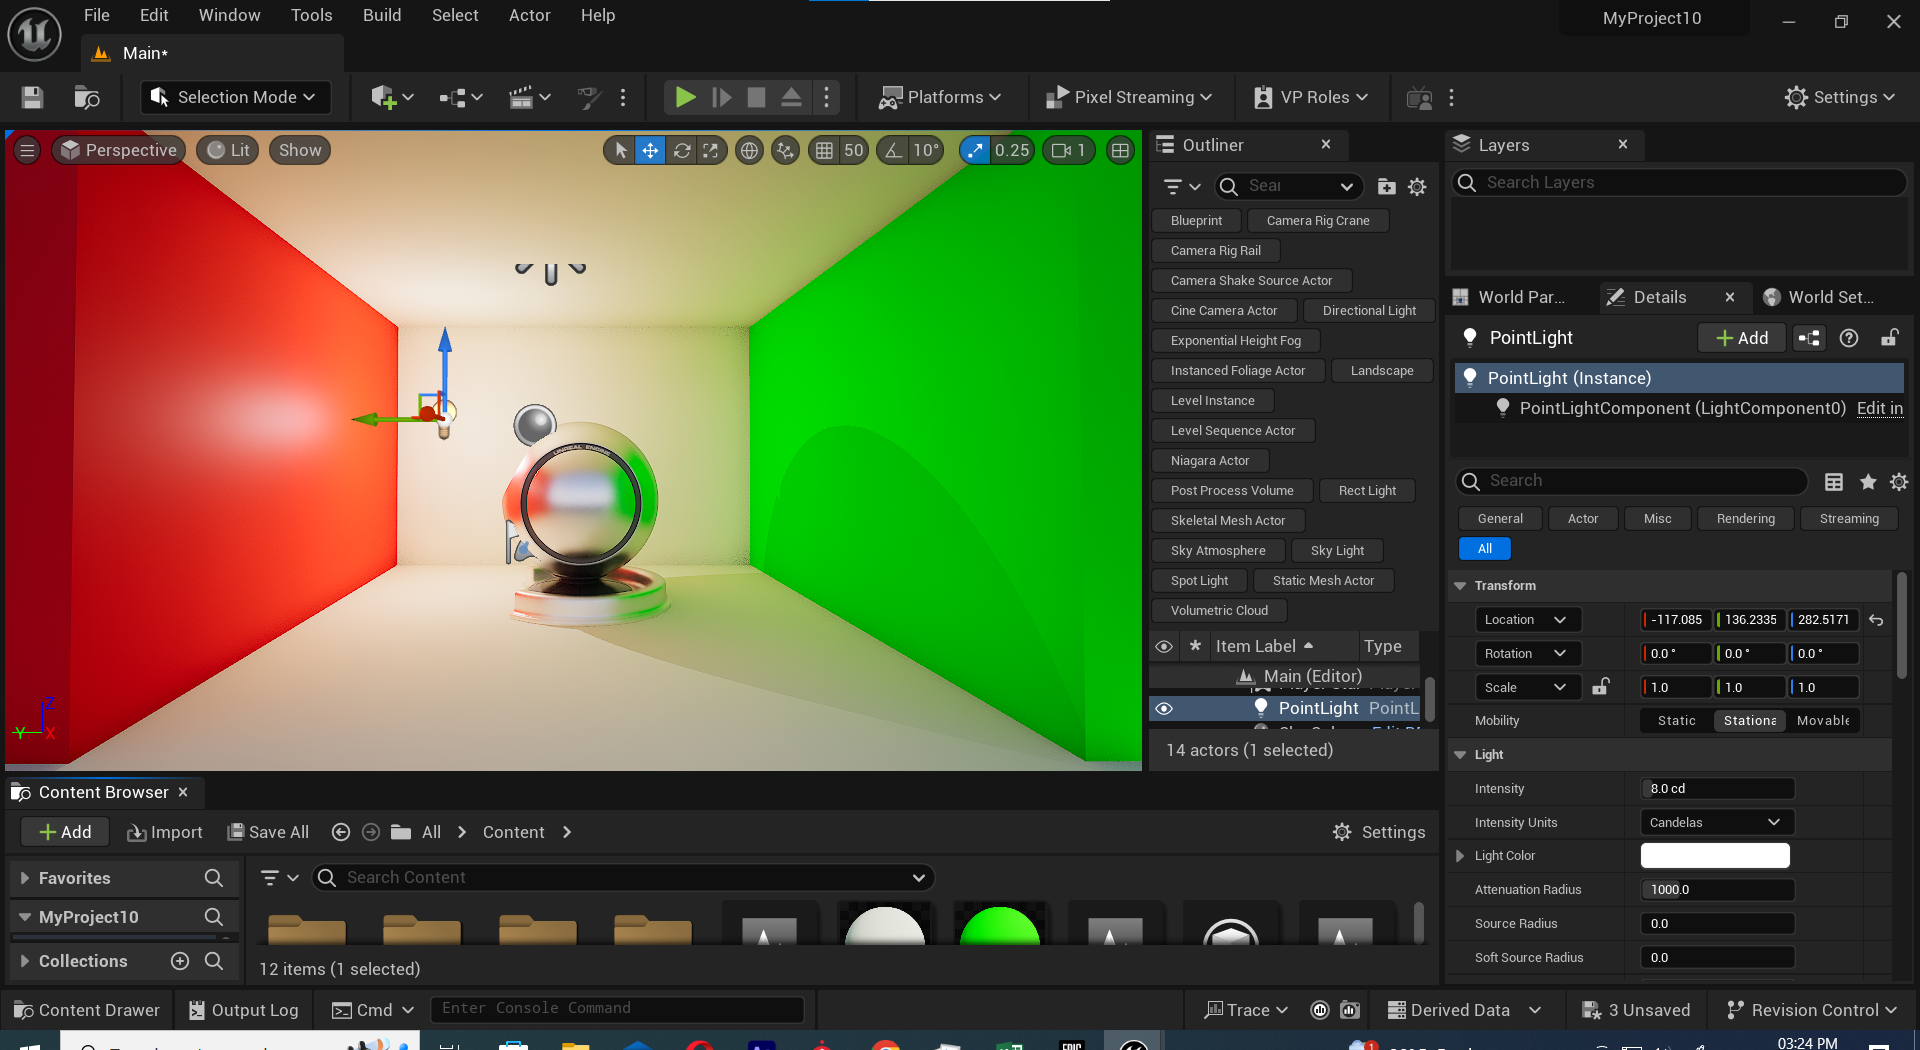
an overview of lights in Unreal Engine. Unreal Engine is a popular game development engine, and it offers a sophisticated lighting system to create realistic and immersive visuals in games and other virtual experiences. Here are some key aspects of lights in Unreal Engine:1. **Types of Lights:**   - **Point Light:** A light source that emits light in all directions from a single point in 3D space.   - **Spotlight:** A directional light with a cone-shaped emission, simulating a focused light beam.   - **Directional Light:** A light source that emits parallel light rays in a specific direction, often used to simulate sunlight.2. **Properties and Settings:**   - **Intensity:** Controls the brightness of the light.   - **Color:** Determines the color of the light emitted.   - **Attenuation:** Defines how the light diminishes with distance.   - **Radius/Length:** Specifies the reach or size of the light source.   - **Cone Angle/Exponent (Spotlight):** Defines the cone angle and falloff for spotlight.3. **Lighting Effects:**   - **Dynamic Shadows:** Unreal Engine supports dynamic shadow casting from lights, providing realistic shadow effects that change in real-time based on the position of the light source and the objects in the scene.   - **Light Functions:** These are textures that can be used to modulate the light's color and intensity, allowing for advanced effects like animated lights or complex patterns.4. **Global Illumination and Reflections:**   - Unreal Engine also supports advanced features like Global Illumination (GI) and Reflections. GI simulates indirect lighting, making scenes more realistic, while reflections create accurate reflections of objects in shiny surfaces.5. **Lighting Scenarios:**   - Unreal Engine allows developers to set up different lighting scenarios for various times of day or environmental conditions. This can be achieved through dynamic day-night cycles or manual adjustments.6. **Lighting Quality:**   - Unreal Engine provides scalable settings for lighting quality, allowing developers to balance visual fidelity with performance based on the target platform.7. **Lighting in Sequencer:**   - Unreal Engine's Sequencer tool allows for cinematic storytelling, and it includes features for controlling lights in animated sequences.Understanding and effectively using lights in Unreal Engine is crucial for achieving visually stunning and immersive environments in games or other interactive experiences. Developers often spend considerable time fine-tuning lighting to achieve the desired atmosphere and realism in their projects.

More details

Published - Wed, 20 Dec 2023

Adobe After Effects 2024 24.1.0.78

Created by - Anil Chauhan

Adobe After Effects 2024 24.1.0.78

Adobe After Effects is a powerful motion graphics and visual effects software widely used in the film, television, and web design industries. If you're just getting started with After Effects, here's a step-by-step guide to help you familiarize yourself with the basics:### 1. **Installation:**   - Make sure you have Adobe After Effects installed on your computer. You can get it through Adobe Creative Cloud.Overview of Adobe After Effects CC BenefitsCreate animated titles, credits, and lower thirds. Start from scratch or with one of the animation presets available inside the app. There are countless ways to make your text move with After Effects, from spin to swipe to slide.Combine videos and images to send a UFO across the sky, blur out a logo, or create an explosion — endless possibilities. There are hundreds of effects to get the look you want, from adding fog to changing colors to making it snow.After Effects works seamlessly with other Adobe apps, creates comps, and immediately sees how they look in Premiere Pro CC with Adobe Dynamic Link. Import work from Photoshop, Illustrator, Illustrator, Illustrator, Illustrator, Character Animator, Adobe XD, and Animate CC. Use Team Projects to collaborate with editors no matter where they’re located. And After Effects is integrated with 300+ software and hardware partners.Adobe offers a complete set of animation apps that work with all your ideas — and each other. Create cinematic movie titles, intros, transitions, and more with After Effects CC. Use Animate CC to create interactive vector animations for games, apps, and the web. Animate characters in real-time with Character Animator CC. And move seamlessly between them with the most comprehensive integration out there.Overview of Adobe After Effects CC FeaturesAdvanced puppet tools for mesh sculptingGet depth passes from native 3D elementsSupercharge your animation flowResponsive Design — TimeSystem Requirements and Technical DetailsIntel Core2 Duo or AMD Phenom II processor; 64-bit support requiredMicrosoft Windows 7 with Service Pack 1, Windows 8, and Windows 8.1. See the CS6 FAQ for more information about Windows 8 support.4 GB of RAM (8 GB recommended)3 GB of available hard disk space; additional free space required during installation (cannot install on removable flash storage devices)Additional disk space for disk cache (10 GB recommended)1280 x 900 displayOpenGL 2.0-capable systemDVD-ROM drive for installation from DVD mediaQuickTime 7.6.6 software required for QuickTime featuresOptional: Adobe-certified GPU card for GPU-accelerated ray-traced 3D renderer### 2. **Interface Overview:**   - Familiarize yourself with the After Effects interface, which includes panels like Composition, Timeline, Project, and Preview. Understanding the layout will make navigation easier.### 3. **Creating a New Composition:**   - Open After Effects and create a new composition by selecting "Composition" > "New Composition" from the menu. Set the dimensions, duration, and other settings.### 4. **Importing Assets:**   - Import your media files (footage, images, audio) into the project panel. You can do this by dragging files directly into the project panel or using the "File" > "Import" option.### 5. **Adding Layers:**   - Arrange your assets in the timeline to create layers. Right-click in the timeline and select "New" to create new layers, such as text or solid layers.### 6. **Keyframes and Animation:**   - After Effects is built on keyframes. Learn how to set keyframes to animate properties over time. You can do this by selecting a property, clicking the stopwatch icon, and adjusting the property at different points in time.### 7. **Effects and Presets:**   - Explore the Effects & Presets panel to apply various effects to your layers. Experiment with different effects to enhance your animations.### 8. **Text and Typography:**   - After Effects has robust text tools. Learn how to create and animate text layers. Experiment with text animations, tracking, and kerning.### 9. **Masking and Rotoscoping:**   - Understand how to use masks to hide or reveal parts of a layer. This is essential for compositing and creating visual effects.### 10. **Working with 3D:**   - After Effects has 3D capabilities. Learn how to create and animate 3D layers. This is useful for creating depth and realistic motion.### 11. **Expressions:**   - Explore the basics of expressions to create dynamic animations and automate repetitive tasks.### 12. **Rendering and Exporting:**   - When you're finished with your composition, learn how to render and export your project. Go to "Composition" > "Add to Render Queue" to set rendering parameters.### 13. **Community and Tutorials:**   - Join online communities and forums like the Adobe After Effects subreddit. There are numerous tutorials available online to help you master specific techniques and workflows.### 14. **Practice and Experiment:**   - The best way to learn is by doing. Experiment with different features, tools, and effects. Don't be afraid to make mistakes; that's part of the learning process.### 15. **Keyboard Shortcuts:**   - Learn some essential keyboard shortcuts to speed up your workflow. After Effects has many shortcuts that can save you time.Remember, After Effects has a learning curve, so be patient and take the time to explore its features. The more you practice, the more comfortable you'll become with creating dynamic motion graphics and visual effects.

More details

Published - Wed, 20 Dec 2023

zbrush 2024

Created by - Anil Chauhan

zbrush 2024

ZBrush has a unique and powerful user interface designed for digital sculpting and 3D modeling. The interface is highly customizable, allowing users to arrange and organize tools according to their preferences. Here's a general overview of the ZBrush user interface:1. **Title Bar:**   - Displays the name of the current document or project.   - Contains standard window controls (minimize, maximize/restore, close).2. **Top Shelf:**   - Houses various menus and buttons, including File, Edit, Tool, and others.   - Quick access to frequently used functions.3. **Palette Trays:**   - Located on the left and right sides of the interface.   - Hold various palettes such as brushes, materials, and tools.   - Can be collapsed or expanded for convenience.4. **Canvas:**   - The central area where the 3D model is displayed.   - You can rotate, zoom, and pan the model using the mouse or tablet.5. **Draw Palette:**   - Contains options for drawing and manipulating objects in 3D space.6. **Tool Palette:**   - Displays the currently selected tool (3D brush, insert mesh, etc.).   - Allows you to select, edit, and manage your tools.7. **Subtool Palette:**   - Manages subtools, which are individual components of your model.   - Allows for duplicating, deleting, and organizing subtools.8. **Timeline:**   - Used for creating animations and morph targets.   - Allows you to manipulate time-based actions.9. **Lightbox:**   - Provides access to ZBrush projects, tools, and materials.   - Can be toggled on and off with the Lightbox button.10. **Status Bar:**   - At the bottom of the interface, it displays information about the current tool, brush, and other settings.   - Also includes navigation information and quick buttons.11. **Quick Access Buttons:**   - Various buttons for commonly used functions, such as saving, undo/redo, and other options.12. **Customizable Menus:**   - You can customize menus and create your own custom interface layouts.ZBrush's interface is known for its flexibility and user-friendly design. It's important to explore the various menus and submenus to discover the full range of features available. Additionally, ZBrush provides extensive documentation and tutorials to help users become familiar with its interface and tools.

More details

Published - Thu, 21 Dec 2023

After Effect User Interface

Created by - Anil Chauhan

After Effect User Interface

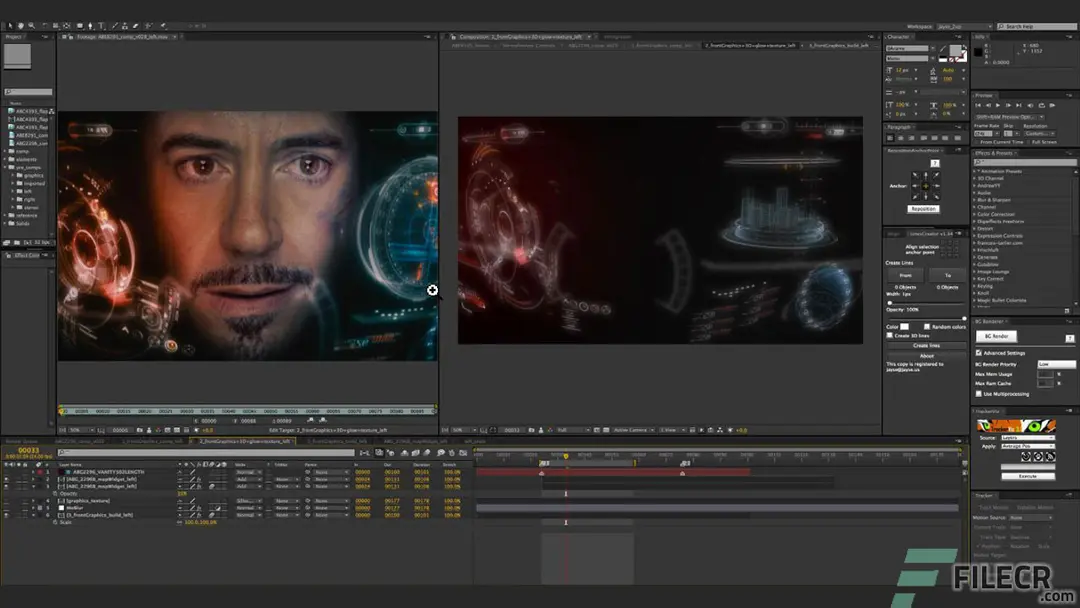
As of my last knowledge update in January 2022, Adobe After Effects has a user interface that is designed for video editing, motion graphics, and visual effects compositing. Keep in mind that software interfaces can be updated, so there may have been changes since then. Here's a general description based on the version available up to my last update:1. **Workspace Panels:**   - **Project Panel:** Displays all the assets (footage, images, audio) you import into your project.   - **Composition Panel:** Shows the currently selected composition, allowing you to preview and edit your work.   - **Timeline Panel:** Where you arrange and edit your layers over time.   - **Layer Panel:** Displays detailed information and controls for the selected layer.2. **Toolbar:**   - Contains various tools for creating and manipulating elements in your composition, such as the selection tool, hand tool, and various drawing and text tools.3. **Preview Controls:**   - Play, pause, and navigate through your composition with these controls. You can also set work area markers for playback.4. **Effect Controls Panel:**   - Displays detailed settings for the selected layer or effect, allowing you to customize parameters.5. **Project and Render Queue:**   - These panels help you manage your project files and set up rendering options for exporting your final composition.6. **Info Panel:**   - Provides information about the position, scale, and color values of the selected layer.7. **Tools Panel:**   - Contains a variety of tools for creating and manipulating elements in your composition.8. **Time Controls:**   - Allows you to set the time indicator to a specific frame or time, as well as control the playback speed.9. **Preview Panel:**   - Displays a real-time preview of your composition.10. **Menu Bar:**    - Houses various menus for accessing different features and functions within After Effects.11. **Workspace Switcher:**    - Allows you to switch between different preset workspaces, such as Standard, Animation, or Visual Effects.After Effects has a flexible interface that you can customize according to your workflow preferences. You can resize panels, create custom workspaces, and save layouts for different tasks. Remember that newer versions of After Effects may have introduced changes or improvements to the user interface. If you're using a more recent version, it's a good idea to refer to the official Adobe After Effects documentation for the most up-to-date information.

More details

Published - Fri, 22 Dec 2023

Stop Motion

Created by - Anil Chauhan

Stop Motion

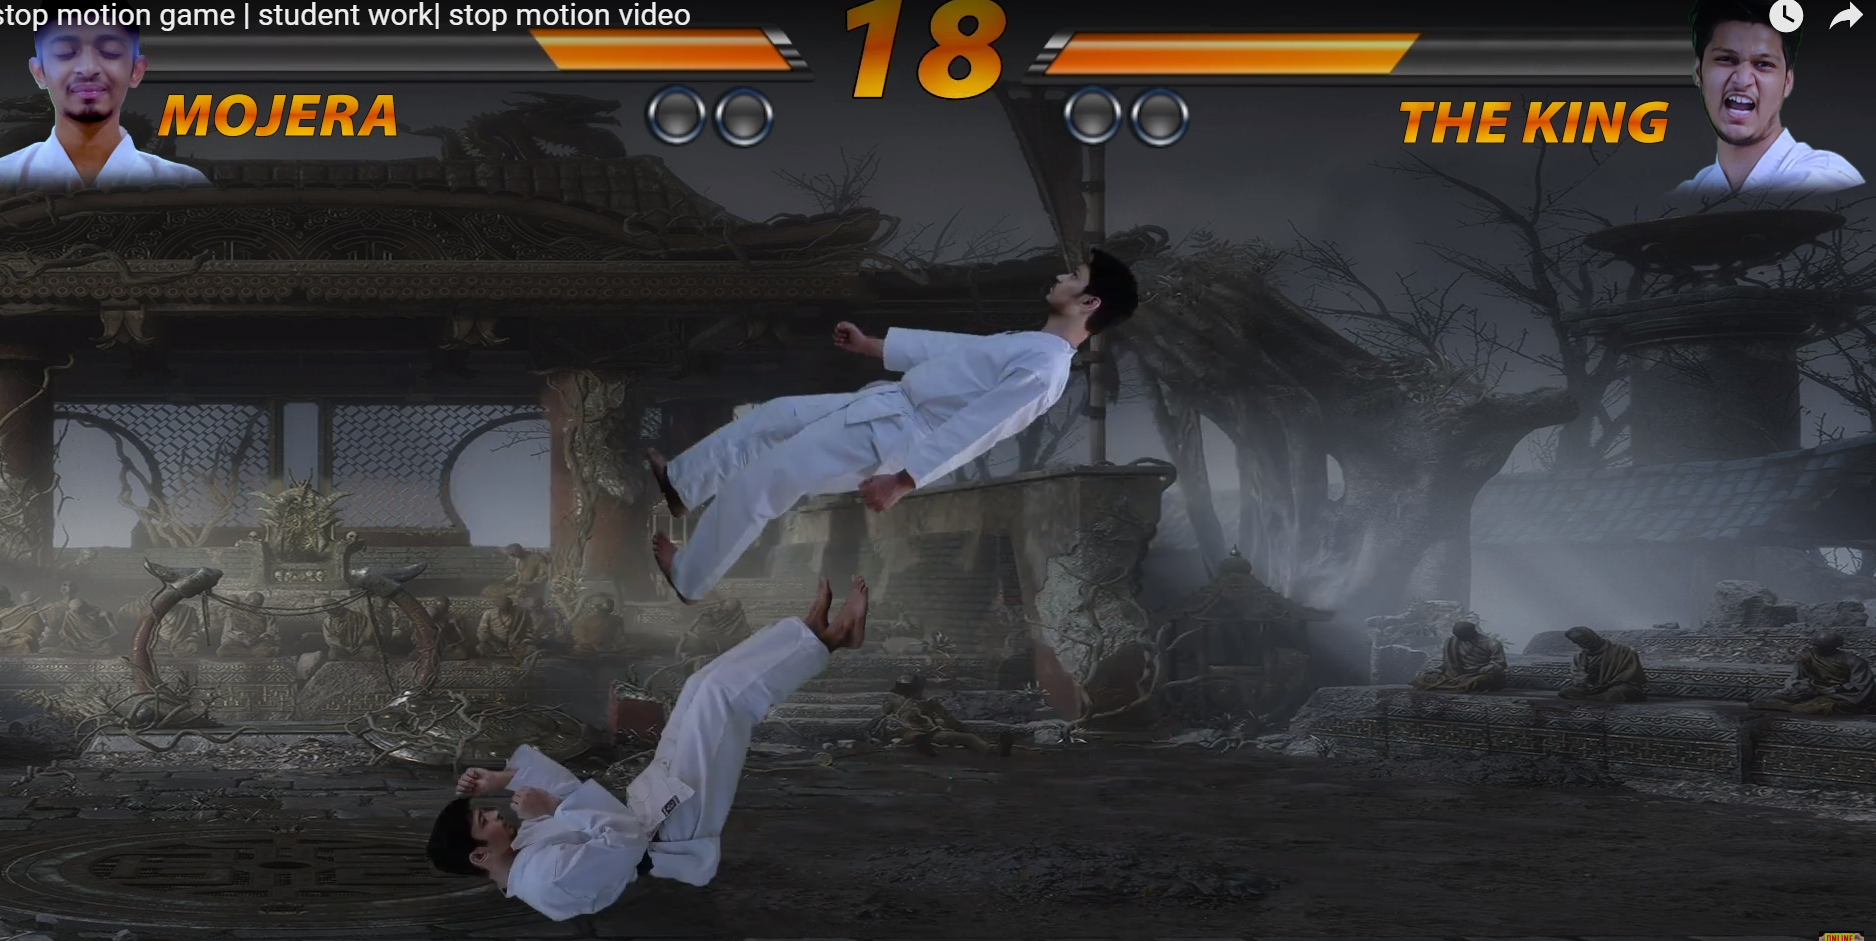
Stop motion is an animation technique that involves capturing a series of individual frames, each representing a small movement or change, and then playing them in sequence to create the illusion of motion. Unlike traditional animation, where images are drawn or painted, stop motion uses physical objects or puppets that are manipulated frame by frame to achieve movement.https://www.youtube.com/watch?v=jp01ddyD4LwHere's a basic overview of how stop motion works:1. **Set Design:** Create a set that serves as the background for your animation. This could be a miniature landscape or a detailed interior, depending on the requirements of your project.2. **Characters and Props:** Design and create characters or objects that will be part of the animation. These can be made from various materials, such as clay (claymation), paper, fabric, or even everyday objects.3. **Frame Capture:** Position your characters or objects on the set and take a photograph. This photograph represents one frame of the animation. Then, move the characters or objects slightly to simulate movement and take another photograph. Repeat this process, capturing many frames.4. **Playback:** When you play back the sequence of frames at a fast speed, the slight movements captured in each frame create the illusion of fluid motion.5. **Editing and Sound:** Once you have captured all the frames, you can edit them together using software. You can add sound effects, music, and dialogue to enhance the final product.Stop motion can be time-consuming and requires patience and attention to detail, but it offers a unique and charming aesthetic. There are various types of stop motion, including claymation (using clay figures), puppet animation (using puppets), and cut-out animation (using flat characters or objects). Famous examples of stop motion animation include films like "The Nightmare Before Christmas" and "Wallace and Gromit."

More details

Published - Sat, 23 Dec 2023

12 Principle in animation

Created by - Anil Chauhan

12 Principle in animation

The 12 principles of animation were introduced by Disney animators Frank Thomas and Ollie Johnston in their book "The Illusion of Life." These principles serve as a set of guidelines for creating more realistic and appealing animations. Here's a brief overview of each principle:So what are the 12 Principles of Animation?Squash and stretchAnticipationStagingStraight-ahead action and pose-to-poseFollow through and overlapping actionSlow in and slow outArcSecondary actionTimingExaggerationSolid drawingAppeal1. **Squash and Stretch:**   - This principle gives the illusion of weight and volume to characters as they move. Objects or characters should deform slightly when in motion.2. **Anticipation:**   - This involves preparing the audience for an action and making the action appear more realistic. It's like a wind-up before the pitch in baseball.3. **Staging:**   - Staging is presenting an idea so that it is unmistakably clear. This can involve the placement of characters, use of color, and camera angles to communicate the message effectively.4. **Straight Ahead Action and Pose to Pose:**   - "Straight ahead" involves drawing frame by frame from start to end, creating a fluid and dynamic motion. "Pose to pose" involves starting with drawing a few key frames and filling in the intervals later, creating more controlled and refined animations.5. **Follow Through and Overlapping Action:**   - Follow through means the termination of an action, and overlapping action is the tendency of parts of the body to move at different rates. Both principles contribute to making movement appear more natural.6. **Slow In and Slow Out:**   - The movement of the human body, and most other objects, needs time to accelerate and slow down. This principle helps to achieve a more realistic and fluid motion.7. **Arcs:**   - Most actions in life follow an arced trajectory rather than a straight line. Animators use arcs to make movements appear more natural.8. **Secondary Action:**   - This is an additional action that reinforces or adds more dimension to the main action. It helps to make the character more realistic and interesting.9. **Timing:**   - The number of frames between two poses can affect the speed of an action. Timing is crucial to creating the desired impact and mood in animation.10. **Exaggeration:**    - Exaggeration involves taking elements of the animation to the extreme to make the action more exciting and interesting. It should still maintain a sense of believability.11. **Solid Drawing:**    - Animators must understand the basics of three-dimensional shapes, weight, balance, light, and shadow to create characters and objects that feel solid and occupy space.12. **Appeal:**    - The appeal of a character is crucial for engaging the audience. It involves designing characters in a way that makes them interesting, sympathetic, and memorable.These principles are fundamental to animation and are applicable across various animation styles and techniques. They provide a foundation for creating animations that are visually compelling, emotionally resonant, and believable.

More details

Published - Sat, 23 Dec 2023

Vray Material

Created by - Anil Chauhan

Vray Material

VRay (Virtual Reality Ray Tracing) is a popular rendering engine used in various 3D modeling and animation software applications such as 3ds Max, Maya, Rhino, and SketchUp. When working with VRay, creating realistic materials is crucial for achieving high-quality renders. Here's a general guide on creating and working with VRay materials:### 1. **Material Basics:**   - In your 3D modeling software, create or select the object you want to apply the material to.   - Open the Material Editor and create a new VRay material.### 2. **Diffuse Color:**   - Set the base color of the material using the diffuse color parameter. This represents the color of the material under direct lighting.### 3. **Reflection and Refraction:**   - Adjust reflection and refraction settings to control how the material interacts with light. This is crucial for achieving realistic surfaces, especially for materials like glass or metal.### 4. **Bump and Normal Maps:**   - Use bump maps or normal maps to add surface detail without increasing the geometry complexity. These maps simulate small surface variations, adding realism to the material.### 5. **Specular Highlights:**   - Adjust the specular highlights to control the shininess of the material. Higher values result in sharper highlights, while lower values create a more diffuse appearance.### 6. **Transparency:**   - For materials like glass or water, adjust the transparency settings. You can control the level of transparency and the color of the material in the transparent state.### 7. **Subsurface Scattering (SSS):**   - For materials like skin or wax, consider using subsurface scattering to simulate light penetration beneath the surface, creating a more realistic appearance.### 8. **Displacement:**   - Use displacement maps to add detailed geometry to the surface of the object. This can create realistic surface variations like bumps and wrinkles.### 9. **Fresnel Effect:**   - Apply the Fresnel effect to control how reflective a material is based on the viewing angle. This helps simulate real-world reflective behavior.### 10. **Environment and Lighting:**   - Consider the overall lighting setup and environment. Adjust the HDRI map or other lighting parameters to enhance the material's appearance.### 11. **Material Libraries:**   - VRay often comes with pre-built material libraries. Explore these libraries for a quick start and then customize them to suit your scene.### 12. **Testing and Iteration:**   - Regularly test your materials in different lighting conditions and camera angles. Make adjustments as needed to achieve the desired look.### 13. **Resources and Tutorials:**   - Take advantage of online resources and tutorials. VRay has a large community, and there are many tutorials available for specific materials and effects.Remember that creating realistic materials often involves a combination of these settings, and experimentation is key. Additionally, the specific steps may vary slightly depending on the 3D modeling software you are using along with VRay.

More details

Published - Tue, 26 Dec 2023

Search
Popular categories
Latest blogs
Advanced Editing Techniques
After Effects offers a wide range of advanced editing techniques that can take your motion graphics, visual effects, and compositing skills to the next level. Here are some key techniques to explore:1. Advanced Masking & Rotoscoping Rotobrush 2.0: Quickly separate subjects from backgrounds. Refine Edge Tool: Helps with hair and fine details. Track Mattes & Alpha Mattes: Use shapes or text to mask specific areas. Content-Aware Fill: Removes objects and fills gaps intelligently. 2. Expressions & Scripting Wiggle Expression: wiggle(3,50) creates random motion. Time Expression: time*100 generates continuous movement. Looping Animation: loopOut("cycle") for seamless loops. Master Properties & Essential Graphics: Customize elements easily in Premiere Pro. 3. Advanced Motion Tracking Point Tracking: Attach elements to moving objects. Planar Tracking (Mocha AE): Used for screen replacements. 3D Camera Tracking: Integrate text/effects into real-world footage. Parallax Effects: Create depth using multiple layers. 4. 3D & Depth Techniques 3D Layer Controls: Rotate, scale, and position objects in a 3D space. Cameras & Depth of Field: Simulate cinematic depth. Parallax 3D Effect: Convert 2D images into depth-rich motion. Element 3D Plugin: Create and animate 3D objects. 5. Advanced Keying & Compositing Keylight Plugin: High-quality green screen removal. Spill Suppression: Reduce green/blue light reflections. Light Wrap Technique: Blend keyed elements with backgrounds. Shadow & Reflection Compositing: Enhance realism. 6. Time Manipulation Time Remapping: Speed ramping and slow-motion effects. Echo & Pixel Motion Blur: Create fluid, trailing effects. Frame Blending & Optical Flow: Smooth out speed changes. 7. Particle Effects & Simulations Particular Plugin (Trapcode Suite): Advanced particle systems. CC Particle World: Built-in alternative for particle effects. Newton Plugin: Adds real-world physics to animations. Liquify & Displacement Maps: Create organic distortions. 8. Color Grading & Visual Enhancements Lumetri Color Panel: Fine-tune exposure and color. Lookup Tables (LUTs): Apply professional color grades. Glow & Bloom Effects: Enhance light sources for realism. Chromatic Aberration: Mimic lens imperfections. 9. Procedural Animation & Effects Fractal Noise & Turbulent Displace: Generate natural textures. Audio Reactivity: Use audio amplitude to drive animations. Shape Layer Animations: Create complex motion graphics. 10. Advanced Transitions & Effects Shatter Effect: Simulate object breakage. Morphing Transitions: Seamless morphing between images. Camera Shake & Motion Blur: Add cinematic realism. Glitch & Distortion Effects: Create digital interference effects. Motion stabilization in After Effects is essential for fixing shaky footage and making it look smooth and professional. Here are different techniques to achieve motion stabilization:1. Warp Stabilizer (Easiest & Most Common)Steps: Import your shaky footage into After Effects. Select the clip in the timeline. Go to Effect > Distort > Warp Stabilizer. After the analysis is complete, adjust the settings: Result: "Smooth Motion" (retains some movement) or "No Motion" (completely stabilized). Smoothness: Increase for stronger stabilization (default is 50%). Method: Subspace Warp (Best for complex movement) Perspective (For slight perspective changes) Position, Scale, Rotation (For minimal correction) Position Only (Least invasive) If you see warping, switch Method to "Position, Scale, Rotation." Adjust Crop Less - Smooth More for better results. Pro Tip: If the footage becomes too zoomed-in, use "Stabilize Only" mode, then manually scale and reposition. 2. Manual Stabilization Using Motion TrackingFor more control, you can manually stabilize using the built-in motion tracking.Steps: Import your footage and open it in the Layer Panel. Go to Window > Tracker to open the tracker panel. Select your clip and click Track Motion. Choose Position Only (or add Rotation/Scale if needed). Place the tracking point on a high-contrast area that remains visible throughout the clip. Click Analyze Forward ▶ (let it process the movement). Once tracking is complete, create a Null Object (Layer > New > Null Object). Click Edit Target in the Tracker panel and select the Null Object. Click Apply (X and Y axis). Parent your footage to the Null Object (using the pick whip) to stabilize. Pro Tip: If needed, manually adjust keyframes to fine-tune stabilization. 3. Smoother Motion with ExpressionsFor subtle stabilization, you can use expressions to reduce jitter.Steps: Select your shaky footage. Press P to open Position properties. Hold Alt (Option on Mac) and click the stopwatch. Enter this expression: temp = wiggle(5,2); [temp[0], temp[1]] Adjust numbers for different levels of smoothness. 4. Using Mocha AE for Advanced StabilizationFor more control over specific areas: Open Effects & Presets > Mocha AE and apply it to your clip. Inside Mocha, track a stable feature in your scene. Export the tracking data and apply it to a Null Object. Parent your footage to the Null Object for stabilization. Which Method Should You Use? For quick fixes: Use Warp Stabilizer. For more control: Use manual tracking with a Null Object. For professional stabilization: Use Mocha AE. Motion Tracking in After EffectsMotion tracking allows you to track the movement of an object in a video and apply that movement to another element, such as text, graphics, or effects. After Effects provides different tracking methods depending on your needs.1. Single-Point Tracking (Basic)Used for tracking simple movement (e.g., a single object like a logo or eye movement).Steps: Import your footage and select it in the timeline. Go to Window > Tracker to open the Tracker Panel. Click Track Motion (this opens the Layer Panel). In the Tracker Controls, enable Position (for simple tracking). Place the tracking point on a high-contrast feature. Click Analyze Forward ▶ to track motion frame-by-frame. Create a Null Object (Layer > New > Null Object). Click Edit Target, select the Null Object, and press Apply (X and Y). Parent other elements (text, images) to the Null Object using the pick whip. ???? Best For: Attaching elements to moving objects (e.g., text following a moving car).2. Multi-Point Tracking (Position, Rotation, Scale)Used when an object rotates or changes size.Steps: Follow the steps from Single-Point Tracking, but enable Rotation and Scale in the Tracker Controls. Set two tracking points on opposite edges of the moving object. Apply tracking to a Null Object and attach elements to it. ???? Best For: Attaching graphics or effects to moving objects with depth.3. Planar Tracking (Mocha AE)Used for tracking flat surfaces (e.g., screens, signs, walls).Steps: Apply Mocha AE (Effect > BorisFX Mocha AE) to your footage. Open Mocha AE, select a planar surface, and draw a tracking shape. Click Track Forward ▶ to analyze movement. Export tracking data and apply it to a solid or adjustment layer. ???? Best For: Screen replacements, logo tracking on walls, object removal.4. 3D Camera Tracking (Advanced)Used for tracking objects in 3D space (e.g., placing 3D text in a scene).Steps: Select your footage and go to Effect > 3D Camera Tracker. After analysis, hover over the footage to see tracking points. Right-click a group of points and choose Create Null & Camera. Attach elements (text, graphics) to the Null Object. ???? Best For: Integrating text and objects into a real-world 3D scene.5. Motion Tracking with Expressions (Smooth Movement)You can use expressions to smooth out motion tracking. After tracking, go to the Position property of the target object. Alt+Click the stopwatch and enter: temp = wiggle(2,5); [temp[0], temp[1]] Adjust numbers for more/less movement. ???? Best For: Creating natural-looking movement in tracked elements.Which Tracking Method Should You Use? ✅ Basic Object Tracking → Single-Point Tracking ✅ Scaling & Rotating Objects → Multi-Point Tracking ✅ Screen/Logo Replacements → Mocha AE ✅ Adding 3D Text in a Scene → 3D Camera Tracker Face Tracking in After EffectsFace tracking in After Effects allows you to track facial features for effects like motion graphics, retouching, or facial replacements. There are two primary methods for face tracking:1️⃣ Face Tracking with After Effects (Built-in Face Tracker) 2️⃣ Face Tracking with Mocha AE (For More Advanced Control)1. Face Tracking with After Effects (Easy & Built-in)This method allows you to track facial features like eyes, nose, and mouth without plugins.Steps: Import Footage: Drag your video into the timeline. Open the Layer Panel: Double-click the footage to open it in the Layer Panel. Enable Face Tracking: Go to Window > Tracker to open the Tracker Panel. Select Face Tracking (Detailed Features) or Face Tracking (Outline Only). Start Tracking: Click Analyze Forward ▶ to begin tracking. After Tracking Completes: Right-click on the footage and choose Convert to Keyframes. This creates keyframes for facial movements. Attach Effects or Graphics: Create a Null Object and copy the keyframes to it. Parent other elements (e.g., glasses, effects) to the Null Object. ???? Best For: Applying face effects, color correction on specific areas, or motion-tracking masks.2. Face Tracking with Mocha AE (For Advanced Tracking & Face Replacement)Mocha AE provides more control and is ideal for advanced face tracking.Steps: Apply Mocha AE: Select your footage. Go to Effects & Presets > BorisFX Mocha AE and apply it. Open Mocha AE: Click "Track in Mocha" to open the Mocha interface. Create a Tracking Mask: Use the X-Spline or Bezier tool to draw around the face. Enable Shear & Perspective Tracking for accurate results. Track Forward ▶: Let Mocha track the face. Export Tracking Data: In Mocha, go to Export Tracking Data > After Effects Transform Data. Paste the data into a Null Object in After Effects. Attach Effects or Elements: Parent face effects, text, or graphics to the Null Object. ???? Best For: High-precision face tracking, face replacements, advanced VFX.3. Applying Effects to a Tracked FaceOnce you have a face tracked, you can: ✅ Add Motion Graphics (e.g., attach animated sunglasses, hats). ✅ Apply Retouching (e.g., smooth skin, lighten eyes). ✅ Face Replacement (e.g., swap a face with another actor). ✅ Blend Effects with the Face (e.g., fire effects, cyberpunk overlays). 3D Camera Tracker in After EffectsThe 3D Camera Tracker in After Effects analyzes video footage and creates a virtual 3D camera that matches the movement of the real-world camera. This allows you to place objects, text, and effects into a scene as if they were part of the original footage.Steps to Use the 3D Camera Tracker1. Prepare Your Footage Import your video and place it in the timeline. Ensure the clip has enough parallax movement (depth changes) for accurate tracking. 2. Apply the 3D Camera Tracker Select your footage in the timeline. Go to Effect > Track Camera. After Effects will analyze the footage (this may take time, depending on the resolution and length). Once completed, a series of colored tracking points will appear over the footage. 3. Create a 3D Null, Text, or Solid Hover over the tracking points. When they form a triangle, right-click and choose: Create Text and Camera (for adding 3D text) Create Solid and Camera (for placing a solid layer) Create Null and Camera (for attaching objects) A 3D Camera is automatically created in the timeline. Attach any graphics, 3D elements, or effects to the Null Object to match the camera movement. 4. Adjust the Scene Scale, rotate, or move the elements to fit naturally into the tracked scene. Use motion blur or depth of field for added realism. Tips for Better 3D Camera Tracking✅ Use High-Quality Footage – Avoid too much motion blur. ✅ Ensure Parallax Motion – The tracker needs foreground and background depth changes. ✅ Adjust Solve Method – If tracking fails, go to Advanced and change the Solve Method (e.g., "Tripod Pan" for static shots). ✅ Refine Tracking Points – Manually delete bad tracking points for better accuracy.Best Uses of the 3D Camera Tracker???? Adding 3D Text in a Scene ???? Attaching Objects to Moving Elements (e.g., labels on buildings) ???? Creating VFX Effects (e.g., explosions that match camera movement) ???? Replacing Billboards or Screens in Videos Would you like a step-by-step guide for a specific effect? ????

8 Hours Ago

Introduction to Level Design Through Blocking in Unreal Engine
Introduction to Level Design Through Blocking in Unreal EngineBlocking is a fundamental step in level design that helps establish the layout, scale, and flow of a game environment before adding detailed assets. In Unreal Engine, blocking involves using simple geometric shapes (like cubes and cylinders) to prototype levels efficiently.Key Concepts Covered:✅ Understanding Blocking: Learn why blocking is essential for level design. ✅ Basic Tools & Workflow: Explore Unreal Engine's BSP (Binary Space Partitioning) and Geometry tools. ✅ Gameplay Flow & Composition: Arrange spaces for smooth player movement and engagement. ✅ Iterating & Refining: Quickly test and adjust level layouts before adding assets.Blocking allows designers to focus on gameplay first, ensuring a solid foundation before polishing the visuals. Ready to build your first level? ???????? Let me know if you need tags or a more detailed guide! ????In Unreal Engine, a pivot point is the reference point around which an object rotates and scales. By default, the pivot is located at the center or bottom of an object, depending on how it was imported or created. However, sometimes you may need to adjust the pivot for better control during manipulation.???? How to Change the Pivot in Unreal Engine Temporarily Move the Pivot Select the object in the viewport. Hold ALT + Middle Mouse Button (MMB) and drag to reposition the pivot. This change is temporary and resets when you deselect the object. Permanently Set a New Pivot Select the object. Press Right Click → Pivot → Set as Pivot Offset. This change remains even after deselecting the object. Reset the Pivot to Default Right-click the object. Select Pivot → Reset to return it to its original position. ???? Alternative Methods for Pivot Adjustment Use the Modeling Tools Editor (Unreal 5) If you have a static mesh, go to Modeling Mode and use the pivot tools. Modify the Pivot in a 3D Modeling Software (Blender, Maya, 3ds Max) If your asset was imported, adjust the pivot in your 3D software and re-import it. Would you like help with a specific pivot issue in Unreal? ????Creating simple block-out levels in game design using basic shapes and volumes is an essential technique known as grey-boxing or blocking out. This phase allows designers to quickly prototype levels to focus on layout, player flow, and scale before adding detailed assets. Here's how you can approach it:1. Plan the Layout: Start with a rough idea of the level's flow. Sketch a basic floor plan or use reference images to help with inspiration. Think about how the player will move through the level. Are there pathways, obstacles, or areas of interest? 2. Use Basic Shapes: Use simple cubes, rectangles, and spheres to represent walls, floors, platforms, and other basic elements. In Unreal Engine or other game engines, you can use Static Meshes (like boxes) or the Geometry Tools for faster creation. 3. Positioning and Scaling: Place your shapes in a way that represents the spatial layout. Don’t worry about fine details—focus on the overall flow. Ensure your player character can move easily through the space. Test the scale of objects by walking the player through the environment. 4. Player Flow: Consider how the player moves through the environment. Create natural pathways that lead to objectives or challenges. Use large blocking shapes to outline areas such as rooms, corridors, or open spaces that will later be filled with detailed assets. 5. Experiment with Elevation and Obstacles: Add simple ramps or steps to test verticality and player movement. Use volumes (like cylinders or cones) to represent barriers or interactive elements. 6. Test and Iterate: Regularly test the level in its current form. Does the player move through the space comfortably? Is there a good challenge progression? Make adjustments to shapes and layout to improve the level’s flow. 7. Add Game Logic: Once the basic shape and layout are done, you can start adding triggers, interactions, and simple collision boxes to simulate gameplay. This phase helps you visualize how the player will interact with the space and ensures that the design is functional before you commit time to creating more complex assets.Blocking, or grey-boxing, is a critical phase in the game design process. It allows designers to lay out a basic, functional structure for the game world without focusing on art or fine details. Here’s why it's so important:1. Faster Iteration: Quick Prototyping: Grey-boxing allows for rapid testing of level ideas and gameplay mechanics. It’s much faster to block out a level with simple shapes than to create detailed environments. Designers can iterate quickly based on playtests or feedback. Easy Changes: Since the design is made with basic shapes, it’s simple to make large-scale changes. You can rearrange areas, add new pathways, or resize structures without worrying about art assets. 2. Focus on Core Gameplay: Player Flow and Interaction: Grey-boxing helps you focus on the layout and flow of the level. You can test how the player navigates the environment, how obstacles interact with gameplay, and where critical elements, like objectives or enemies, should go. Identifying Issues Early: By blocking out the level early in the design process, you can identify problems such as bad player flow, confusing layouts, or unbalanced areas, before adding the complexity of detailed art assets. 3. Efficient Collaboration: Clear Communication: Grey-boxing provides a clear, tangible representation of the level for team members. Artists, programmers, and level designers can all see and discuss the same basic version of the level and can easily identify areas needing work. Cross-Discipline Feedback: It allows non-designers (e.g., programmers or artists) to give input, leading to more well-rounded feedback early in the design process. Artists can visualize the potential scale of areas, while programmers can begin to implement basic game mechanics. 4. Gameplay and Environment Balance: Visualizing Scale and Space: Grey-boxing ensures the scale of environments feels right for the player. It helps with things like perspective, distances between objects, and the general space of the environment. Testing Game Mechanics: It's easier to test things like jumping, movement, line-of-sight, and combat spaces in a grey-boxed level. You can adjust elements based on these tests before more complex systems are added. 5. Helps with Asset Planning: Identifying Asset Requirements: Once the level is blocked out, you’ll have a better idea of the types of art assets you’ll need—such as textures, models, or lighting setups—and can plan these resources effectively. Optimizing Workflow: By having a solid plan in place, the art and asset teams can focus on creating the necessary details only after confirming that the core design works. 6. Cost-Effective: Low-Cost Testing: Grey-boxing is a low-cost, low-risk phase that ensures the design is on the right track before committing significant resources to creating art, animations, and other high-cost elements. If the gameplay or level design isn’t working, it’s much cheaper to fix at this stage. In summary, grey-boxing helps prioritize functionality, gameplay, and layout over visuals early in the design process, making it an invaluable tool for creating solid, enjoyable game environments.Layout planning for player flow, environment scaling, and game design logic is an essential part of level design in game development. Here's how you can approach each aspect effectively:1. Player Flow: Goal: The player should be guided through the environment in a way that feels natural and intuitive, with clear progression from one area to the next. Pathways: Design the layout with logical paths that the player will follow. These paths should lead to important areas, objectives, or challenges. Make sure the player isn’t confused about where to go next. Linear Paths: For more straightforward games, you might have one primary path that the player follows from start to finish. Non-linear Paths: In open-world or exploration-based games, multiple pathways or hidden areas can encourage discovery and replayability. Landmarks: Use large, visually distinct objects or structures (e.g., towers, statues, or buildings) to serve as visual landmarks, helping players orient themselves within the environment. Obstacles & Challenges: Use obstacles or challenges to slow the player down or force them to engage with the environment. These can be physical (walls, pits), combat-related (enemies), or puzzles. Flow Control: Ensure that the flow isn’t too rushed or too slow. Adjust pacing by creating areas of tension (combat or tight spaces) followed by areas of relief (open spaces, exploration). 2. Environment Scaling: Size and Proportions: The environment must be scaled in a way that makes sense for both the player and the design of the game. Objects and spaces should feel appropriately sized in relation to the player character. For example, in a first-person game, doors should be large enough for the player to pass through comfortably. In platformers, jumps should be scaled to match the player’s movement abilities. Verticality: Consider how vertical space impacts the environment. Platforms, cliffs, and drop-offs can add depth to the level design, affecting both player movement and visual interest. Distance and Perspective: Scaling affects the sense of distance. If the player feels too far from important objectives, you might want to bring them closer or make them more visible to improve navigation and gameplay. Consistency: The scale of objects and spaces should remain consistent to avoid confusing the player. If one section of a level feels huge, while another feels cramped without reason, it could break immersion. Navigation Aids: To ensure players don’t feel lost, give them cues that help with scale and direction, such as using light sources, environmental changes, or sound effects. 3. Game Design Logic: Gameplay Goals: The layout and scaling of the environment should always support the core gameplay goals. For instance, in an action game, narrow hallways and open spaces may create opportunities for combat or stealth. In a puzzle game, the level might need to provide different layers of interaction and logic. Progression and Difficulty: Plan the layout so that the player experiences a gradual increase in difficulty. This can involve more complex puzzles, tougher enemies, or more intricate platforming as the player advances. Tutorial Areas: Early levels or areas should introduce basic mechanics and give the player time to understand them. As the game progresses, challenges can get more difficult, requiring the player to apply what they've learned in creative ways. Player Rewards and Exploration: Include areas that reward players for exploration. Hidden paths, collectibles, or Easter eggs can make the player feel like their effort is rewarded and encourage them to explore beyond the main path. Dynamic Interactions: If your game allows for interactions with the environment, think about how the player can use or change the environment. For example, destructible objects, movable platforms, or interactable switches that open doors or alter the environment’s layout. Pacing and Breaks: Design the environment to have areas of tension followed by moments of calm or relief. After an intense battle or difficult section, provide the player with a break to explore or collect items before the next challenge. Narrative Support: If your game has a story, the environment should reflect and support it. The setting can convey the tone, history, and context of the narrative, making the player feel more immersed in the world. Combining All Three Aspects:When you plan the layout of a level, these three elements—player flow, environment scaling, and game design logic—must work together harmoniously to create an enjoyable and functional experience. Here's a basic approach to integrate them: Start with Player Flow: Map out the path the player will take through the level, ensuring it feels intuitive and natural. Add Environment Scaling: Ensure the size and layout of the world are appropriate to the player and game type. Think about how different spaces will feel and how the player will experience them. Apply Game Design Logic: Layer in the gameplay mechanics, challenges, and narrative elements to make the environment not only functional but fun, immersive, and engaging. By thoughtfully planning these aspects, you can create levels that feel cohesive, balanced, and exciting for players.

1 Day Ago

Nuke, animating parameters
In Nuke, animating parameters is a key aspect of creating dynamic visual effects. Here’s how you can animate parameters in Nuke:1. Setting Keyframes Select a Node: Click on the node you want to animate (e.g., Transform, Blur, etc.). Find the Parameter: Locate the parameter you want to animate (e.g., Translate, Scale, Rotate). Set a Keyframe: Right-click the parameter and choose "Set Key" OR Click the small diamond icon next to the parameter. Move to Another Frame: Change the frame number in the timeline. Modify the Value: Adjust the parameter; Nuke automatically creates a new keyframe. 2. Using the Curve Editor Open the Curve Editor (Shortcut: Shift + E). Select the animated parameter from the left panel. Adjust the Bezier handles to smooth or ease the animation. Right-click on keyframes for interpolation options like linear, constant, or cubic. 3. Using the Dope Sheet Open the Dope Sheet (Shortcut: Alt + D). This gives a visual timeline of keyframes. Drag keyframes to adjust timing. Right-click keyframes for options like copy, paste, delete. 4. Expressions for Automation Right-click the parameter and choose "Edit Expression". Use expressions like: frame → Moves based on the frame number. sin(frame) → Creates a wave-like motion. random(frame) → Generates random values. frame/10 → Slows down movement. 5. Linking Parameters (Expressions & Linking) Right-click a parameter → "Add Expression". Use parent.node.parameter to link values (e.g., Blur1.size = Transform1.scale * 10). 6. Using Motion Paths For movement-based animation (like object motion), use the Transform node. Adjust Translate X/Y over time to define a path. 7. Scripting for Advanced Animation Use Python or TCL scripts to automate animations. Example in Python: nuke.toNode("Transform1")["translate"].setAnimated() nuke.toNode("Transform1")["translate"].setValueAt(50, 1) # Frame 1 nuke.toNode("Transform1")["translate"].setValueAt(200, 50) # Frame 50 By mastering these animation techniques, you can create smooth and dynamic effects inside Nuke. Need help with a specific animation? ????

1 Day Ago

All blogs