Created by - Anil Chauhan
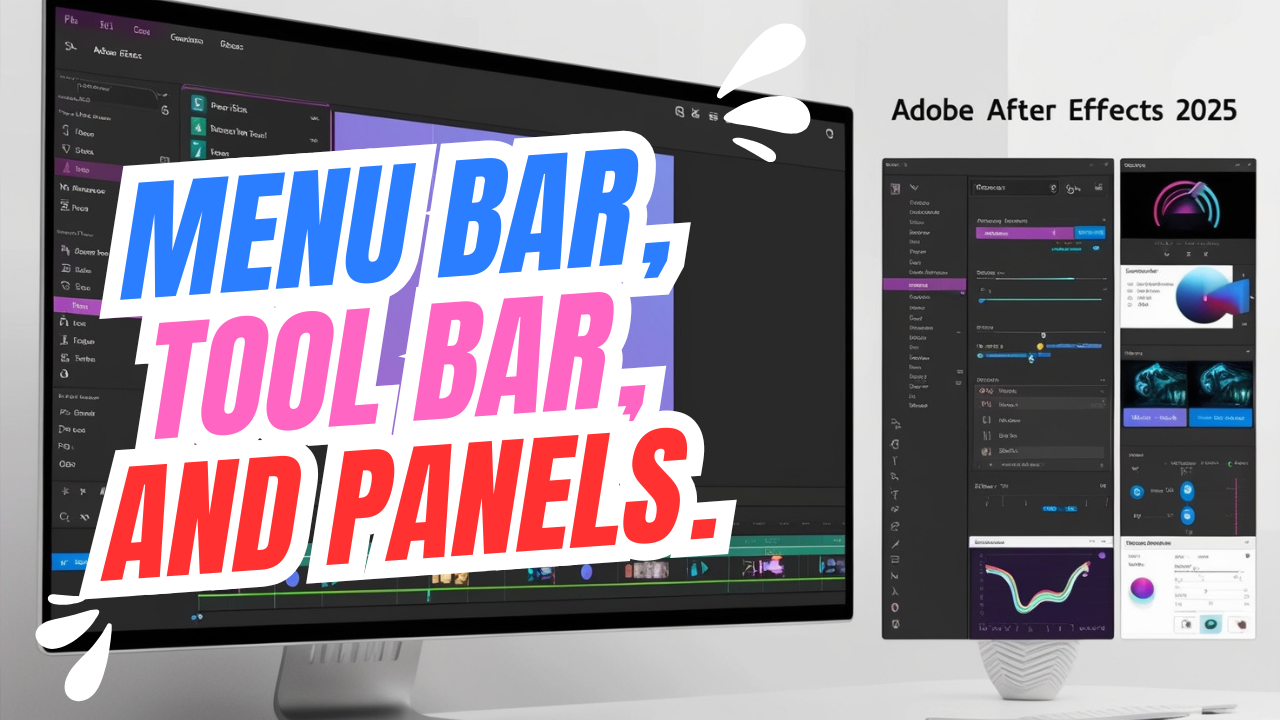
Menu Bar, Tool Bar, and Panels.
In Adobe After Effects, the interface is organized into several key sections that help users to efficiently navigate and use its features. These include the Menu Bar, Tool Bar, and Panels. Here's a breakdown of each of these components:1. Menu BarThe Menu Bar is located at the top of the screen and contains various options that allow you to access the core functions and settings of After Effects. These menus are organized into different categories: File: Allows you to create new projects, open existing ones, save, import, export, etc. Edit: Provides options for undoing actions, preferences, and other editing-related functions. Composition: Controls the creation and editing of compositions, which are the containers for your animation and effects. Layer: Contains options for working with layers, like creating new layers or adjusting their properties. Effect: Contains a wide variety of effects and presets that can be applied to layers or compositions. Animation: Provides shortcuts for animation features like keyframing, timing, and interpolation. View: Offers controls for how you see the project, such as zooming in/out or switching views. Window: Allows you to manage the visibility of different panels and tools. Help: Offers access to help documentation, tutorials, and other resources. 2. Tool BarThe Tool Bar is located directly beneath the Menu Bar and provides quick access to various tools that you can use to manipulate layers and objects within your composition. These tools are used to create, select, transform, and adjust elements in the timeline and composition view. Some common tools in the toolbar include: Selection Tool (V): Used to select layers and objects. Hand Tool (H): Allows you to move the composition view around. Zoom Tool (Z): Enables you to zoom in or out in the Composition panel. Pen Tool (G): Used to create masks or shape paths. Text Tool (Cmd+T or Ctrl+T): Used to create text layers. Shape Tools (Q): Allows you to create various geometric shapes like rectangles, circles, and polygons. Roto Brush Tool (Alt+W): Used for rotoscoping (isolating elements from a background).Adobe After Effects has a robust set of tools designed for motion graphics, compositing, and visual effects. Below is an overview of the 17 primary tools in the After Effects toolbar and their functionalities:1. Selection Tool (V) Used to select, move, or transform layers, objects, and keyframes in the composition or timeline. 2. Hand Tool (H) Lets you pan around the composition or timeline when zoomed in for better navigation. 3. Zoom Tool (Z) Allows you to zoom in or out on the composition or layer panel for precision editing. 4. Rotation Tool (W) Rotates layers or objects around their anchor point. 5. Anchor Point Tool (Y) Adjusts the anchor point of a layer, which affects rotation, scaling, and position transformations. 6. Pan Behind Tool (Anchor Point Tool Shortcut) (Y) Moves the anchor point without affecting the layer's position. 7. Shape Tool (Q) Draws vector shapes, such as rectangles, ellipses, or polygons. Press and hold the tool to access different shapes. 8. Pen Tool (G) Creates custom paths for masks or motion paths. Press and hold for additional tools like the Add Vertex or Convert Vertex tools. 9. Text Tool (T) Creates text layers for titles, lower thirds, and other typographic elements. Includes horizontal and vertical text options. 10. Brush Tool (Cmd + B / Ctrl + B) Paints directly onto layers. Primarily used in the Layer Panel. 11. Clone Stamp Tool (Alt + B / Option + B) Duplicates parts of a layer using a sampled area. Useful for cleaning up footage. 12. Eraser Tool (Alt + Shift + E / Option + Shift + E) Erases content from painted layers or footage. 13. Puppet Pin Tool (P) Adds deformation pins to layers for animating flexible movement, such as bending arms or limbs. 14. Roto Brush Tool (Alt + W / Option + W) Used to isolate subjects in a video, similar to rotoscoping, by painting directly on the footage. 15. Refine Edge Tool Works alongside the Roto Brush tool to improve edge details for isolated subjects. 16. Type Tool (Horizontal and Vertical) Adds text layers for animation or compositing. Offers vertical and horizontal text options. 17. Track Camera Tool Used to analyze footage and create a 3D camera for seamless integration of 3D objects or text into live-action scenes. Keyboard Shortcuts for Efficiency V: Selection Tool H: Hand Tool Z: Zoom Tool G: Pen Tool Q: Shape Tool T: Text Tool Y: Anchor Point Tool W: Rotation Tool These tools collectively enable After Effects to handle tasks ranging from simple text animation to complex visual effects and compositing. Let me know if you'd like details on specific tools or workflows! Additionally, the tool bar may also contain icons for other tools like the Clone Stamp, Puppet tools, and more.3. PanelsPanels are the core organizational elements of After Effects' workspace. They display and allow you to interact with various aspects of your project. Some of the most important panels include: Project Panel: Displays all the assets (footage, images, audio, etc.) used in your project. It’s where you import, organize, and manage your media files. Composition Panel: Shows the visual output of your composition, where you see your animation in action. Timeline Panel: Displays the layers of your composition in a timeline format. This is where you control the timing, placement, and animation of each layer. Layer Panel: Used to manipulate individual layers, such as adjusting the properties like opacity, scale, position, and rotation. Effect Controls Panel: Displays the settings for any effects applied to selected layers, where you can tweak the effect parameters. Tools Panel: This is not always visible, but you can dock it. It provides a list of tools like the Selection, Brush, or Pen tools. Preview Panel: Shows the current preview of your composition. It allows you to play back the animation to see the result in real-time or frame-by-frame. Audio Panel: Displays audio levels and waveform, allowing you to adjust the audio settings of your project. Character Panel: If you're working with text, this panel allows you to modify text settings such as font, size, tracking, and leading. Paragraph Panel: Allows you to adjust the alignment, paragraph spacing, and indentation for text layers. Effect & Presets Panel: Shows the list of available effects and allows you to search for and apply effects to layers. Customizing the Workspace:After Effects provides flexibility in how you organize your panels. You can: Dock panels together for a more compact view. Undock them into separate floating windows. Save custom workspaces to quickly switch between different layouts based on your needs (e.g., editing, animation, or color correction). Overall, the Menu Bar gives access to the software's main functions, the Tool Bar provides quick access to tools for manipulating your project, and the Panels are where you interact with and control your project's elements and settings.
More detailsPublished - Mon, 06 Jan 2025
Created by - Anil Chauhan
Introduction to Autodesk Maya
Introduction to Autodesk MayaAutodesk Maya is a powerful 3D computer graphics software used for creating interactive 3D applications, including video games, animated films, TV series, and visual effects. It is widely recognized as one of the industry-standard software for 3D modeling, animation, simulation, and rendering. Maya is known for its comprehensive set of tools, versatility, and high-quality output, making it essential for professionals in the fields of animation, VFX, game development, and 3D visualization.Here is a breakdown of the core features and concepts in Autodesk Maya:1. 3D ModelingMaya allows users to create 3D models of characters, environments, and objects using various tools: Polygonal Modeling: The creation of 3D objects using polygons, such as squares, triangles, and other shapes. This is the most commonly used method for hard surface modeling. NURBS (Non-Uniform Rational B-Splines): A mathematical method for creating smooth curves and surfaces, often used in industrial design and automotive modeling. Subdivision Surfaces: This technique allows for smoother surfaces when subdivided, giving more control over organic shapes, often used in character modeling. 2. AnimationMaya is particularly renowned for its animation tools, which allow users to bring 3D models to life: Keyframing: Setting specific points of motion for objects in a timeline. Maya interpolates the motion between keyframes to create smooth animations. Rigging: Creating a skeletal structure for a 3D model (such as a character), which allows for easier manipulation of the model for animation. Character Animation: With Maya, animators can control characters through inverse kinematics (IK), forward kinematics (FK), facial rigging, and motion capture integration. Blend Shapes: Used to animate facial expressions and other deformations by blending different shapes of the same model. 3. Texturing and ShadingTexturing refers to adding details like color, texture, and surface properties to a 3D model. Maya supports: UV Mapping: Unwrapping a 3D model’s surface to apply textures. Shading: Using shaders to define how a surface interacts with light, including effects like reflections, transparency, and glossiness. Substance Integration: Maya integrates with Substance Painter, allowing users to texture 3D models with high-quality materials and advanced texture painting techniques. 4. Lighting and RenderingMaya provides powerful rendering features, making it suitable for both high-quality and real-time rendering: Lighting: Adding light sources to a scene, including point lights, spotlights, directional lights, and area lights. The choice of light affects the look and feel of the scene. Rendering Engines: Maya supports different rendering engines like Arnold (integrated with Maya), mental ray, and others. Arnold, in particular, is used for creating photorealistic images and animations. Global Illumination: Simulating how light interacts with surfaces, resulting in more realistic lighting and shading effects. Render Layers and Passes: Organizing different elements (such as shadows, reflections, and diffuse colors) into separate layers for greater control during post-production. 5. Dynamics and SimulationMaya includes tools for simulating real-world physics: Particle Systems: Simulating smoke, fire, explosions, and other effects that involve numerous particles. Cloth Simulation: Using the nCloth system to simulate realistic fabric behavior. Hair and Fur: Maya's XGen allows artists to create realistic hair and fur for characters or environments. Fluid and Rigid Body Dynamics: For simulating liquid, gas, and solid objects interacting with each other in realistic ways. 6. MEL and Python ScriptingMaya supports scripting languages like MEL (Maya Embedded Language) and Python to automate tasks and extend its functionality. Users can write scripts to control the software, create custom tools, and improve their workflow.7. Plugins and ExtensionsMaya is highly extensible, offering a range of third-party plugins to enhance its functionality. Popular plugins include those for creating advanced simulations, rendering, and character animation tools.8. InteroperabilityMaya supports file exchange with other software such as: Autodesk 3ds Max for cross-platform workflows. ZBrush for high-resolution sculpting. Unity and Unreal Engine for game development integration. Industries and Applications Animation: Maya is used to create animated characters, environments, and visual effects for films and television series. Video Games: It is heavily used for modeling, rigging, and animating characters, environments, and props for video games. VFX: Maya plays a critical role in creating visual effects for blockbuster movies, including simulations like smoke, fire, explosions, and realistic lighting. Architecture and Product Design: In industries like architecture and industrial design, Maya is used for visualization, prototyping, and rendering. Conclusion Autodesk Maya is a comprehensive and versatile software package, offering everything from basic 3D modeling to advanced character animation, VFX, and rendering tools. Its robust feature set and industry-standard status make it an essential tool for 3D artists, animators, and visual effects professionals around the world.
More detailsPublished - Mon, 06 Jan 2025
Created by - Anil Chauhan
Main Menu Bar
The user interface (UI) of Autodesk Maya is designed to provide an efficient and customizable workspace for 3D modeling, animation, and visual effects creation. The interface is divided into various panels and elements, allowing users to access a wide range of tools and features. Here's a breakdown of the key components of Maya's user interface:1. Main Menu Bar Located at the top of the interface, the Main Menu Bar includes menus such as File, Edit, Create, Modify, and Windows. These menus provide access to fundamental functions like opening and saving files, creating objects, and modifying scenes. 2. Shelf The Shelf is a toolbar just below the menu bar, containing customizable icons and shortcuts for commonly used tools. Users can add and organize icons for quick access to functions like rendering, modeling, animation, and simulation. You can create custom shelves to streamline your workflow. 3. Viewport The Viewport is the main display area where users interact with their 3D scene. You can view and manipulate objects in the scene using various camera views (perspective, top, front, side, etc.). It supports multiple views and display modes (wireframe, shaded, textured) to help visualize different stages of the modeling or animation process. 4. Channel Box / Layer Editor The Channel Box displays and allows users to modify the attributes of selected objects, such as position, rotation, scale, and material properties. It's a convenient panel for making quick adjustments. The Layer Editor allows users to manage and organize different scene elements into layers, enabling the toggling of visibility, selection, and editing for various elements within the scene. 5. Attribute Editor The Attribute Editor provides detailed control over the properties of selected objects, materials, lights, cameras, and other scene components. It displays all available attributes for the object, enabling precise adjustments. 6. Outliner The Outliner is a hierarchical view of all the objects in your scene. It allows users to organize and manage objects, lights, cameras, and more. It’s especially useful for large scenes with many elements, making it easy to select, rename, or group objects. 7. Toolbox The Toolbox (usually on the left side) contains essential tools for 3D manipulation, such as the select tool, move tool, rotate tool, scale tool, and paint tools. It also includes more specialized tools for sculpting, drawing curves, and more. 8. Time Slider The Time Slider at the bottom of the screen is used for animation. It displays the timeline of keyframes and allows users to scrub through the animation, play, pause, or set keyframes at specific points. 9. Status Line The Status Line at the top provides quick access to key functions such as saving, undoing, and redoing actions. It also displays important status information, like the current scene’s frame rate and status of the rendering process. 10. Perspective / Camera Views Maya's default view is the Perspective View, which allows users to navigate a 3D scene interactively. You can switch to Orthographic Views (front, side, top) for precise modeling. Multiple viewports can be opened to show different perspectives simultaneously. 11. Rendering and Display Panels The Rendering Panels are found in the main menu bar, allowing users to access rendering options such as Arnold, Render View, and Render Settings. These settings enable users to set up and preview rendered images or animations. 12. Viewport Controls Users can customize the appearance of the Viewport by adjusting lighting, shading, and display modes. The Viewport can show models in wireframe, shaded, textured, or rendered mode, giving users flexibility to work with different visual representations of their scene. 13. Script Editor The Script Editor is located at the bottom of the interface and provides a place to write, execute, and debug MEL (Maya Embedded Language) or Python scripts. It displays output messages and errors, enabling automation and customization of tasks. 14. Help and Documentation The Help Menu provides access to Maya's documentation, tutorials, and community resources, which are useful for learning and troubleshooting. 15. Status and Notifications In the lower-right corner, the status bar and notifications display important information about the scene, such as whether a rendering is in progress, or when a task has been completed. 16. Viewport Menu Users can right-click in the viewport to access additional options, including visibility controls, render settings, and more. Customization and Layouts:Maya's interface is highly customizable, allowing users to arrange and resize panels, and even create multiple workspace layouts for different tasks. Whether you're working on modeling, animation, or simulation, you can adjust the UI to suit your specific workflow.Conclusion: Maya’s user interface is designed for efficiency and flexibility. Its modular approach allows for a tailored workflow suited to individual preferences, whether you are a beginner or a professional. Through its panels, tools, and customizable layout, Maya provides artists with the necessary functionality to work with complex 3D projects.
More detailsPublished - Mon, 06 Jan 2025
Created by - Anil Chauhan
The 12 principles of animation
The 12 principles of animation were developed by Disney animators Frank Thomas and Ollie Johnston in the 1930s. These principles are still the foundation for creating engaging, dynamic, and believable animations. Here’s an overview of each: Squash and Stretch: This principle gives the illusion of weight and volume to characters and objects. By stretching and squashing, you can show movement and flexibility, like a bouncing ball or a character changing shape during a jump. Anticipation: Before a character makes a major move, they give a small preparatory movement. This helps the audience understand what is about to happen, such as a character crouching before jumping or winding up before throwing something. Staging: This principle involves presenting an idea so that it is clear to the audience. The action or scene should be framed in a way that guides the viewer’s attention and clearly conveys the mood or message. Straight Ahead Action and Pose to Pose: Straight Ahead Action: Animating frame by frame from start to finish creates a more fluid, spontaneous feeling. Pose to Pose: Animators create key poses first and then fill in the in-between frames. This approach gives more control over the timing and structure of the animation. Follow Through and Overlapping Action: Follow Through: This refers to the continuation of movement after the main action. For example, a character’s hair or clothes continuing to move after they stop. Overlapping Action: This principle is about different parts of a character’s body moving at different times. For instance, when a character runs, the arms and legs don’t move together, but one follows the other. Slow In and Slow Out: This principle involves having more frames at the beginning and end of an action, and fewer in the middle. It helps create a more natural, realistic feel to movement by mimicking how things speed up and slow down. Arcs: Most natural actions follow a circular or arc-like path. By animating movements in arcs, you can make the action feel more fluid and lifelike. Secondary Action: Adding secondary actions to the main action adds depth and complexity to the scene. For example, a character walking might have their arms swinging, or a character smiling while they speak. Timing: This principle refers to the number of frames used for an action. More frames can make a movement slower and heavier, while fewer frames make it faster and lighter. Proper timing is crucial for conveying emotions and energy. Exaggeration: Exaggerating certain actions or expressions can make the animation more dynamic and entertaining. For example, a character’s reaction to surprise might be exaggerated to make it more comical or dramatic. Solid Drawing: This principle ensures that characters and objects are drawn with volume, weight, and balance. It makes the animation appear three-dimensional and more believable. Appeal: This refers to creating characters and scenes that are engaging, interesting, and visually pleasing. An appealing design, whether through facial expressions, body language, or overall style, keeps the audience connected with the animation. Together, these principles help animators create more lifelike, engaging, and emotionally resonant animations.
More detailsPublished - Mon, 06 Jan 2025
Created by - Anil Chauhan
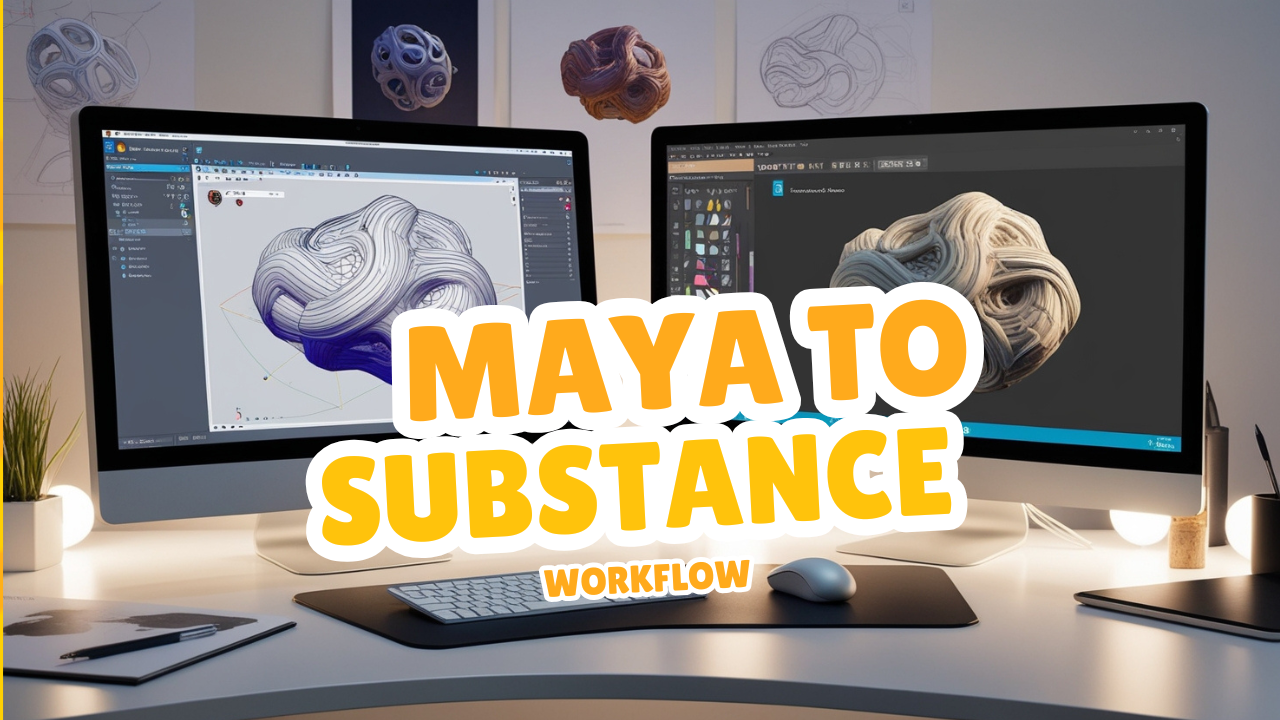
Maya to Substance workflow
The Maya to Substance workflow typically involves preparing a 3D model in Autodesk Maya and exporting it to Adobe Substance (e.g., Painter or Designer) for texturing. Here's a step-by-step guide:1. Modeling in Maya Create your model: Ensure your model is clean, with proper geometry (quads preferred for most workflows). UV Mapping: Unwrap the UVs to ensure a clean, non-overlapping UV layout. Use Maya's UV Editor for adjustments. Avoid stretching and ensure the UV shells are proportional to the object's scale. Freeze Transformations: Go to Modify > Freeze Transformations to reset object transformations. Delete History: Use Edit > Delete by Type > History to clean the scene of unnecessary data.https://www.youtube.com/watch?v=cgR5DqGK7UA&list=PLIi3DnFfUZQGTOlhaR4jpvCvmI_wF5hMC 2. Preparing for Export Apply Materials: Assign simple materials in Maya (e.g., Lambert or Blinn) to identify parts of your model. Use separate materials for different textures you want to apply in Substance Painter. Set Naming Conventions: Name meshes and materials clearly (e.g., Body_Mesh, Metal_Material). Triangulate the Mesh (optional): Some workflows prefer to triangulate the mesh to avoid unexpected issues in Substance Painter. Use Mesh > Triangulate if needed. Export as FBX or OBJ: Use File > Export Selection and choose FBX or OBJ format. In the export settings: Enable "Smoothing Groups." Include "Materials" and "Embed Media" (optional).https://www.youtube.com/watch?v=r1O4JEnznKo&list=PLIi3DnFfUZQGQ2pwEsb4-Vagq2iu42xsdhttps://www.youtube.com/watch?v=DYm6hGmpQlY&list=PLIi3DnFfUZQGufLSIMBcVUVJX47K8hfoGhttps://www.youtube.com/watch?v=rXJS-6wfcWchttps://www.youtube.com/watch?v=CSvU8odoqyM&list=PLIi3DnFfUZQHncQfJ023eEHnKfi5yKZ5t 3. Importing to Substance Painter New Project: Open Substance Painter and create a new project. Select your exported file (FBX or OBJ). Configure texture settings (e.g., resolution, bit depth). Bake Mesh Maps: Go to Texture Set Settings > Bake Mesh Maps. Bake maps like Normal, Ambient Occlusion, Curvature, and World Space Normal. Use a high-poly model for baking if applicable (select the high-poly mesh during the baking process). Apply Textures: Use Substance Painter's tools to paint and apply materials, smart materials, and masks.https://www.youtube.com/watch?v=s9Hp3g-H8vQ&list=PLIi3DnFfUZQEGPhhTUteT7a7u1NLNAaW- 4. Export Textures from Substance Painter Export Settings: Go to File > Export Textures. Select the appropriate preset for your target renderer (e.g., Arnold, V-Ray, or Unity). Set texture resolution and output format (e.g., PNG or EXR). Export Path: Choose a location for your exported textures. 5. Importing Textures Back into Maya Apply Textures: Import the textures (Base Color, Normal Map, Roughness, etc.) into Maya. Use the Hypershade editor to create a material (e.g., aiStandardSurface for Arnold). Connect the textures to the corresponding material attributes: Base Color → Base Color Normal → Bump Mapping (set to Tangent Space Normals) Roughness → Specular Roughness Adjust Lighting: Set up proper lighting in Maya for realistic rendering. 6. Rendering in Maya Use a renderer like Arnold for final output. Test render settings for quality and performance. Apply additional tweaks if necessary (e.g., HDRI environment for lighting). Tips for a Smooth Workflow Always check for scale consistency between Maya and Substance. Use Substance’s default UV Checker to ensure UVs are clean. Keep a clean project folder structure to avoid missing textures or files. Save versions of your files at key stages to avoid losing progress. Let me know if you need specific help with any of these steps!
More detailsPublished - Wed, 08 Jan 2025
Created by - Anil Chauhan
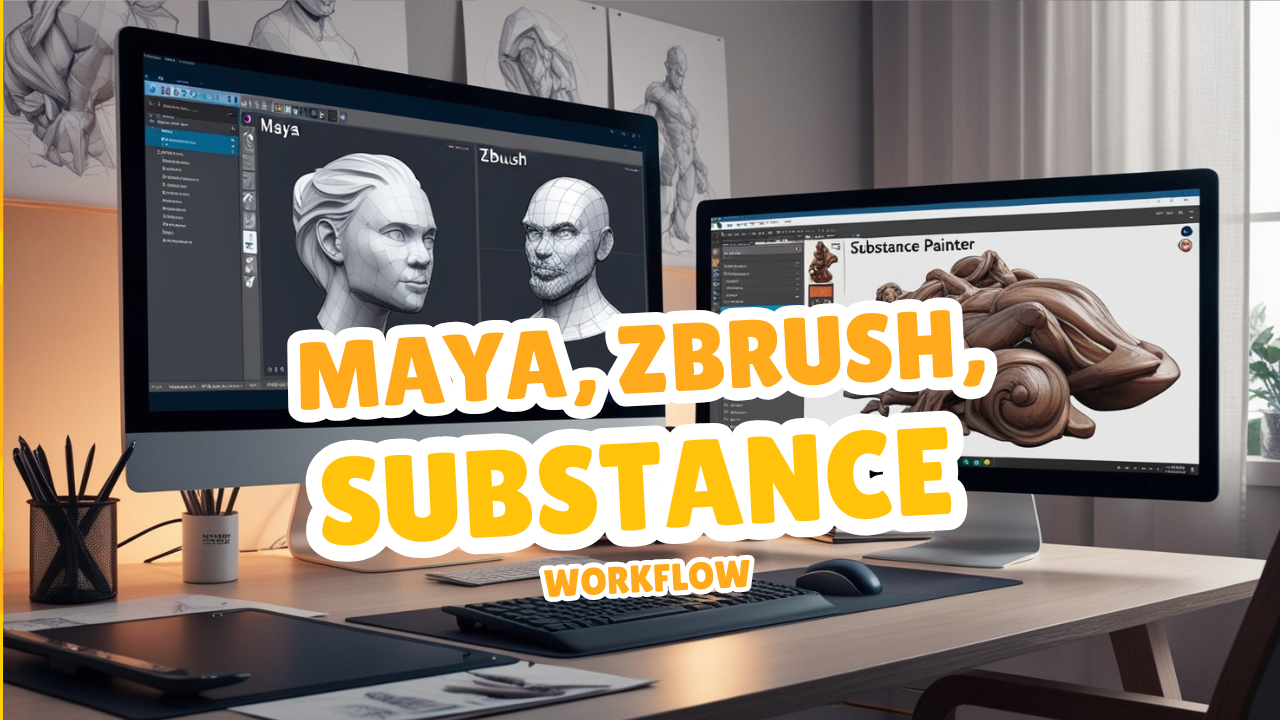
Maya, ZBrush, and Substance workflow
The Maya, ZBrush, and Substance workflow is a robust pipeline for creating high-quality 3D assets. Here's an overview:1. Modeling in Maya Base Mesh Creation: Start by modeling a low-poly base mesh in Maya. Ensure the topology is clean and well-structured (use quads for better subdivision). UV Unwrapping: Create a proper UV layout with non-overlapping UV shells in Maya. Save this UV layout for later use when texturing.https://www.youtube.com/watch?v=PHE2X64mM-0&list=PLIi3DnFfUZQFdg-MTdgpZi_FC1PiUP6uOhttps://www.youtube.com/watch?v=PHE2X64mM-0&list=PLIi3DnFfUZQFdg-MTdgpZi_FC1PiUP6uO 2. High-Resolution Sculpting in ZBrush Import Base Mesh: Export the low-poly model from Maya as an OBJ or FBX. Import it into ZBrush. Sculpt High-Poly Details: Subdivide the mesh in ZBrush and sculpt high-resolution details like wrinkles, pores, and textures. Use brushes, alphas, and masking for intricate details. Polypainting (optional): Apply vertex-based coloring directly in ZBrush, which can later guide texturing. Decimation or Retopology: If necessary, use ZBrush’s Decimation Master or ZRemesher to optimize the model for exporting. 3. Creating and Baking Maps Export High-Poly Model: Export the detailed high-poly model from ZBrush as an OBJ or FBX. Normal and Other Maps: Use Substance Painter or Maya to bake maps (e.g., Normal, Ambient Occlusion, Curvature) by comparing the high-poly and low-poly models. 4. Import to Substance Painter Set Up New Project: Import the low-poly mesh with UVs into Substance Painter. Bake Mesh Maps: Bake Normal, AO, Curvature, and other maps using the high-poly model. Texture Painting: Apply smart materials, masks, and custom textures in Substance Painter. Use the maps from ZBrush as a guide for detailing.https://www.youtube.com/watch?v=WUJ2HlNz3q4&list=PLIi3DnFfUZQGWowx5DIlqGozzJwGw7Olq 5. Export Textures Choose Export Settings: Export textures from Substance Painter with presets for your rendering engine (Arnold, V-Ray, Unreal Engine, etc.). Output Maps: Export Base Color, Normal, Roughness, Metalness, and AO maps. 6. Finalizing in Maya Import Textures: Bring the Substance Painter textures into Maya. Apply Materials: Use Hypershade to assign and connect the maps to a material (e.g., aiStandardSurface for Arnold). Base Color → Base Color Normal Map → Bump Mapping (set to Tangent Space Normals) Roughness → Specular Roughness Set Up Lighting and Rendering: Add HDRI lighting or a custom light setup. Render the final image or animation using Arnold, Redshift, or another renderer.https://www.youtube.com/watch?v=GKPMrKfKRW0 Tips for an Efficient Workflow Maintain consistent scaling and orientation between Maya, ZBrush, and Substance Painter. Use clear naming conventions for models and textures. Regularly save your progress in each application. Use a version control system if working in a team. Let me know if you need specific details for any part of this workflow!
More detailsPublished - Wed, 08 Jan 2025
Created by - Anil Chauhan
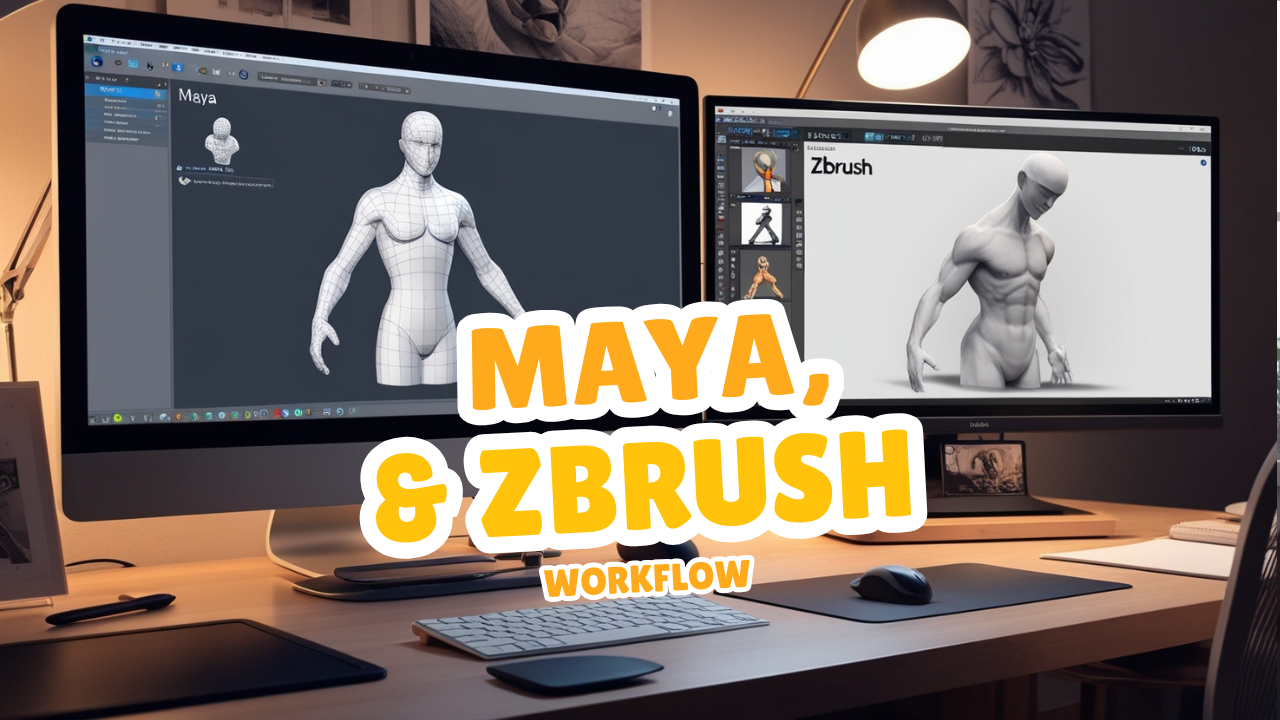
Maya and ZBrush workflow
The Maya and ZBrush workflow is ideal for creating high-quality 3D models, combining Maya’s modeling and animation tools with ZBrush’s powerful sculpting capabilities. Here's a step-by-step guide:1. Modeling in Maya Create a Base Mesh: Start with a low-poly base model in Maya. Ensure proper topology with quads for smooth subdivision in ZBrush. UV Mapping (optional at this stage): If you plan to sculpt details directly, UV mapping isn't necessary in Maya before exporting to ZBrush. However, creating a UV layout early can be useful for texturing later. Optimize Geometry: Clean up the model, remove unnecessary faces, and ensure a good edge flow. 2. Importing to ZBrushhttps://www.youtube.com/watch?v=KlpCMrVmQRw&list=PLIi3DnFfUZQHh8DfzkXZkv8SINdpZb7oo Export Base Mesh from Maya: Export the low-poly base model as an OBJ or FBX. Import to ZBrush: Open ZBrush and import the base mesh. Subdivide the Mesh: Increase the subdivision levels to add more geometry for detailed sculpting. Sculpting High-Poly Details: Use ZBrush tools like brushes, masking, and alphas to sculpt fine details (e.g., wrinkles, pores, or patterns). Symmetry: Use symmetry tools for uniform sculpting on both sides of the model.https://www.youtube.com/watch?v=--F-0uYchqEhttps://www.youtube.com/watch?v=NzPGT_9DF1Ehttps://www.youtube.com/watch?v=3_2B533RC1chttps://www.youtube.com/watch?v=JNvrASuuxwIhttps://www.youtube.com/watch?v=Zj99wW9eDK0https://www.youtube.com/watch?v=-Lsay7Ais-w&list=PLIi3DnFfUZQHflrvxxjEzDKCQH-NMNR9phttps://www.youtube.com/watch?v=f6KGosgFg8E 3. Retopology and UV Mapping Retopologize in ZBrush: Use ZRemesher to create a clean, optimized low-poly mesh suitable for animation or export back to Maya. UV Mapping in ZBrush or Maya: Create UV maps in ZBrush using UV Master or export the retopologized mesh back to Maya for detailed UV unwrapping.https://www.youtube.com/watch?v=AsANHrxHLlghttps://www.youtube.com/watch?v=M4k3pHs-uqghttps://www.youtube.com/watch?v=kZL_InsGpfMhttps://www.youtube.com/watch?v=W7J3a8pkFOEhttps://www.youtube.com/watch?v=8ejYoxjrgTQ 4. Baking Maps Generate Normal and Displacement Maps: In ZBrush, bake Normal and Displacement maps using the high-poly and low-poly meshes. These maps capture fine details from the high-poly sculpt and apply them to the low-poly model. Export Maps: Export the baked maps (e.g., Normal, Displacement) for use in Maya or other software. 5. Importing Back to Maya Load the Low-Poly Model: Import the retopologized, low-poly mesh back into Maya. Apply Maps: Use Hypershade to connect Normal and Displacement maps to the material (e.g., aiStandardSurface for Arnold). Normal Map → Bump Mapping (set to Tangent Space Normals). Displacement Map → Displacement Shader. Adjust Settings: Fine-tune displacement values for optimal rendering.https://www.youtube.com/watch?v=sqXdSUMq-4Yhttps://www.youtube.com/watch?v=TaE9-gId93Qhttps://www.youtube.com/watch?v=sLzcXtoJgAchttps://www.youtube.com/watch?v=Zj99wW9eDK0 6. Lighting and Rendering Set Up Lights: Use HDRI or physical lights in Maya for realistic illumination. Render with Arnold or Other Engines: Use Maya's Arnold renderer or another engine to render the model with all the sculpted details applied. Optional: Texturing Workflow If needed, export the low-poly model with maps to Substance Painter or another texturing tool for painting and creating PBR textures. Tips for a Smooth Workflow Maintain consistent scaling between Maya and ZBrush. Save incremental versions of your files. Use ZBrush’s GoZ feature for a seamless connection between ZBrush and Maya. Optimize the mesh for animation or game-ready assets by keeping polygon count manageable. Let me know if you'd like to explore a specific step in more detail!
More detailsPublished - Wed, 08 Jan 2025
Created by - Anil Chauhan
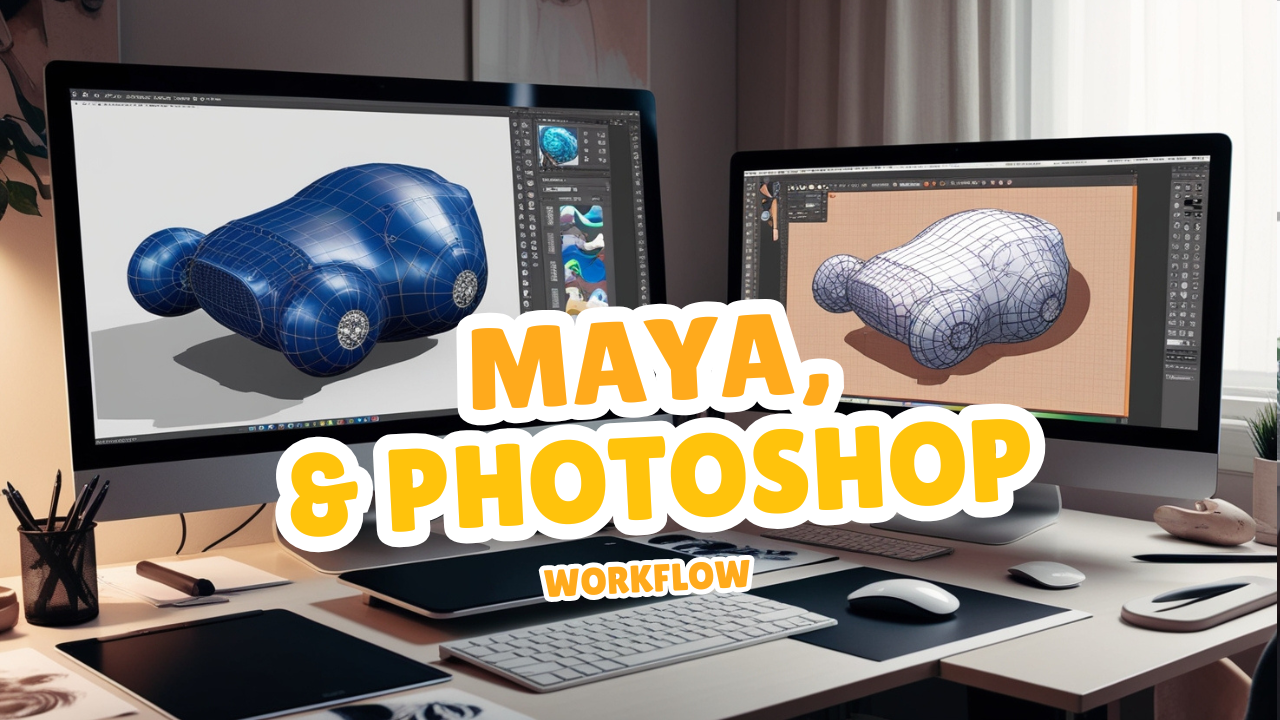
Maya and Photoshop workflow
The Maya and Photoshop workflow is a powerful combination for 3D modeling, UV mapping, and texture creation or editing. This workflow allows you to create models in Maya and then use Photoshop for painting or refining textures. Here's a detailed guide:1. Modeling in Maya Create a 3D Model: Build a low-poly or high-poly model in Maya, ensuring clean topology. UV Mapping: Unwrap the model's UVs in Maya's UV Editor. Organize UV shells for efficiency and ensure no overlapping areas. Export the UV layout as an image for use in Photoshop: In the UV Editor, go to Image > UV Snapshot, choose the resolution and format, and save the UV map. 2. Texture Creation in Photoshop Import the UV Map: Open the exported UV snapshot in Photoshop. Use it as a guide on a separate layer for painting textures. Create Layers: Use multiple layers for Base Color, Shadows, Highlights, and Details. Apply brushes, gradients, and textures to enhance the appearance. Add Detail: Use blending modes and filters for realistic effects (e.g., fabric patterns, metallic scratches). Save Textures: Save the file in PSD format for future editing and export a flattened version in formats like PNG or JPG. 3. Importing Textures Back into Maya Apply Textures: Open the Hypershade in Maya and create a material (e.g., aiStandardSurface for Arnold). Connect the texture created in Photoshop to the material’s Base Color or other properties (e.g., Roughness or Bump Map). Assign Material: Apply the material to your 3D model in the viewport. Adjustments: Preview the texture on the model and return to Photoshop to tweak the texture if necessary.https://www.youtube.com/watch?v=1Utlg0Skeuo&list=PLIi3DnFfUZQEScQ-euXGEtGk_rhg_694X 4. Lighting and Rendering Set Up Lighting: Add lights in Maya (e.g., directional light, area light, or HDRI). Test Renders: Render the model using Arnold or another renderer to evaluate texture appearance. Refine: If the texture looks off, go back to Photoshop, make adjustments, and re-export.https://www.youtube.com/watch?v=jDACsLGdyus&list=PLIi3DnFfUZQHDt3b4L6NIvloLk5i44Z11https://www.youtube.com/watch?v=xPKjlMR2ByA 5. Optional: Texture Baking If working with Normal Maps, Ambient Occlusion, or Displacement Maps, bake them in Maya or another software and refine them in Photoshop. Load baked maps into Photoshop for retouching, adding details, or enhancing realism.https://www.youtube.com/watch?v=5hwlcmSoVdohttps://www.youtube.com/watch?v=lQ9cpiNx9j4https://www.youtube.com/watch?v=a6WzEyJHhPYhttps://www.youtube.com/watch?v=DynXhzx6YwMhttps://www.youtube.com/watch?v=1r_aIwGRpQ8 Tips for a Smooth Workflow Use non-destructive workflows in Photoshop (e.g., Adjustment Layers). Keep your UV layout visible but separate from texture layers to avoid overwriting it. Organize layers in Photoshop for clarity (e.g., group Base Colors, Highlights, etc.). Save iterative versions of your files for backups. Let me know if you'd like more specific steps or examples for this workflow!
More detailsPublished - Wed, 08 Jan 2025
Created by - Anil Chauhan
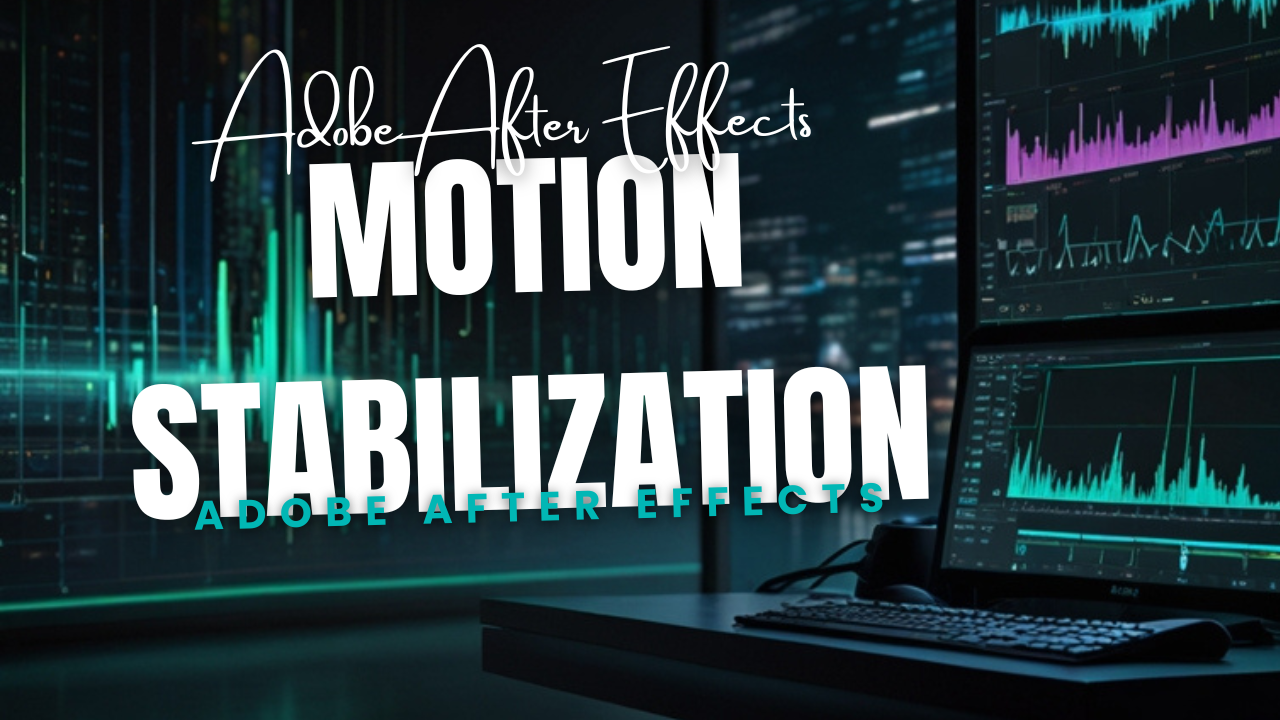
Motion stabilization in Adobe After Effects
Motion stabilization in Adobe After Effects is a process used to smooth out shaky or jittery footage, making it appear more stable. This is commonly done using the Warp Stabilizer effect, though there are other manual techniques for more precise control. Here's how to perform motion stabilization using Warp Stabilizer:Using Warp Stabilizer Import Your Footage: Open After Effects and import your footage into the project panel. Drag your footage onto the timeline. Apply the Warp Stabilizer Effect: Select the footage layer in your timeline. Go to the Effects & Presets panel (or the top menu bar) and search for "Warp Stabilizer." Drag and drop the Warp Stabilizer effect onto your footage. Let It Analyze: The Warp Stabilizer effect will automatically analyze the footage. This process may take some time depending on the length and resolution of the clip. Once the analysis is complete, it will automatically stabilize the footage. Adjust Settings (if needed): In the Effect Controls panel, tweak the settings to suit your needs: Smoothness: Controls how much stabilization is applied (default is 50%). Increase or decrease this based on the look you want. Method: Choose the stabilization method: Position: Corrects only position. Position, Scale, Rotation: Stabilizes more dimensions but may crop the footage. Perspective: Corrects perspective distortions. Subspace Warp: Provides the most advanced stabilization by warping parts of the frame. Borders: Stabilize Only: No cropping is applied; you see the movement. Stabilize, Crop: Crops the footage but leaves black borders. Stabilize, Crop, Auto-scale: Automatically scales up the footage to remove black borders. Preview the Result: Play back the stabilized footage to ensure it meets your expectations. Make further adjustments if necessary. Manual Stabilization (Advanced Control)For more control, you can stabilize manually using tracking tools: Track Motion: Select your footage layer and go to the Tracker Panel. Click Track Motion and choose the tracking points for stabilization. Apply Tracking Data: Assign the tracking data to a null object or directly to the footage. Use expressions to stabilize specific motion. Adjust Keyframes: Manually fine-tune the position, scale, and rotation keyframes to achieve the desired stabilization.https://www.youtube.com/watch?v=NM9z7F_LUE0 Tips for Better Results Footage Quality: High-quality footage with clear reference points will yield better results. Avoid Over-Stabilization: Over-stabilizing can introduce unnatural warping or distortions. Test Different Methods: Experiment with various stabilization settings to find the best fit for your footage. Would you like guidance on a specific scenario or setting?
More detailsPublished - Thu, 09 Jan 2025
Search
Popular categories
Adobe After Effects 2025
28Unreal Engine
14zbrush
10Maya Animation
8zbrush tutorial jewelry
7Maya 2025
6Latest blogs
Mesh |Edit Mesh|Mesh Tools
8 Hours Ago

Advanced Editing Techniques
17 Hours Ago

Introduction to Level Design Through Blocking in Unreal Engine
2 Days Ago
Write a public review