
Created by - Anil Chauhan
Autodesk Maya, UV unwrapping
In Autodesk Maya, UV unwrapping is the process of mapping a 3D model’s surface to a 2D plane so that textures can be applied to the model. This process is essential for texturing in 3D modeling, as it allows artists to paint or project textures accurately on the model's surface.Key Concepts of UV Unwrapping in Maya: UV Coordinates: Every point on a 3D model's surface has a corresponding 2D coordinate system called UVs. These UV coordinates are analogous to latitude and longitude on Earth and map to the 3D surface of your model. Textures are painted or projected onto these UV coordinates. UV Mapping: UV Mapping involves unfolding a 3D model's surface into a 2D representation, similar to how you might unwrap the surface of a 3D object (like a cube or a cylinder) into a flat sheet. This 2D map can then be used to paint or apply textures. The goal of UV mapping is to create a non-distorted, well-organized layout of the UVs, where textures will appear correctly when applied. Unwrapping Process: In Maya, unwrapping typically involves the following steps: Seams: These are the edges where the 3D mesh will be "cut" to unfold it into 2D. Seams are crucial in controlling how the unwrapping is done and where the texture will align. Unfolding: After placing the seams, Maya uses algorithms to unfold the mesh into a 2D layout. Packing: Once the mesh is unwrapped, the UV islands (the 2D representation of different parts of the mesh) are arranged and packed efficiently into a 0-1 texture space. This ensures optimal use of the texture map. UV Editing in Maya: Maya provides tools like the UV Editor to visualize and manipulate UV coordinates. In this editor, you can see the UV layout of the model and adjust it manually. You can scale, rotate, move, and stitch UV islands to refine the texture mapping. Maya also provides options to align UVs and optimize space usage. Types of UV Mapping in Maya: Automatic Mapping: Maya automatically generates UVs, usually by projecting them from the top, front, side, or other perspectives. Planar Mapping: This type of mapping is useful for objects that are roughly flat and works by projecting from one direction. Cylindrical Mapping: This method is ideal for objects with a cylindrical shape, like pipes, where the mapping is done by wrapping the model like a cylinder. Spherical Mapping: This mapping works best for spherical or rounded objects by projecting the UVs from a center point, like peeling an orange. Pelt Mapping: This technique involves flattening a 3D surface into 2D, which can reduce stretching and distortions. It's particularly useful for organic shapes like characters. Using the UV Toolkit in Maya: Maya’s UV Toolkit provides several tools to help with UV unwrapping, including commands for adding seams, unfolding the mesh, relaxing UVs, and optimizing the UV layout for better texture space usage. Challenges in UV Unwrapping: Proper unwrapping can be challenging, especially for complex meshes. Artists need to minimize visible seams and texture stretching, which often requires manual adjustments. Avoiding distortion in the texture and ensuring that the UV layout is efficient (uses the texture space well) are important aspects of the process.Creating UV maps in Autodesk Maya involves several methods, depending on the complexity of the model and the specific needs for texturing. Here's a step-by-step overview of the most common UV mapping techniques in Maya:1. Automatic UV MappingBest for: Quick UV generation with minimal manual effort, often used for complex shapes. Steps: Select the model. Go to UV > Automatic in the Modeling menu set. Maya creates UV shells based on the shape of the object. Adjust and arrange the UV shells in the UV Editor. 2. Planar MappingBest for: Flat surfaces or objects visible predominantly from one angle. Steps: Select the faces to map. Go to UV > Planar. Choose the projection axis (X, Y, or Z). Adjust the UVs in the UV Editor as needed. 3. Cylindrical MappingBest for: Cylindrical shapes like bottles or pipes. Steps: Select the object or faces to map. Go to UV > Cylindrical. Adjust the manipulator to fit the object. Use the UV Editor for fine-tuning and layout. 4. Spherical MappingBest for: Spherical objects like balls or planets. Steps: Select the object or faces to map. Go to UV > Spherical. Adjust the manipulator to fit the sphere. Edit UVs to prevent overlaps or distortions. 5. Camera-Based UV MappingBest for: Creating UVs based on the camera's current perspective. Steps: Select the object or faces. Go to UV > Camera-Based. The UVs will reflect the view of the camera. 6. Automatic Unwrapping (UV Unfold & Layout)Best for: Organizing and optimizing UVs for detailed texturing. Steps: Open the UV Editor (Windows > UV Editor). Select UV shells. Use Unfold to relax UVs. Use Layout to arrange UVs in 0-1 space. 7. Cutting and Sewing UV EdgesBest for: Custom UV creation with precise control over seams. Steps: Select edges to cut using the UV Editor. Go to Cut UV Edges. Move and arrange UV shells. Use Sew UV Edges to stitch UV shells together. Tips for Efficient UV Mapping: Use Checker Textures to check for stretching or distortion. Keep UVs within the 0-1 space for standard texturing workflows. Minimize seams in visible areas. Use tools like UV Toolkit (accessible via the UV Editor) for additional functionality. Let me know if you'd like detailed steps for any specific method! ???? Benefits of Proper UV Unwrapping: Accurate Texture Application: With well-unwrapped UVs, textures will apply seamlessly to the 3D model, avoiding stretching or misalignment. Efficient Texture Use: A good UV layout ensures that the texture space is used efficiently, which is especially important in game development or animation where texture memory is limited. Flexibility: With proper UV unwrapping, artists can paint or apply complex textures with greater control, enhancing the final visual quality of the model. In summary, UV unwrapping is a fundamental technique in 3D modeling, especially for texturing. Maya provides several tools to automate and assist in this process, but mastering manual unwrapping ensures the highest quality results for 3D models.In Maya, there are several methods of UV unwrapping that are used depending on the shape and complexity of the 3D model. Here are the main types of unwrapping techniques: Automatic Mapping: Maya automatically generates a set of UV coordinates for the object. It does this by projecting the UVs from different views (top, front, side) or a default projection type. This method is fast but often results in overlapping UVs and poor texture space utilization, requiring further adjustments. Planar Mapping: This method projects the UVs onto the model from a single plane, such as from the top, front, or side. It works best for flat or relatively simple shapes, like walls, floors, or any objects with large flat surfaces. While simple and fast, planar mapping can cause distortions on more complex or curved objects. Cylindrical Mapping: Cylindrical mapping is used for objects with a cylindrical shape, such as pipes, bottles, or legs. This projection technique wraps the model like a cylinder, allowing it to be unwrapped without much distortion along the curved surface. However, the ends of the cylinder often require additional manipulation. Spherical Mapping: Spherical mapping projects the UVs onto the model from a spherical perspective, which is ideal for round objects like balls or heads. The UVs are projected from a central point in all directions. While effective for spherical objects, it can lead to distortion at the poles (top and bottom) of the sphere. Unfold Mapping: This technique uses algorithms to unfold the 3D model into a 2D representation with minimal distortion. Maya's Unfold tool in the UV Editor uses these algorithms to optimize the unfolding process, giving more control over the results. This is a more advanced method, especially useful for organic shapes or complex models. Pelt Mapping: Pelt mapping is a more advanced unwrapping technique that involves cutting the mesh along seams and "peeling" the surface like a piece of fabric. This is useful for organic, complex shapes (like characters) and helps minimize texture stretching by unfolding the model in a way that is close to how it would behave in real life. Camera-Based (Projection Mapping): This method allows you to project the UVs from a camera view. It is helpful for specific situations where you want to apply a texture that has been projected onto the object from a particular viewpoint, such as in matchmoving or when applying complex textures like decals. Cutting (Manual Seams): Manual seams involve selecting edges on the mesh and creating cuts, which allows you to control where the object "unfolds" or "unwraps." After adding seams, you can use Maya's unfolding tools to flatten out the surface. This is a flexible and controlled approach for more intricate unwrapping, especially for hard-surface models. Each of these unwrapping methods has its own strengths and weaknesses, and they can often be combined for the best results depending on the object being worked on. For example, you may start with automatic or cylindrical mapping and refine it with manual seams and unfold mapping to get the best UV layout.
More detailsPublished - Tue, 31 Dec 2024
Created by - Anil Chauhan
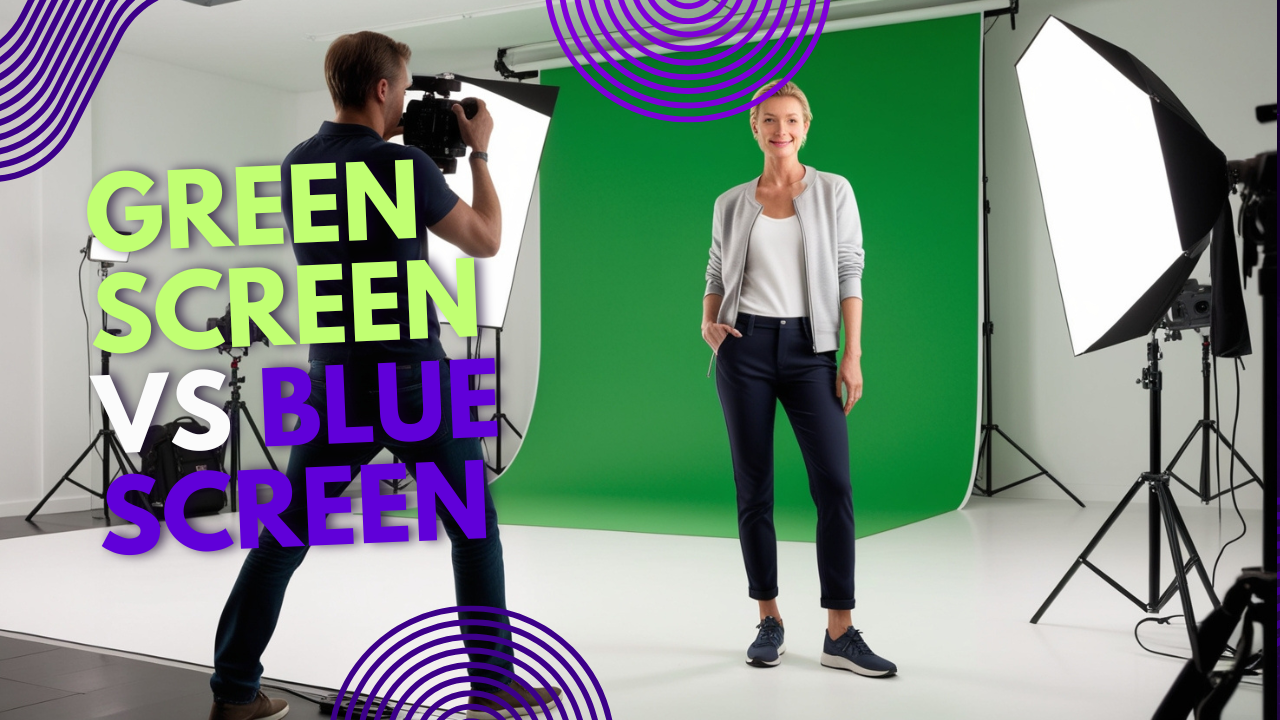
Green screen and blue screen
In After Effects, a green screen (also known as chroma keying) is a technique used to remove a specific color (typically green) from a video clip, allowing the background to be replaced with different footage or imagery. Here's a detailed description of how green screen works within After Effects: Key Concepts: Chroma Keying Process: The first step is to isolate the green background using the chroma key effect. The green color is removed, and the pixels that matched it are made transparent, leaving the subject or objects in the foreground. The transparent areas can then be replaced with any background, such as video footage, images, or graphics.https://www.youtube.com/watch?v=UfGGSR6-Kks Green Screen Effect (Keylight): In After Effects, the most commonly used tool for green screen work is the Keylight effect. The Keylight effect allows the user to specify the color they want to remove (usually green or blue) and adjusts settings such as screen gain, screen balance, and screen softness to ensure the edges of the subject are clean and the keying looks natural.https://www.youtube.com/watch?v=VrH-O7aKWLc Fine-Tuning: Edge Refinement: After applying the key, you often need to refine the edges of the subject to remove any residual green spill that may still appear on the edges of the subject, especially on hair or fine details. This can be done with various settings in Keylight or with additional effects like Spill Suppression. Matte Choking: To get rid of unwanted edges and to make the key more precise, the matte choking technique is used. This tightens or expands the transparent areas around the subject. Feathering: Soften the edges of the matte (the transparent area) to make the transition between the subject and the new background more natural. Replacement of Background: Once the green screen is keyed out, you can place any new background or visual element behind the subject. This could include a 3D environment, animated visuals, or real-world footage. In After Effects, you can track the camera or subject's motion to ensure that the new background moves accordingly.https://www.youtube.com/watch?v=p0Pe5v0aXzY Advantages of Using Green Screen in After Effects: Flexibility: Green screens allow filmmakers and editors to place subjects in environments that may be difficult, expensive, or impossible to shoot in reality. Precision: After Effects offers powerful tools for fine-tuning the green screen effect, making it a great choice for high-quality professional results. Integration with Other Effects: After Effects makes it easy to combine chroma keying with other advanced visual effects, such as motion graphics, particle systems, and compositing. Common Use Cases: Film and TV: For placing actors in complex environments, like fantasy worlds, or for CGI-heavy scenes. Weather Forecasts: Used in news broadcasts where the presenter is positioned in front of a map or weather graphic. Virtual Sets: In studio productions, where a green screen is used to create virtual backgrounds for talk shows or live performances. YouTube and Content Creation: For vloggers and creators to place themselves into different environments, such as gaming streams or special effects-heavy videos. This green screen process in After Effects gives creators the ability to manipulate and composite footage seamlessly for dynamic and visually captivating results.https://www.youtube.com/watch?v=TU8VVtehflcGreen screen and blue screen are techniques used in video production and photography to create special effects by replacing a solid-colored background with different images or footage. Here's a breakdown of both:Green Screen (Chroma Keying) Color: Green is typically used because it is not a color commonly found in skin tones, making it easier to isolate the background from the subject. Usage: The background behind the subject is a bright green color, which is then replaced (keyed out) by digital imagery or video during post-production. Advantages: Higher contrast with skin tones: Most people’s skin tones do not contain much green, making it easy to separate the subject from the background. Works well with most modern cameras: Green is bright and can be captured effectively by cameras, making it easier to work with in editing software. Common Uses: Weather broadcasts, movie special effects, video games, and virtual sets.https://www.youtube.com/watch?v=6PYqGsJCJeU Blue Screen (Chroma Keying) Color: Blue is the alternative to green and is used for similar purposes. Usage: Like green screen, blue screen involves shooting with a blue background, which is then digitally replaced with another image or video. Advantages: More suitable for certain subjects: Blue is sometimes preferred over green, especially if the subject has green colors in their wardrobe or the scene has a lot of greenery, as it avoids blending with the background. Works well for darker skin tones: Blue tends to contrast better with darker skin tones compared to green. Common Uses: Same as green screen, but sometimes used in cases where green might interfere with other elements in the shot. Key Differences Color Choice: Green is brighter and often easier to work with, while blue might be chosen depending on the subject matter or lighting conditions. Lighting Considerations: Both techniques require the background to be evenly lit to prevent shadows or variations in color that could complicate post-production keying.https://www.youtube.com/watch?v=YlQrhQv778c In both techniques, once the background is removed, you can insert virtually any kind of image or footage to replace it, creating the illusion that the subject is somewhere else entirely (e.g., in space, on a different planet, or in front of a digital set).https://www.youtube.com/watch?v=C2BatTa8zdIBoth green screen and blue screen are commonly used in chroma keying, a technique in filmmaking and video production to remove a background and replace it with a different image or scene. While they serve the same purpose, they differ in certain characteristics, and the choice between them depends on the situation. Here’s a breakdown:1. Color Choice and Background Compatibility Green Screen: Green is the most commonly used color because it is the least likely to match human skin tones, hair colors, and clothing, making it easier to separate the subject from the background. It's brighter and requires less lighting power compared to blue, which helps with cleaner keying. Ideal for outdoor shooting: When shooting in natural light, green often works better as it stands out more against typical environments. Blue Screen: Blue is often used when the subject has green in their outfit or props, as the blue will be less likely to overlap with those colors. It’s more common in situations where the subject is surrounded by green (like forest settings) or when skin tones are darker. Works better for skin tones with more red or yellow hues, such as in Caucasian or Asian actors with light skin, where green might cause some issues. 2. Lighting and Technical Factors Green Screen: Green is much brighter, so it often requires less lighting to achieve the same level of brightness. Ideal for high-resolution footage: It captures a cleaner image with less noise, especially in bright settings. Blue Screen: Blue is darker and can require more lighting to properly key out. It can sometimes result in more noise in low-light situations. Blue can be harder to work with in terms of keying and compositing, as it tends to be a bit more challenging to separate from similar colors. 3. Post-production and Editing Green Screen: Green is typically easier to key out because it's a more distinct and brighter color, giving better contrast with most skin tones. The use of green allows for more flexibility when it comes to compositing complex images and backgrounds. Blue Screen: In some cases, blue can create more issues when compositing, especially when fine details such as hair or transparent objects are involved, since blue may spill onto edges and details. Some special effects, like reflections or fog, may work better with a blue screen. 4. Choosing Based on Subject Green Screen: Better for most general use, including actors, animated characters, and special effects involving objects or backgrounds that don't have green. Blue Screen: Useful when dealing with subjects that are wearing green, or if the background or lighting necessitates blue over green. Conclusion: Green screens are preferred for most shoots due to their brightness and cleaner keying, especially when working with daylight and modern cameras. Blue screens are still used, especially in situations where green might conflict with the subject's colors or in certain visual effects workflows. Ultimately, it depends on the subject, lighting conditions, and intended effects in post-production!
More detailsPublished - Thu, 02 Jan 2025
Created by - Anil Chauhan
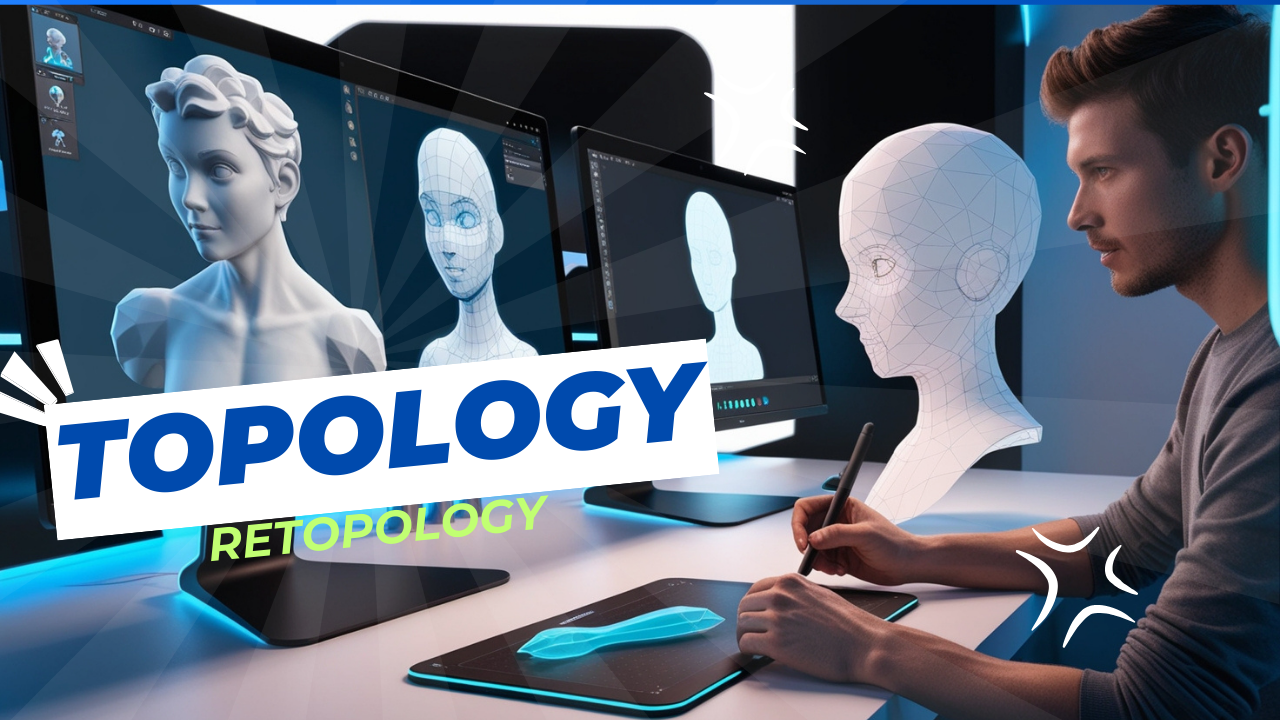
Topology
Topology can refer to different concepts depending on the context. Here are the primary meanings:Mathematics:Topology is a branch of mathematics dealing with the properties of space that are preserved under continuous transformations such as stretching or bending but not tearing or gluing. It involves concepts like: Open and closed sets Continuous functions Topological spaces Homeomorphisms (shape equivalence) Applications in fields like geometry, analysis, and algebra. 3D Modeling (Computer Graphics):In 3D modeling, topology refers to the arrangement of edges, faces, and vertices in a 3D mesh. Good topology ensures: Clean edge flow for deformation (e.g., rigging and animation) Reduced artifacts in rendering Optimized performance in real-time engines (e.g., games) Network Topology:In computer science, topology describes the arrangement of elements in a network, such as nodes and connections. Common types include: Bus Star Ring Mesh Let me know if you'd like detailed information on any specific context! ????Retopology is the process of creating a new, optimized mesh topology over an existing high-resolution 3D model. It is widely used in 3D modeling and animation workflows, especially in industries like gaming, VFX, and virtual reality.Why Retopology Is Needed: High-Poly Models from Sculpting: Sculpting software like ZBrush or Blender often generates very dense meshes with millions of polygons that aren't suitable for animation or real-time rendering. Clean Topology: Retopology creates a clean, evenly distributed mesh with good edge flow, making it easier to animate and work with. Performance Optimization: Retopologized models are lightweight and more efficient for real-time applications, like games. UV Mapping: Clean topology helps with efficient and distortion-free UV unwrapping for texturing. Steps in Retopology: Import the High-Res Model: Start with the dense, detailed mesh as a reference. Create the New Low-Poly Mesh: Use retopology tools to draw or generate a new topology over the high-res model. Match the Details: Project high-resolution details onto the new low-poly mesh using normal maps or displacement maps. Refine and Optimize: Adjust edge loops and ensure proper density for animation deformations. Tools for Retopology: Blender: Retopology tools and shrinkwrap modifier. ZBrush: ZRemesher for automated retopology. Maya: Quad Draw in the Modeling Toolkit. 3DCoat: Dedicated retopology features. TopoGun: Specialized software for retopology. Would you like a guide or workflow for retopology in a specific software? ????
More detailsPublished - Fri, 03 Jan 2025
Created by - Anil Chauhan
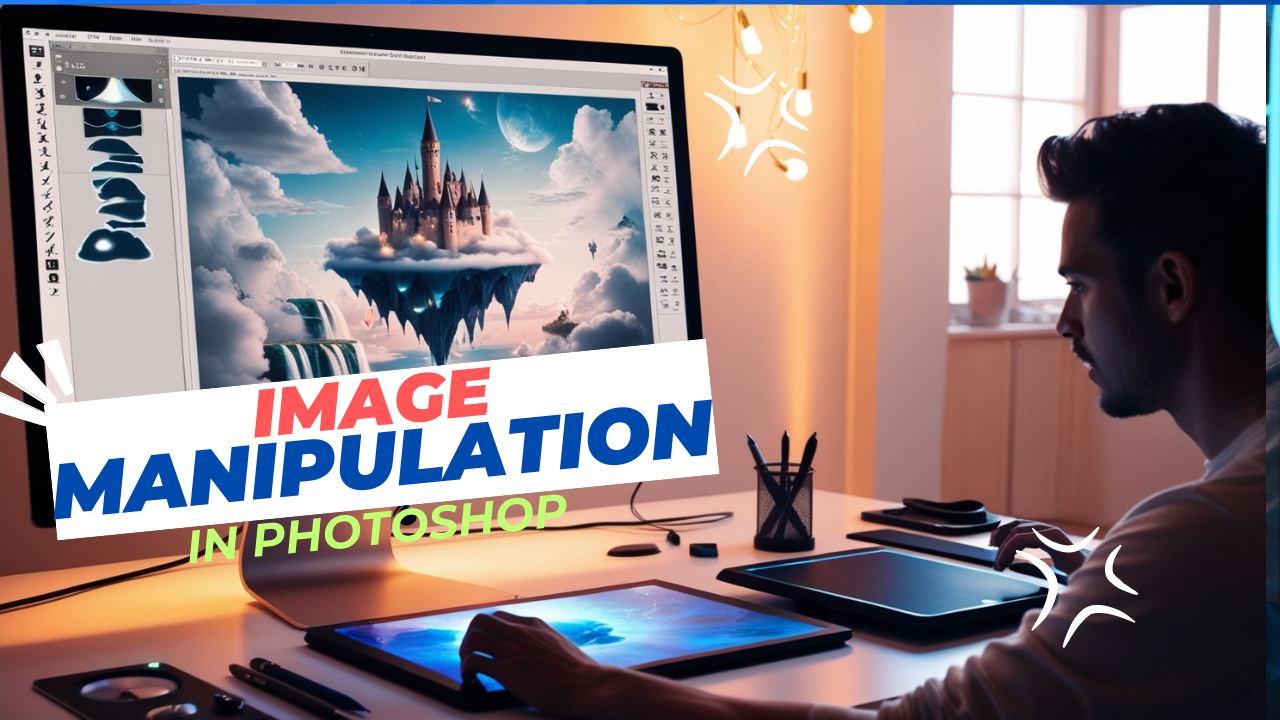
Image manipulation in Photoshop
Image manipulation in Photoshop refers to the process of altering or enhancing an image using the software’s wide range of tools and techniques. It can be used for everything from basic photo editing to creating surreal, artistic compositions. Here's a breakdown:Key Techniques in Photoshop Image Manipulation1. Basic Adjustments Description: Involves improving the overall look of an image. Tools/Features: Brightness/Contrast: Adjust light and dark areas. Levels & Curves: Fine-tune shadows, midtones, and highlights. Hue/Saturation: Change color intensity or overall tone. Color Balance: Shift color emphasis (e.g., warmer or cooler tones). 2. Retouching Description: Removing blemishes, imperfections, or unwanted elements. Tools/Features: Healing Brush/Spot Healing Tool: Fix small imperfections like acne or scratches. Clone Stamp Tool: Duplicate specific parts of an image for seamless fixes. Content-Aware Fill: Remove objects and fill spaces intelligently. Liquify Tool: Adjust shapes or distortions, commonly used for face/body adjustments. 3. Compositing Description: Combining multiple images or elements into one cohesive scene. Tools/Features: Layers & Masks: Manage different elements in a non-destructive way. Blend Modes: Control how layers interact visually. Selections (e.g., Quick Selection, Lasso): Isolate specific areas for editing. Pen Tool: Create precise paths and shapes. 4. Advanced Transformations Description: Changing the perspective, size, or position of objects. Tools/Features: Free Transform: Resize, rotate, skew, or warp elements. Perspective Warp: Adjust the perspective of an object. Puppet Warp: Bend or manipulate specific areas of an image, like limbs. 5. Creative Effects Description: Adding artistic flair or dramatic effects. Tools/Features: Filters (e.g., Gaussian Blur, Motion Blur): Create depth or simulate movement. Adjustment Layers (e.g., Gradient Map, Photo Filter): Stylize images non-destructively. Layer Styles (e.g., Glow, Drop Shadow): Add depth and emphasis to objects or text. 6. Text and Graphic Integration Description: Adding and manipulating text or graphic elements. Tools/Features: Text Tool: Create and style text. Shape Tool: Add geometric or custom shapes. Smart Objects: Import scalable graphics or editable layers. 7. Special Effects Description: Creating surreal or dramatic edits. Techniques: Double Exposure: Overlay two images with transparency. Surreal Edits: Use masks, blending, and brushes to create fantasy scenes. Dispersion Effects: Simulate particles breaking apart using layer masks and brushes. Workflow for Image Manipulation Prepare the Image: Open and duplicate the original layer for non-destructive editing. Analyze the Needs: Decide what changes are needed (e.g., retouching, adding elements, or applying effects). Apply Edits Step-by-Step: Use layers and adjustment layers for flexibility. Blend and Refine: Match lighting, color, and perspective between elements. Final Touches: Sharpen, add noise, or adjust color grading for a polished look. Export: Save in the desired format (JPEG, PNG, PSD) depending on usage. Applications of Photoshop Image Manipulation Photography Retouching: Enhancing portraits, landscapes, or products. Advertising: Creating attention-grabbing visuals. Art and Design: Crafting digital art or surreal compositions. Film and Media: Designing posters or promotional material. Social Media: Creating engaging posts and stories. Let me know if you'd like to dive into a specific technique or need step-by-step instructions for any process! ????
More detailsPublished - Fri, 03 Jan 2025
Created by - Anil Chauhan
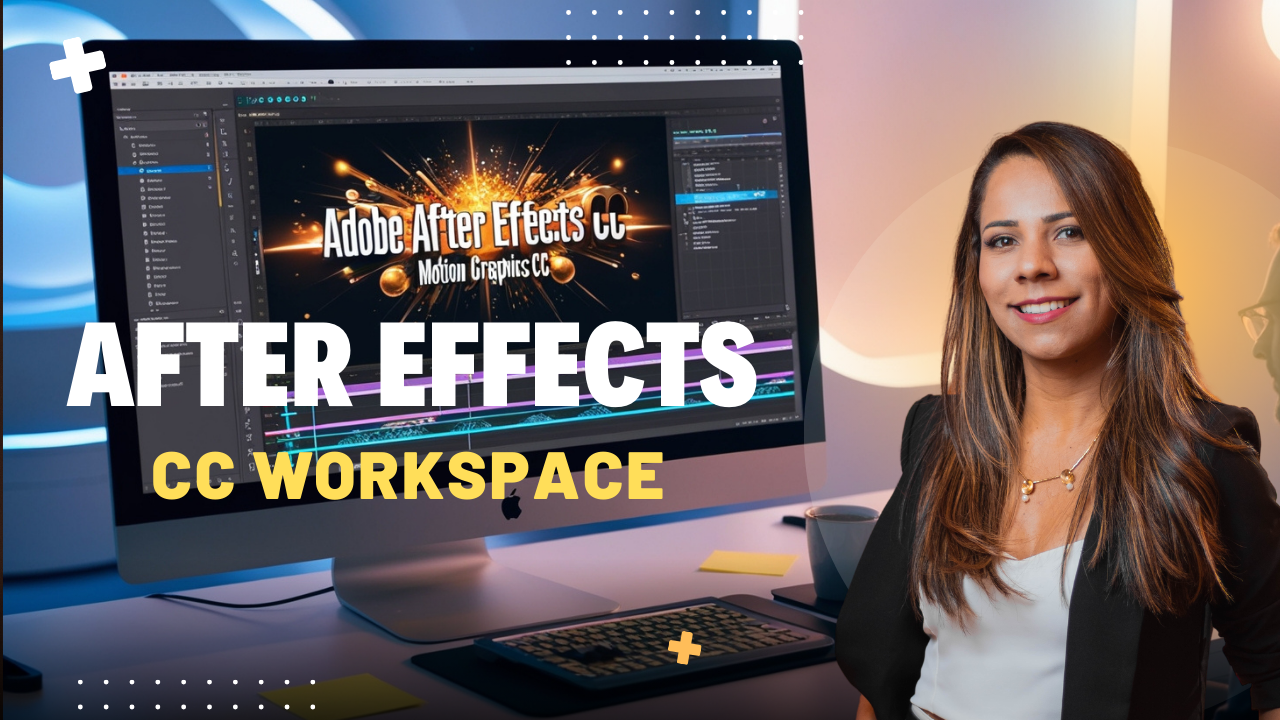
Adobe After Effects CC workspace
The Adobe After Effects CC workspace is designed to provide a structured environment for creating, editing, and compositing visual effects and motion graphics. Here's a breakdown of its main components:Key Panels in the After Effects Workspace1. Project Panel Purpose: Organizes all your assets, such as imported footage, images, audio, and compositions. Features: Displays media files and folders. Allows for easy asset management and previewing. 2. Composition Panel Purpose: Shows the current composition, enabling you to preview and manipulate the project visually. Features: Displays layers in a 2D or 3D workspace. Real-time playback with visual effects applied. Interactive tools for zoom, pan, and layer selection. 3. Timeline Panel Purpose: The heart of animation, where you control keyframes, layers, and timing. Features: Layer stack for organizing elements. Keyframe editor for animation properties. Time ruler for precise timing adjustments. 4. Toolbar Purpose: Provides quick access to essential tools for creating and editing. Key Tools: Selection Tool Pen Tool (for masks and paths) Text Tool Shape Tool Camera and Light Tools (for 3D work) 5. Effects & Presets Panel Purpose: Houses a library of effects and presets for applying visual and audio adjustments. Features: Search functionality for quick access. Drag-and-drop effects onto layers or compositions. 6. Preview Panel Purpose: Controls playback options for real-time previews. Features: Play, pause, and step-through frames. Adjust resolution and playback quality. RAM preview for smoother playback. 7. Layer Panel Purpose: Provides detailed control over individual layers, including masks and effects. Features: Focus on a single layer for precise adjustments. View mask paths and anchor points. 8. Render Queue Panel Purpose: Manages the rendering process for exporting your final video. Features: Output format settings. Render status and progress display. Customizing the Workspace Default Layouts: Switch between predefined layouts like Standard, Animation, or Effects. Drag & Drop Panels: Rearrange panels by dragging and docking them in desired positions. Save Custom Layouts: Save your customized workspace for repeated use (Window > Workspace > Save as New Workspace). Tips for Efficient Use Use Keyboard Shortcuts for faster navigation and edits. Enable Snapping in the Composition Panel for precise alignment. Take advantage of Work Area adjustments in the Timeline to focus on specific sections. Would you like detailed instructions for a specific task in After Effects? ????
More detailsPublished - Fri, 03 Jan 2025
Created by - Anil Chauhan
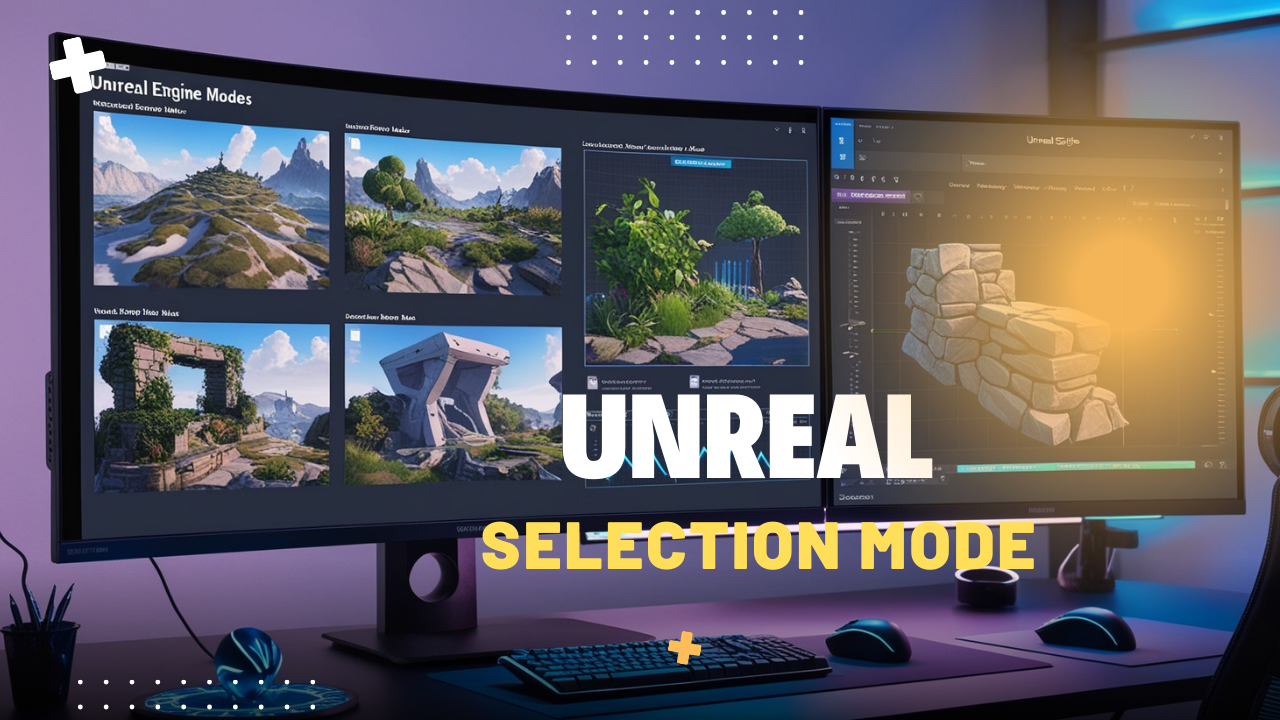
Unreal Selection Mode
Here’s a detailed breakdown of the key modes in Unreal Engine that you mentioned:1. Selection Mode Purpose: The default mode for selecting and interacting with objects in the scene. Features: Select actors in the viewport for editing or manipulation. Move, rotate, or scale objects using the Transform Gizmo. Access actor properties in the Details Panel. Use Case: General scene setup, arranging objects, and making adjustments. 2. Landscape Mode Purpose: Focused on creating and editing landscapes for outdoor environments. Features: Sculpt terrain with tools like Raise/Lower, Smooth, and Flatten. Paint textures (e.g., grass, sand) using layers. Add foliage and procedural vegetation using foliage spawners. Use Case: Building large terrains for games like open-world or RPGs. 3. Foliage Mode Purpose: Allows you to paint and manage vegetation on surfaces. Features: Paint foliage assets like trees, grass, and rocks onto landscapes or meshes. Adjust settings for density, scale variation, and randomization. Use Cluster Placement to optimize performance. Use Case: Adding natural elements to outdoor environments. 4. Mesh Paint Mode Purpose: Paints textures or vertex colors directly onto meshes. Features: Paint vertex colors to blend materials or create effects (e.g., rust, damage). Modify texture UVs or material parameters interactively. Support for static and skeletal meshes. Use Case: Detailed texture customization or material blending. 5. Modeling Mode Purpose: Provides tools for creating and editing 3D geometry directly in Unreal. Features: Tools for sculpting, extruding, and cutting geometry. Create procedural shapes or refine imported meshes. Supports high-poly modeling with Nanite for efficient rendering. Use Case: Prototyping level geometry or creating custom assets. 6. Fracture Mode Purpose: Enables simulation of destructible objects using Chaos Physics. Features: Fracture meshes into pieces for destruction effects. Configure physics properties like debris and collision behavior. Bake or simulate destruction in real-time. Use Case: Realistic destruction for objects like walls, vehicles, or props. 7. Brush Editing Mode Purpose: Edit BSP brushes (basic geometry shapes) for level blockouts. Features: Modify vertices, edges, and faces of BSP shapes. Create basic structures like walls, floors, or platforms. Tools for scaling, slicing, and extruding. Use Case: Quick prototyping or building simple level layouts. 8. Animation Mode Purpose: Used for previewing and editing skeletal animations in the viewport. Features: Visualize animations on skeletal meshes. Modify or adjust animation sequences. Add animation blueprints to simulate character movement. Use Case: Character rigging, animation fine-tuning, or gameplay testing. Summary of Use Cases Selection Mode: General object interaction. Landscape Mode: Building terrains. Foliage Mode: Adding vegetation. Mesh Paint Mode: Texture blending and vertex painting. Modeling Mode: 3D geometry creation. Fracture Mode: Destruction and physics effects. Brush Editing Mode: Level blockouts and basic structures. Animation Mode: Skeletal animation preview and editing. Each mode is designed for a specific stage of the game or scene creation process, ensuring versatility and efficiency in Unreal Engine projects. Let me know if you'd like detailed instructions on any specific mode! ????
More detailsPublished - Fri, 03 Jan 2025
Created by - Anil Chauhan
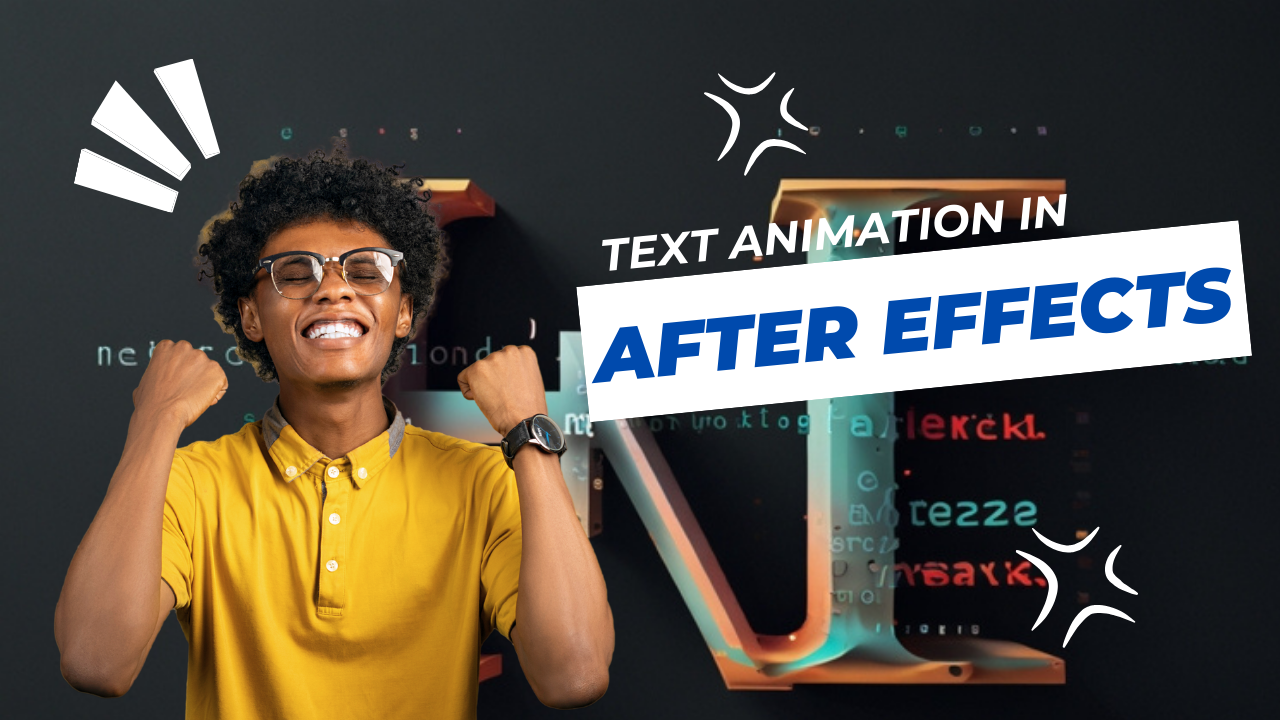
Text Animation in After Effects
In Adobe After Effects, text animation and animation effects are powerful tools that allow you to create stunning visual effects and motion graphics. Here's a breakdown of how to approach both:Text Animation in After EffectsText animation in After Effects is the process of animating individual characters, words, or lines of text. You can animate text properties like position, scale, rotation, opacity, and even more complex properties like color or tracking.Common Text Animation Techniques: Animating Text with Presets: After Effects offers a variety of text animation presets that you can apply to text layers. These presets can animate your text in various ways, such as fade-ins, bounce effects, or typewriter effects. To apply a preset: Select your text layer. Go to the Effects & Presets panel. Search for Text Animation Presets. Drag and drop a preset onto your text layer. Using the Animator for Custom Text Animation: After Effects has a feature called text animators that allow you to animate specific properties of text. You can animate individual letters, words, or the entire block of text. Steps to create a basic custom animation: Create a text layer. Click on the text layer to reveal its properties. Click the Animate button next to your text layer in the timeline. Choose a property to animate (e.g., Position, Opacity, Scale). Modify the properties to animate the text in and out over time (adjust the keyframes). Using the Range Selector: A Range Selector allows you to control which part of the text is animated. You can animate properties from one letter to the whole word, or even animate individual characters. By modifying the Start, End, and Offset sliders in the Range Selector, you can create various text animation effects like a typewriter effect, random character pops, or line-by-line reveals. Path Animations: You can animate text along a path or mask. This allows you to make text move in interesting ways, such as curved motion or zig-zag movement. Steps: Create a Path using the Pen Tool. Apply a Text Layer and select the Path option to make the text follow the path.https://www.youtube.com/watch?v=qD2CSEkwKCM Animation Effects in After EffectsAnimation effects refer to a broad range of motion effects and transformations that can be applied to any layer, including text, images, shapes, and video clips. These effects control things like movement, color, and transformations.Popular Animation Effects: Transformations (Position, Scale, Rotation, Opacity): These basic animation properties are applied to any layer and allow for movement across the screen. For example: Position: Moves the layer across the frame. Scale: Changes the size of the layer over time. Rotation: Rotates the layer. Opacity: Adjusts the transparency. How to animate: Select your layer. Hit the P (Position), S (Scale), R (Rotation), or T (Opacity) keyboard shortcut to reveal the properties. Set keyframes by clicking the stopwatch icon next to the property. Adjust the values over time to create animations.https://www.youtube.com/watch?v=WM2HbgvPPaI Keyframe Animation: Keyframes are markers that define specific points in time when an animation property changes. You can animate multiple properties at once (e.g., position, scale, and opacity) to create complex animations. Ease In/Out: After Effects allows you to ease keyframes, which makes animations smoother by adjusting how the layer accelerates and decelerates between keyframes. Right-click a keyframe → Keyframe Assistant → Easy Ease. Motion Blur: Motion blur can be added to layers to simulate the natural blur that occurs when objects move quickly. This makes animations appear more realistic and fluid. Time Effects: Time Stretching: Allows you to change the speed of the animation. Time Remapping: Lets you manipulate time in a layer, enabling you to speed up, slow down, or reverse a clip. Effects and Plugins: After Effects includes a range of built-in effects that can animate layers in various ways: Glow: Adds a glowing effect to a layer, useful for text and shapes. Drop Shadow: Adds depth to your layers by creating a shadow behind them. Turbulent Displace: Creates warping effects on a layer. CC Particle World: Generates particle-based animations, like smoke or fire.https://www.youtube.com/watch?v=MvUGIT3J0fk Track Mattes: Use a track matte to make certain parts of a layer visible based on the alpha or luminance of another layer. This is great for creating custom animations where one layer reveals or hides parts of another. 3D Layer Animations: After Effects allows you to animate layers in 3D space. You can move layers along the X, Y, and Z axes, create camera movements, and apply 3D effects to create depth in your animation. Expression-Based Animations: Expressions are snippets of code that allow for more complex animations and procedural effects without needing keyframes. For example, you can link the position of one layer to the rotation of another using expressions. Combining Text Animation and Effects:To create a more dynamic composition, you can combine text animations and animation effects: For example, you could create a 3D text animation, where the text is animated using keyframes, and then add motion blur, glow effects, or particle effects to enhance the visual appeal. You can use custom expressions to create advanced animations, such as bouncing text or a reaction animation based on an audio layer.https://www.youtube.com/watch?v=SYpiu_8a5XkTips for Effective Text Animation and Animation Effects: Keep it simple: Overcomplicating text animations can make them look too busy or distracting. Use ease: Applying ease in/ease out to keyframes makes your animation smoother. Consistency: Maintain a consistent style and pacing across your animations to keep the look cohesive. Experiment: After Effects is incredibly versatile, so experimenting with different animation styles, effects, and combinations can lead to impressive results.https://www.youtube.com/watch?v=BSkboDk0DI8 By mastering both text animations and various animation effects, you can create professional-looking motion graphics that will bring your projects to life!
More detailsPublished - Sat, 04 Jan 2025
Created by - Anil Chauhan
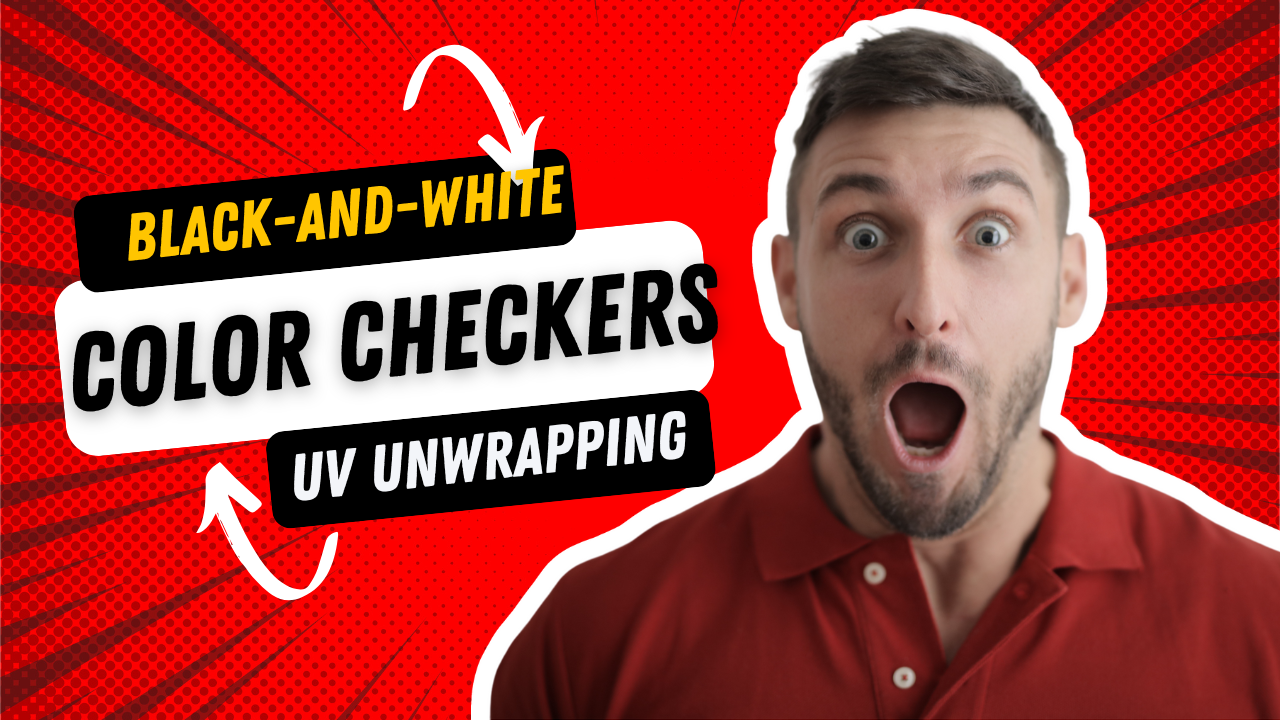
UV unwrapping, both black-and-white and color checkers
In UV unwrapping, both black-and-white and color checkers are used as tools to help with texture mapping and ensuring accurate, undistorted textures are applied to 3D models. However, the two serve different purposes:1. Black and White Checker: Purpose: The black-and-white checker is used primarily for checking the evenness and scale of the UV map. It helps you identify distortions in the unwrapped UVs and whether the texels (texture pixels) are stretched or compressed. How it works: The black-and-white pattern consists of alternating black and white squares, typically in a grid. When applied to the UV map, this checker pattern shows whether the UV coordinates are distorted (i.e., if the squares are uneven or stretched). If the squares are perfectly uniform across the surface of the 3D model in the rendered texture, it means the UV map is well-unwrapped and proportional. Any distortions, stretching, or squishing will become evident because the checkerboard pattern will not remain square or regular. When to use: Typically used during the UV unwrapping process to ensure that the UV layout is proportional and doesn't introduce visual distortion in the texture. It's most useful when you need to check how textures will be applied to a model, especially when applying diffuse maps or other detailed textures.https://www.youtube.com/watch?v=yLrT2RxglJ4 2. Color Checker: Purpose: The color checker is a texture with a grid of various colors, often with both shades of gray and other colors (such as red, blue, green, and others). Its primary purpose is to evaluate color accuracy and lighting effects on the model after it’s unwrapped and textured. How it works: The color checker contains a set of color patches with known values that can be used to check if the texture or lighting setup is affecting the colors in an unintended way. It allows you to evaluate how lighting, shaders, and textures interact with the surface of the model. This helps to assess the color correctness after the model is unwrapped and lit. A color checker can be useful for calibrating render settings or ensuring that materials look accurate under different lighting conditions. When to use: You use a color checker after UV unwrapping and texturing to evaluate the visual integrity of the textures applied to the model and ensure that the colors are being rendered correctly. It's also useful when adjusting shading, rendering, or when working on photorealistic rendering to compare color accuracy with real-world reference images.https://www.youtube.com/watch?v=NVIpvwI22bY Key Differences: Black and White Checker: Focuses on identifying UV distortion and ensuring uniform texel density. Used primarily during the unwrapping process to detect stretching or squishing in the UV map. Provides no color information—only checks for uniformity in space. Color Checker: Focuses on evaluating color accuracy and lighting effects on the surface of the 3D model. Used after unwrapping and texturing, especially in rendering to ensure accurate and consistent colors. Helps check how textures appear under different lighting conditions and in the final render. Summary: Use a black-and-white checker for UV distortion and even texture mapping. Use a color checker for color accuracy, lighting effects, and ensuring textures appear correctly under various lighting conditions.
More detailsPublished - Sat, 04 Jan 2025
Created by - Anil Chauhan
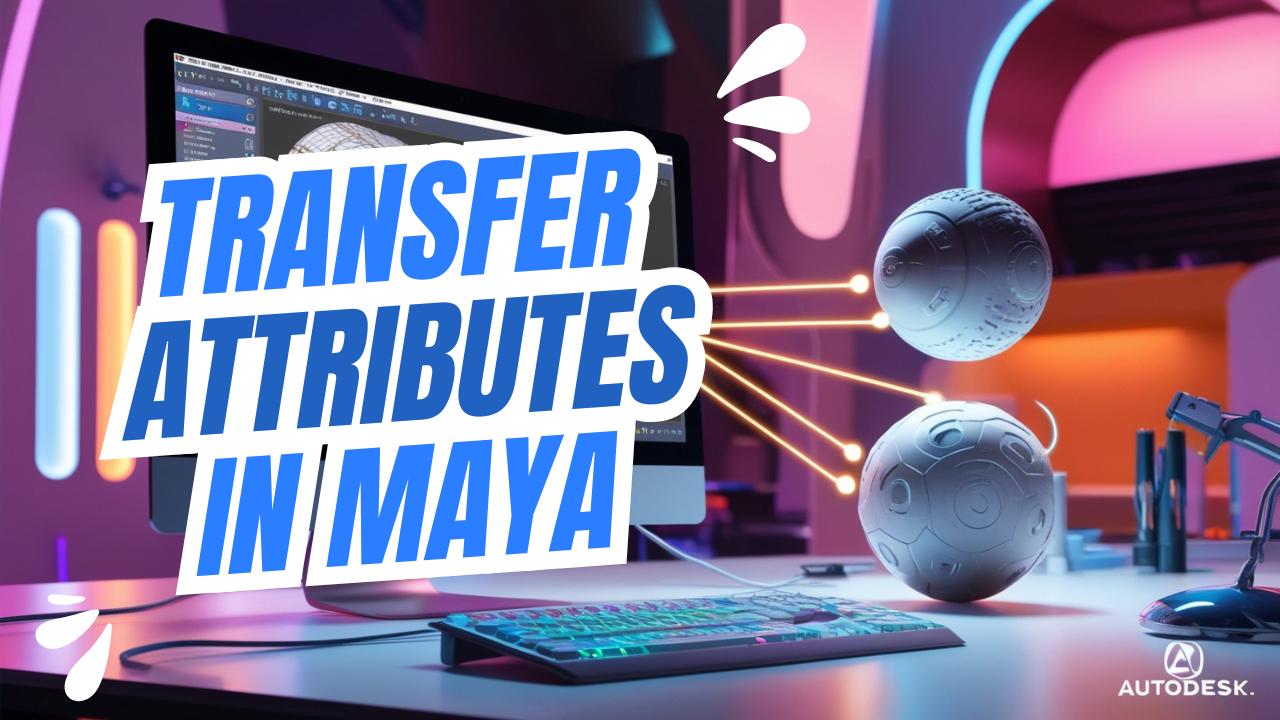
Transfer Attributes in Maya
The Transfer Attributes tool in Autodesk Maya is a powerful feature used to transfer specific attributes such as UVs, vertex colors, normals, and even point positions from one object to another. This is particularly useful in workflows like retopology or when transferring UV maps between different versions of a model.Where to Find It:You can find the Transfer Attributes option in the Mesh menu: Go to the Modeling menu set. Navigate to Mesh > Transfer Attributes. Key Options in Transfer Attributes:When you open the Transfer Attributes options, you'll see several settings that allow you to control how attributes are transferred:Attributes to Transfer: UV sets: Transfers UV mapping from one object to another. Vertex position: Transfers vertex positions (useful for morphing or retopology). Vertex color: Transfers vertex colors if both objects have them. Vertex normal: Transfers normals for custom smoothing or shading. Sample Space:This determines how the mapping between the source and target objects is calculated: World: Transfers attributes based on the world space positions. Local: Transfers attributes based on local object space positions. UV: Uses the UV coordinates of the source object to map the transfer. Topology: Uses the topology (vertex order) to perform the transfer (best used when the source and target share a similar structure). Search Method: Closest Point: Finds the nearest point on the source object to transfer data. Closest Component: Transfers data to the nearest vertex or face on the source object. Other Options: Flip UVs: Flips the transferred UVs. Search Envelope: Defines the search radius for finding the closest points or components. Example Workflow: Transfer UVs: Select the source object with correct UVs. Shift-select the target object. Go to Mesh > Transfer Attributes. Set Attributes to Transfer to "UV sets." Set Sample Space to "World" or "Local," depending on your model's alignment. Click Apply. Retopology (Transfer Vertex Positions): Create a new, cleaner topology object. Select the high-poly mesh (source). Shift-select the low-poly mesh (target). Set Attributes to Transfer to "Vertex position." Set Sample Space to "World." Click Apply. Common Issues and Tips: Objects Alignment: Ensure the source and target objects are aligned correctly in the world or local space. Topology Differences: For UV or vertex transfers, objects should ideally have similar topologies or vertex distributions. History: Delete history on the target object after the transfer to clean up the scene. Preview Before Apply: Use the tool interactively to adjust settings and verify the results. Would you like help with a specific use case or additional tips?
More detailsPublished - Mon, 06 Jan 2025
Search
Popular categories
Adobe After Effects 2025
28Unreal Engine
14zbrush
10Maya Animation
8zbrush tutorial jewelry
7Maya 2025
6Latest blogs
Mesh |Edit Mesh|Mesh Tools
5 Hours Ago

Advanced Editing Techniques
14 Hours Ago

Introduction to Level Design Through Blocking in Unreal Engine
2 Days Ago
Write a public review