Created by - Anil Chauhan
carving | wood carving
Carving and sculpting in ZBrush, followed by rendering in KeyShot, can yield stunning results! Here’s a streamlined workflow you might find useful:### 1. Sculpting in ZBrush- **Start with a Base Mesh**: Use a primitive shape or a low-poly base mesh to define the overall form.- **Dynamic Subdivision**: Enable dynamic subdivision for a smoother surface without increasing polygon count initially.- **Sculpting Tools**: Utilize brushes like the Standard, Clay Buildup, and Move tools to shape your model. Use the Zadd and Zsub functions for adding and subtracting volume.- **Detailing**: Use the Detail tools for finer details. Consider using alphas for textures, and make sure to frequently save your progress.- **Polygroups**: Organize your model using polygroups for easier selection and masking.- **UV Mapping**: Once satisfied, unwrap your model using ZBrush’s UV Master for proper texture mapping later.### 2. Exporting to KeyShot- **Export the Model**: Export your sculpted model as an OBJ or FBX file. Ensure you have proper UVs and, if necessary, create a low-res version for faster rendering.- **Texture Maps**: If you've created texture maps (like normal, displacement, or diffuse), export these as well.### 3. Rendering in KeyShot- **Import Model**: Open KeyShot and import your ZBrush model. KeyShot supports OBJ and FBX formats well.- **Material Setup**: Apply materials from the library. You can also create custom materials for specific effects.- **Lighting**: Set up your scene’s lighting. Use HDRI images for realistic lighting, or adjust the environment settings for different moods.- **Camera Settings**: Adjust the camera perspective and settings to frame your sculpt well.- **Rendering**: Set your desired resolution and quality settings. Render your scene and make adjustments as needed.### Tips- **Workflow Integration**: Consider using GoZ to streamline the transfer between ZBrush and KeyShot.- **Post-Processing**: After rendering, you can further enhance your images in software like Photoshop.### PracticeExperiment with different techniques and settings to refine your workflow. The combination of ZBrush's detailed sculpting and KeyShot's powerful rendering capabilities can lead to impressive results. Happy sculpting!
More detailsPublished - Wed, 02 Oct 2024

Created by - Anil Chauhan
online courses
f you're looking for online courses specifically for Maya, Substance, and ZBrush, there are several platforms that offer great resources:1. Cgartistallrounder : They have a variety of courses on Maya, Substance Painter, and ZBrush. You can often find courses tailored to beginners as well as more advanced users.2. YouTube: There are many free tutorials available for each of these software programs, covering everything from basics to advanced techniques. @cgartistallrounder93893. Pinterest : Focuses on tech and creative skills, and has in-depth courses on Maya, Substance Painter, and ZBrush.https://in.pinterest.com/cgartista/
More detailsPublished - Wed, 16 Oct 2024
Created by - Anil Chauhan
FREE AI Image Generator
Here are some free AI image generators you can use:https://www.youtube.com/watch?v=fAESTvslxmY1. **Craiyon (formerly DALL-E Mini)**: This web-based tool generates images from text prompts and is very easy to use.2. **NightCafe Studio**: Offers a variety of AI art generation styles. You can create images from text and access daily free credits.3. **DeepAI**: Provides a straightforward interface to create images from textual descriptions.4. **Artbreeder**: Allows you to blend images and create new artwork by adjusting various parameters.5. **StarryAI**: This app generates images based on your prompts and has a user-friendly interface.These tools are great for experimenting with different styles and generating unique images!
More detailsPublished - Thu, 17 Oct 2024
Created by - Anil Chauhan
Elevate your 3D skills with Maya, Unreal, Substance Painter, and ZBrush! ????
"???? Ready to take your 3D game to the next level? Dive into the world of creativity with **Maya**, **Unreal Engine**, **Substance Painter**, and **ZBrush**! ✨ Whether you’re crafting stunning animations, immersive environments, or intricate textures, these tools have you covered. Start your journey today and bring your wildest ideas to life! ???????? #3DArt #Maya #UnrealEngine #SubstancePainter #ZBrush #GameDev"Contact no 7804861096
More detailsPublished - Mon, 21 Oct 2024
Created by - Anil Chauhan
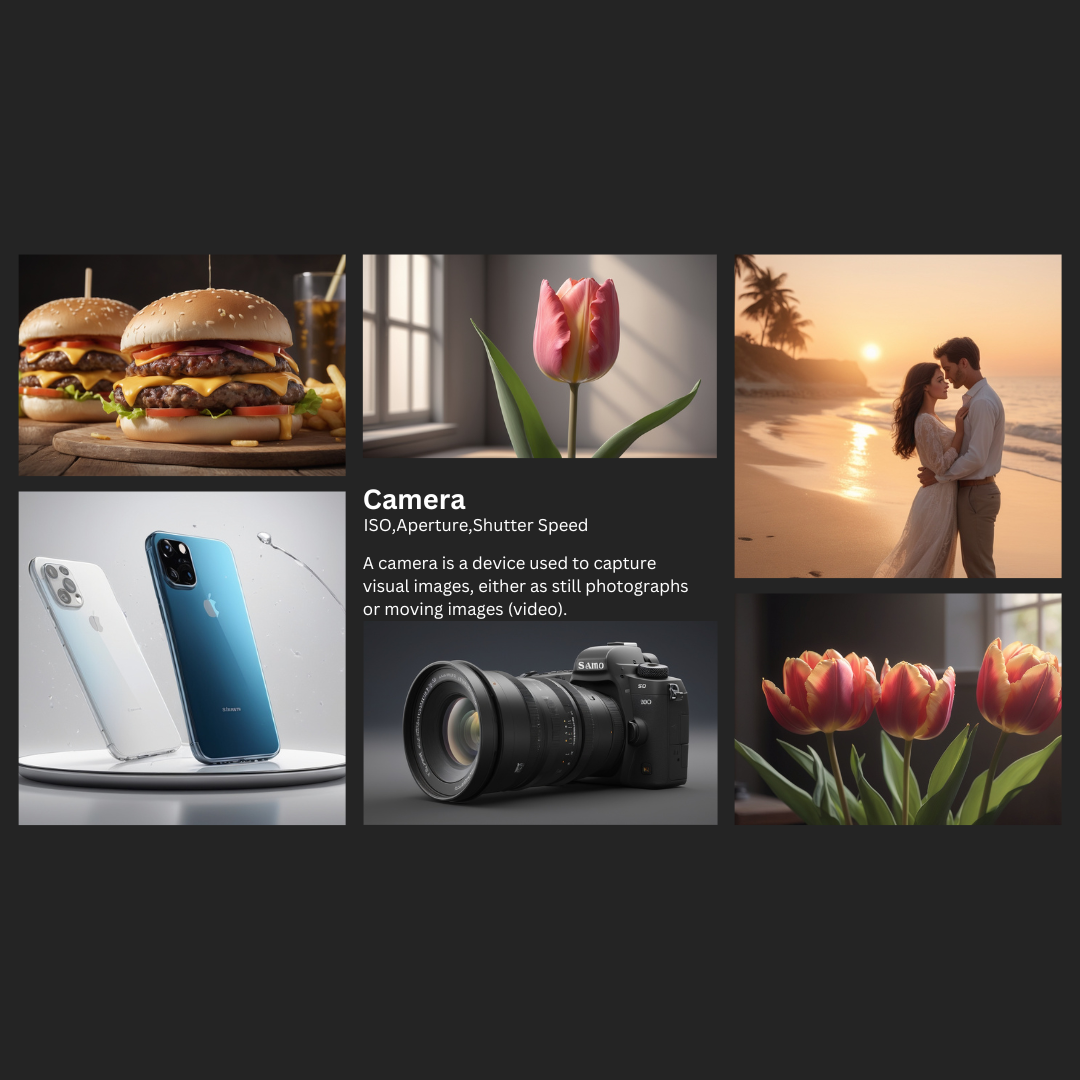
Camera, ISO, Aperture, Shutter Speed, White Balance, Focal Length, Depth of Field,
Key Camera Properties: ISO (International Organization for Standardization): ISO refers to the sensitivity of the camera's sensor to light. A higher ISO value (e.g., 1600, 3200) makes the sensor more sensitive, allowing you to capture images in low light conditions, but can also introduce more digital noise (graininess). A lower ISO value (e.g., 100, 200) provides less sensitivity to light, which results in cleaner, sharper images but requires more light for proper exposure.Scene: A single tulip or rose in a soft, dimly lit room, with a small window letting in ambient light.ISO: 800-1600Reason: Since the lighting is low, you'll need a higher ISO to ensure the image is properly exposed. A setting of ISO 800-1600 will help gather enough light without introducing too much noise.Effect: This will help capture the soft, dreamy feel of the flower without underexposing. The higher ISO will make the image brighter without needing long exposures, which could introduce motion blur. The slight increase in noise can add a subtle "grainy" texture that can work well with the soft light.Additional Settings:Aperture: f/2.8 for a shallow depth of field, creating a soft background (bokeh) to emphasize the flower.Shutter Speed: 1/60s to 1/125s, depending on how steady you can hold the camera or if you're using a tripod. Aperture: The aperture is the opening in the lens through which light passes to reach the camera's sensor or film. The size of the aperture is controlled by a mechanism of blades that form an opening, often referred to as an f-stop. The f-stop is written as a number (e.g., f/2.8, f/5.6, f/16). A lower f-number (e.g., f/1.8, f/2.8) indicates a wider aperture, letting in more light, which is good for low-light conditions and creating a shallow depth of field (blurred background). A higher f-number (e.g., f/16, f/22) indicates a smaller aperture, allowing less light in, and is typically used for situations where you want a deep depth of field, keeping both the foreground and background in focus.Bright Midday Beach (Strong Sunlight)Scene: A couple walking hand-in-hand on the beach during midday, when the sun is at its brightest.Aperture: f/8 to f/11Reason: In bright sunlight, you'll need a smaller aperture (higher f-stop) to avoid overexposing the image. A smaller aperture also ensures more of the scene is in focus, which is ideal for capturing the couple and the surrounding beach environment (sand, waves, sky).Effect: The aperture range of f/8 to f/11 will give you a deep depth of field, keeping both the couple and the background (waves, distant horizon) sharp. The bright light from midday also helps with fast shutter speeds, so you can avoid any motion blur while maintaining sharp focus.Sunset / Golden Hour (Soft, Warm Light)Scene: The couple on the beach during sunset or the golden hour, with soft, warm light and a long, dramatic shadow.Aperture: f/2.8 to f/4Reason: During sunset or golden hour, there's softer, warmer light. A wider aperture (lower f-stop) like f/2.8 or f/4 will help you take advantage of this low-light situation while keeping the couple in focus. A wide aperture also creates beautiful background blur (bokeh), making the couple stand out against the soft, glowing background.Effect: The shallow depth of field created by f/2.8 or f/4 will isolate the couple from the background, allowing the warm hues of the sunset to softly blur behind them. This creates a dreamy, romantic atmosphere, with a focus on the couple's connection.Additional Settings:ISO: 400 to 800 (to compensate for lower light levels without introducing too much noise).Shutter Speed: 1/250s to 1/500s (since the light is softer but still strong enough to prevent too much motion blur). Aperture Size Exposure Depth of Field f/1.4 Very large Lets in a lot of light Very thin f/2.0 Large Half as much light as f/1.4 Thin f/2.8 Large Half as much light as f/2 Thin f/4.0 Moderate Half as much light as f/2.8 Moderately thin f/5.6 Moderate Half as much light as f/4 Moderate f/8.0 Moderate Half as much light as f/5.6 Moderately large f/11.0 Small Half as much light as f/8 Large f/16.0 Small Half as much light as f/11 Large f/22.0 Very small Half as much light as f/16 Very large Shutter Speed: This controls how long the camera's sensor is exposed to light. It is measured in seconds or fractions of a second (e.g., 1/1000s, 1/60s, 1s). Fast shutter speeds (e.g., 1/1000s) freeze motion, while slow shutter speeds (e.g., 1/30s or slower) can create motion blur, useful for capturing the feeling of movement or light trails.Fast Shutter Speed (Freeze Motion)Scene: A sleek smartphone placed on a clean, simple background, with reflective surface (like a glossy table or a backdrop with lights) to emphasize its design.Shutter Speed: 1/200s to 1/500sReason: Since the phone is a static object, you'll want a fast shutter speed to ensure a sharp, crisp image. A shutter speed in this range is ideal for freezing any slight movement (if you're adjusting the phone, changing props, or if there's any ambient motion in the scene). It ensures that the fine details of the phone (e.g., logo, screen, or texture) are sharp.Effect: This fast shutter speed will allow you to capture the phone with clear, precise details while preventing any blur that could occur from hand movement, slight shifts in the phone, or camera shake.Additional Settings:Aperture: f/8 to f/11 (for a deep depth of field, ensuring the entire phone is in focus).ISO: 100 to 400 (to avoid noise and maintain a clean image with natural light).Lighting: Use diffused light or softboxes to reduce harsh shadows and highlight the phone’s features without reflections that could detract from the product’s details. White Balance: White balance adjusts the colors in your image to ensure that objects which appear white in person are rendered white in the photo, correcting for different types of light sources (e.g., daylight, tungsten, fluorescent). Different settings (like Daylight, Cloudy, or Incandescent) help you get accurate color representation based on the light conditions. Focal Length: This is the distance between the camera's lens and the image sensor when the subject is in focus, typically measured in millimeters (e.g., 35mm, 50mm, 200mm). A shorter focal length (e.g., 18mm or 35mm) provides a wider field of view (ideal for landscapes or group photos), while a longer focal length (e.g., 85mm or 200mm) allows you to zoom in on distant subjects and create a more narrow field of view (great for portraits or wildlife). Depth of Field: Depth of field refers to how much of the image is in focus, from the foreground to the background. Shallow depth of field (created by a wide aperture like f/1.8) results in a blurred background (bokeh effect), often used in portraits. Deep depth of field (created by a small aperture like f/16) keeps the entire scene in focus, ideal for landscapes. These properties work together in a camera's exposure triangle—ISO, aperture, and shutter speed—to determine the overall exposure and aesthetic of an image. By adjusting one or more of these elements, you can control how the final image looks in terms of brightness, sharpness, depth, and motion. Aperture in Photography: Aperture refers to the size of the opening in the lens that allows light to pass through to the camera's sensor or film. It plays a crucial role in both exposure (how bright or dark an image appears) and depth of field (how much of the scene is in focus). Aperture is measured in f-stops (or f-numbers), such as f/1.4, f/2.8, f/5.6, f/16, etc.. These numbers describe how wide or narrow the aperture opening is. Key Concepts of Aperture: F-stop (f-number): Smaller f-stop numbers (e.g., f/1.4, f/2.8) correspond to wider apertures, which allow more light into the camera. Larger f-stop numbers (e.g., f/8, f/16) correspond to narrower apertures, which allow less light into the camera. A change in the f-stop by one full number (e.g., from f/2.8 to f/4) either halves or doubles the amount of light entering the lens. Light and Exposure: Aperture has a direct effect on the exposure of your image. A wider aperture (lower f-stop) allows more light to hit the sensor, which is beneficial in low-light conditions. A narrower aperture (higher f-stop) reduces the amount of light and is often used in bright conditions or to achieve specific creative effects. Depth of Field (DOF): Shallow depth of field means that only a small portion of the image is in focus, with the background and foreground blurred. This is typically achieved with wide apertures (like f/1.4 or f/2.8). It's often used in portraits to isolate the subject from the background. Deep depth of field means that much of the scene (from foreground to background) is in focus. This is achieved with small apertures (like f/8 or f/16). It's commonly used in landscape photography to ensure that everything from the front of the scene to the horizon is sharp. What is Aperture? How Aperture Affects Your Photos: Aperture and Exposure: Aperture affects the brightness of your photo. In low-light situations, you may need to open the aperture wide (use a lower f-stop like f/1.8) to let in more light. In bright conditions, you may want to use a higher f-stop (like f/11 or f/16) to avoid overexposure. Aperture and Depth of Field: Wide Apertures (e.g., f/1.4, f/2.8): Shallow depth of field. Blurry background (bokeh effect) that isolates the subject. Great for portraits or macro shots. Narrow Apertures (e.g., f/8, f/16): Deeper depth of field. More of the scene in focus, from foreground to background. Ideal for landscape photography where you want the entire scene sharp. Visual Examples: Wide Aperture (f/1.8 or f/2.8): Shallow depth of field with a blurry background. Ideal for portraits where you want the subject to stand out. Example: A portrait where the person's face is sharp, but the background is soft and out of focus. Narrow Aperture (f/16 or f/22): Deep depth of field, with much more of the scene in focus. Perfect for landscapes where you want both the foreground and background in sharp focus. Example: A landscape photo where both the flowers in the foreground and the distant mountains are equally sharp. How to Choose the Right Aperture: For Portraits: Use a wide aperture (f/1.4 to f/2.8) to get a blurry background (bokeh) and draw focus to the subject. For Landscapes: Use a narrow aperture (f/8 to f/16) to keep most of the scene in focus, from the foreground to the horizon. For Low-Light Conditions: Open the aperture wide (e.g., f/2.8 or lower) to let in more light and avoid using a high ISO or slow shutter speed. Aperture in the Exposure Triangle: Aperture is one of the three main settings in the exposure triangle, along with shutter speed and ISO. These three elements work together to determine the exposure of your photo: Shutter Speed controls how long the sensor is exposed to light. ISO controls the sensor's sensitivity to light. Aperture controls the amount of light that enters the camera through the lens. In practice, you'll adjust all three depending on the lighting conditions and the effect you want to achieve in your image. In Summary: Aperture is the opening in your lens that controls how much light enters the camera and influences the depth of field. Wide apertures (lower f-stop values) allow more light in and create a shallow depth of field. Narrow apertures (higher f-stop values) let in less light and provide a greater depth of field. By adjusting your aperture, you can creatively control the exposure and depth of field in your photos!
More detailsPublished - Mon, 16 Dec 2024
Created by - Anil Chauhan
Pushpa 2 The Rule Biggest Fan of Pushpa Spoof
Sure! Here's how you can place the characters into each scene based on the story, while keeping their appearance and consistency across the visuals. Scene 1: Pushpa’s Confidence in the Rural Settinghttps://www.youtube.com/watch?v=Vc-Qzwf5vv8 Prompt: "Create a 3D Pixar-style character of a rugged male with wavy black hair, thick beard, and intense expression, wearing a vibrant blue shirt with golden patterns, brown trousers, layered tribal jewelry, and a watch, standing confidently in a rural setting with an orange sunset in the background. The vehicle is nearby, and Pushpa has a determined look on his face, with the wind blowing through his hair, exuding strength and confidence." Scene 2: Shekhawat’s Intense Planning Prompt: "Create a 3D Pixar-style character of a bald, mustached police officer with sharp, intense eyes, wearing a crisp white shirt and red holster belt, leaning menacingly over a wooden desk in a dimly lit office. The room should have police files and documents scattered on the desk. His face shows a mixture of concentration and intimidation, as he plans his next move with an aura of authority and power." Scene 3: Pushpa Preparing for the Showdown Prompt: "Create a 3D Pixar-style rugged male character, with wavy black hair and thick beard, wearing a vibrant blue shirt with golden patterns and brown trousers. He’s getting ready for a confrontation, standing strong with an intense expression, fists clenched. The rural setting is at dusk, with a slight wind blowing through the scene, and the vehicle parked in the background. His face conveys readiness for a challenge." Scene 4: Shekhawat Leading the Charge Prompt: "Create a 3D Pixar-style character of a bald, mustached police officer with sharp, intense eyes, wearing a crisp white shirt and red holster belt, commanding his team with a confident and intimidating stance. He’s standing in a dimly lit office with police reports around him, the air thick with tension as he gives orders. His expression is stern and focused, demonstrating his power in the situation." Scene 5: Pushpa vs. Shekhawat – The Confrontation Prompt: "Create a 3D Pixar-style character of a rugged male with wavy black hair, thick beard, and intense expression, standing face-to-face with a bald, mustached police officer in a dimly lit, tense confrontation. Pushpa’s vibrant blue shirt with golden patterns is slightly dirtied from the battle, while Shekhawat’s white shirt is pristine, with the red holster belt visibly strapped. Both characters maintain their confident stances, with Pushpa’s fierce eyes and Shekhawat’s calculated menace, as they prepare for their final clash." Scene 6: Pushpa’s Victory Pose Prompt: "Create a 3D Pixar-style character of a rugged male with wavy black hair, thick beard, and intense expression, standing confidently in the center of a rural field at dusk, surrounded by his loyal followers. His vibrant blue shirt with golden patterns gleams under the orange sunset. Pushpa stands tall, his arms raised, in a victorious stance, exuding strength and leadership, while his vehicle is parked nearby." Scene 7: Shekhawat’s Final Attempt Prompt: "Create a 3D Pixar-style character of a bald, mustached police officer with sharp, intense eyes, wearing a crisp white shirt, red holster belt, and standing in front of a map in a dark office. Shekhawat’s face shows frustration and determination as he tries to come up with one last plan to defeat Pushpa. His posture is rigid and commanding, but his eyes reveal the desperation in his pursuit." These prompts will ensure that the characters are placed consistently in each scene with the appropriate settings and actions.Here’s the narration of the scenes in Hindi:Scene 1: पुष्पा की आत्मविश्वास से भरी शुरुआतनरेटर: "पुष्पा, अपने वाइब्रेंट नीले शर्ट और सुनहरे पैटर्न्स के साथ, एक ग्रामीण दृश्य में खड़ा है। उसकी घनी दाढ़ी और काले लहराते बाल हवा में उड़ रहे हैं। उसकी आँखों में आत्मविश्वास और साहस की झलक है, और वह सूर्यास्त की नारंगी रोशनी में अपने इलाके का बादशाह बनकर खड़ा है। पास में एक गाड़ी खड़ी है, और पुष्पा की एक दृढ़ और ताकतवर मुस्कान दर्शाती है कि वह किसी भी चुनौती का सामना करने के लिए तैयार है।"Scene 2: शेखावत की तीव्र योजनानरेटर: "शेखावत, एक गंजे पुलिस अधिकारी, अपनी तेज आँखों और घने मूँछों के साथ, अपनी कागजात से भरी मेज़ पर बैठा है। उसकी सफेद शर्ट और लाल होल्स्टर बेल्ट के साथ वह हर एक कदम पर कड़ा नियंत्रण रखता है। कमरे में हल्का अंधेरा है, और शेखावत का चेहरा पूरी तरह से एक योजनाबद्ध आक्रामकता और शक्तिशाली आदेशों से भरा हुआ है।"Scene 3: पुष्पा का सामना करने के लिए तैयारीनरेटर: "पुष्पा अपने वाइब्रेंट नीले शर्ट और सुनहरे पैटर्न्स के साथ, तैयार हो रहा है एक बड़े संघर्ष के लिए। उसके पास अपने विश्वास और साहस के साथ, वह अपनी मुट्ठियाँ कस कर तैयार खड़ा है। उसके चेहरे पर ताजगी और मुकाबला करने का जज़्बा है, और उसका दृढ़ इरादा दर्शाता है कि वह किसी भी मुश्किल का सामना करने के लिए तैयार है।"Scene 4: शेखावत का नेतृत्वनरेटर: "शेखावत, अपने तेज़ और खतरनाक निगाहों के साथ, अपने टीम को आदेश दे रहा है। उसकी सफेद शर्ट और लाल बेल्ट उसे पूरी तरह से एक पुलिस अधिकारी के रूप में परिभाषित करती है। वह एक अंधेरे कार्यालय में खड़ा है, उसके चारों ओर कागजात और रिपोर्ट्स फैली हुई हैं। शेखावत का चेहरा गंभीर और आत्मविश्वास से भरा हुआ है, जैसे वह पूरी स्थिति पर नियंत्रण रखता हो।"Scene 5: पुष्पा और शेखावत की आमना-सामनानरेटर: "अब बारी है संघर्ष की, जहाँ पुष्पा और शेखावत एक-दूसरे के सामने खड़े हैं। पुष्पा की नीली शर्ट और सुनहरे पैटर्न्स से सजी हुई झलक दिखाई दे रही है, जो अब थोड़ी गंदी हो चुकी है, जबकि शेखावत की सफेद शर्ट पर कोई दाग नहीं है। दोनों का चेहरा दृढ़ और संघर्ष से भरा हुआ है। पुष्पा अपनी आँखों में क्रोध और साहस की झलक दिखा रहा है, और शेखावत की आँखों में कड़ी योजना और रणनीति की झलक है। दोनों अपने अंतिम संघर्ष के लिए तैयार हैं।"Scene 6: पुष्पा की जीत का क्षणनरेटर: "पुष्पा, अपने वाइब्रेंट नीले शर्ट और सुनहरे पैटर्न्स में, एक शांत और मजबूत खड़ा है, अपने क्षेत्र में विजय की घोषणा करते हुए। वह अपने हाथ ऊपर उठाए हुए, एक नेता की तरह खड़ा है। उसके आसपास उसके समर्थक हैं, और दूर में उसकी गाड़ी खड़ी है। सूर्यास्त की रोशनी में उसका चेहरा और शर्ट दमक रहे हैं, जो उसकी जीत और ताकत को दर्शाते हैं।"Scene 7: शेखावत की अंतिम कोशिशनरेटर: "शेखावत, अपने तेज़ आँखों और गंभीर चेहरे के साथ, एक अंतिम योजना पर काम कर रहा है। वह एक अंधेरे कमरे में खड़ा है, जहाँ मेज़ पर माप और रणनीतिक रिपोर्ट्स फैली हुई हैं। उसका चेहरा तनाव और कड़ी मेहनत से भरा है, और उसकी आँखों में हार मानने का नाम नहीं है। शेखावत ने अब अपनी आखिरी कोशिश शुरू की है, और वह पुष्पा को हराने के लिए हर दांव पर विचार कर रहा है।" इन दृश्यों में, पात्रों के व्यक्तित्व और उनके लुक को पूरी तरह से स्थिर रखा गया है, जिससे उनकी स्थिरता और विश्वसनीयता बनी रहती है।
More detailsPublished - Thu, 19 Dec 2024
Created by - Anil Chauhan
after effect 2025
Adobe After Effects is a powerful digital visual effects, motion graphics, and compositing software developed by Adobe Systems. It is widely used in video post-production to create cinematic effects, animations, and visual enhancements for films, TV shows, video games, advertisements, and other multimedia content.Key Features of After Effects: Motion Graphics: Create complex animations and kinetic typography.https://www.youtube.com/watch?v=WyO1U3ExEVs&list=PLIi3DnFfUZQGVlB_DCGHv2C9XpH_fJw9o Visual Effects (VFX): Add explosions, weather effects, and other visual enhancements.https://www.youtube.com/watch?v=rDZsmc8QuT4&list=PLIi3DnFfUZQEh6B_WpjiTsZ-ZWrEvOlZc Compositing: Combine multiple video layers into one seamless scene.https://www.youtube.com/watch?v=aHtQ8Raji4s&t=1392s Tracking: Motion tracking allows you to attach objects or effects to moving elements.https://www.youtube.com/watch?v=8_MNyqfFp8U 3D Capabilities: Create 3D layers and work with 3D models. https://www.youtube.com/watch?v=bAWcHDO9WzU&t=4s Color Correction: Adjust and enhance colors for cinematic looks.https://www.youtube.com/watch?v=aHtQ8Raji4s&t=1392s Plugins: Extend functionality with third-party plugins for advanced effects.https://www.youtube.com/watch?v=9i-T6vJMJkY&list=PLIi3DnFfUZQEEIy4CfpHaI1hU1f-w9XlY Integration: Works seamlessly with other Adobe products like Premiere Pro, Photoshop, and Illustrator.https://www.youtube.com/watch?v=UP_NP28YeA4&list=PLIi3DnFfUZQEl56FOqlKnOZ-muci_nVnd Common Uses: Adding title sequences and text animations. Creating special effects like explosions or magical spells. Compositing green screen footage. Designing infographics and animated charts. Enhancing footage with color grading and corrections. It's highly versatile and caters to professionals in filmmaking, advertising, and content creation, as well as hobbyists exploring creative video projects.
More detailsPublished - Fri, 20 Dec 2024
Created by - Anil Chauhan
"Top Tools for 3D Modeling, Texturing, and Sculpting in 2024"
"Learn 3D Modeling Techniques"Stylized 3D Environment CreationOverview Dive into my latest 3D stylized environment project, where artistic creativity meets technical precision. This visually captivating environment was crafted using industry-leading software: Autodesk Maya, Substance Painter, ZBrush, and Unreal Engine.Software and Workflow Modeling in Maya: Every asset in the environment was meticulously modeled in Maya to achieve a unique and stylized aesthetic. Focused on clean topology and optimized geometry for seamless integration into game engines. Detailing in ZBrush: Used ZBrush to sculpt intricate details, adding depth and personality to organic and hard-surface elements. High-poly models were baked down to create detailed normal maps. Texturing in Substance Painter: Applied vibrant, hand-painted textures using Substance Painter. Focused on creating a cohesive color palette to enhance the stylized look while maintaining realism. Utilized PBR techniques to ensure the materials react beautifully to lighting in Unreal Engine. Integration in Unreal Engine: Assembled and lit the environment in Unreal Engine, leveraging its real-time rendering capabilities. Added dynamic lighting, atmospheric effects, and post-processing to enhance mood and storytelling. Optimized assets for performance without compromising visual quality, making it suitable for real-time applications.https://www.youtube.com/watch?v=PHE2X64mM-0&list=PLIi3DnFfUZQFdg-MTdgpZi_FC1PiUP6uOHighlights Stylized Aesthetic: The project emphasizes bold shapes, exaggerated proportions, and a vibrant color scheme. Game-Ready: All assets are optimized for game engine compatibility, ensuring smooth performance. Storytelling: Each element within the environment contributes to the narrative, creating a visually engaging scene. Features and Techniques Used Modular asset creation for efficient level design. Advanced sculpting for intricate surface details. Hand-painted textures that blend realism with artistic flair. Dynamic lighting and volumetric fog for atmospheric effects. Applications This environment is ideal for: Stylized video games. Animated films or series. Interactive VR/AR experiences. Portfolio showcases and concept presentations. Gallery/Portfolio Include renders, wireframes, and breakdowns for each stage of the process (modeling, sculpting, texturing, and final rendering). Include turntables or videos of the environment to give visitors an immersive view.Conclusion This project exemplifies my expertise in creating stylized 3D environments using a comprehensive pipeline. It showcases my ability to combine artistic vision with technical skills to produce high-quality, game-ready assets.For more details or inquiries about similar projects, feel free to contact me or explore my portfolio further!Here’s a detailed workflow description focusing on Maya, ZBrush, and Substance Painter for your stylized 3D environment:Stylized 3D Environment Creation WorkflowStep 1: Modeling in Maya Blockout Phase: Started with a rough blockout in Maya to define the overall layout and proportions of the environment. Ensured the composition adheres to visual storytelling principles and maintains a stylized aesthetic. Base Modeling: Created modular assets for efficiency, focusing on clean topology and edge flow. Used Maya’s Modeling Toolkit for quick adjustments and fine-tuning shapes. UV Mapping: Optimized UV layouts for all assets to ensure high-quality texturing in Substance Painter. Used automatic UV tools and manual adjustments to eliminate stretching and overlapping. Export to ZBrush: Exported low-poly models with properly unwrapped UVs for high-detail sculpting. Step 2: Detailing in ZBrush High-Poly Sculpting: Imported low-poly models into ZBrush and sculpted intricate details like cracks, wood grain, and stylized surface textures. Focused on exaggerating proportions and adding whimsical elements to emphasize the stylized aesthetic. Detail Pass: Used custom brushes and alphas to add surface details like wear, scratches, and organic imperfections. Added secondary details such as fine cracks, dents, and folds to enhance realism. Decimation and Normal Baking: Decimated the high-poly models to reduce polygon count while preserving detail. Exported high-poly versions for baking texture maps in Substance Painter. Step 3: Texturing in Substance Painter Import and Setup: Imported low-poly models with baked normal and ambient occlusion maps into Substance Painter. Set up a PBR workflow to create realistic and stylized materials. Base Textures: Applied base colors, materials, and smart masks to establish the foundational look of the assets. Focused on achieving a hand-painted effect while retaining material-specific properties. Detail Texturing: Added layers of dirt, scratches, and edge wear using procedural techniques and custom brushes. Enhanced stylized elements by emphasizing bold color gradients and simplified shading. Export Textures: Exported textures in Unreal Engine-compatible formats (e.g., Base Color, Roughness, Normal, and Metallic maps). Key Features of the Workflow Seamless Integration: Ensured smooth transitions between Maya, ZBrush, and Substance Painter for a cohesive asset pipeline. Optimized Performance: All assets were created with performance in mind, balancing visual quality and efficiency. Stylized Aesthetic: Combined exaggerated forms and vibrant textures for a distinct visual style. Game-Ready Assets: Delivered assets optimized for real-time rendering in Unreal Engine. Visual PresentationFor your website, consider including: Progression Images: Show each stage of the pipeline (e.g., blockout, sculpting, and texturing). Breakdowns: Share close-up renders of key assets with explanations of techniques used. Interactive Viewer: Use a tool like Sketchfab to embed interactive 3D models. Would you like additional details for a specific stage, or help formatting this for your website? Let me know if you'd like help refining this text or adding specific elements!Here’s a comprehensive workflow for adding all assets into Unreal Engine after working in Maya, ZBrush, and Substance Painter, with proper detailing for your website:Step 4: Integrating Assets into Unreal Engine1. Preparing Assets for Unreal Export from Maya: Exported final low-poly models from Maya as FBX files, ensuring proper naming conventions for easy organization. Verified the models' scale to match Unreal Engine’s default unit system (1 unit = 1 cm). Texture Files from Substance Painter: Exported textures in Unreal-compatible formats (e.g., Base Color, Roughness, Metallic, Normal, Ambient Occlusion). Organized texture maps into folders for seamless import. Collisions and LODs: Added basic collision meshes in Maya (if needed) or used Unreal’s auto-collision generation. Created Level of Detail (LOD) models for optimization, with higher detail for close-ups and reduced polygons for distant views. 2. Importing into Unreal Engine Asset Import: Imported all models into the Unreal Engine Content Browser, maintaining organized folders (e.g., Models, Textures, Materials, Scenes). Checked for proper UV channel assignments to ensure compatibility with lightmaps. Material Setup: Created PBR materials using Unreal Engine’s Material Editor. Connected texture maps (Base Color, Roughness, Metallic, Normal, and AO) to their respective nodes. Fine-tuned material properties for stylized looks, like tweaking emissive colors or adjusting roughness for exaggerated highlights. Lighting Adjustments: Enabled two-sided materials for thin assets like leaves and curtains. Used Material Instances for easier adjustments to shared materials. 3. Building the Scene Asset Placement: Positioned assets in the level using modular workflows to ensure a consistent and reusable layout. Grouped related assets for faster management and editing. Lighting and Shadows: Set up dynamic and static lighting to enhance the stylized aesthetic. Used Directional Light for sunlight and Sky Light for ambient illumination. Enabled Volumetric Fog and Post-Processing Effects for atmospheric depth. Landscape Creation: Used Unreal’s Landscape Tool to sculpt the terrain and blend custom materials for a stylized ground surface. Added grass, rocks, and foliage using Foliage Tool with optimized settings for performance. Blueprints and Interactivity: Added simple Blueprints to introduce dynamic elements, such as flickering lights, moving water, or rotating objects. Optimized interactivity without compromising performance. 4. Optimization for Real-Time Performance Asset Optimization: Ensured assets used appropriate LODs and reduced unnecessary polygons. Cleaned up unused textures and materials to minimize memory overhead. Lightmap Optimization: Adjusted UV lightmaps to prevent artifacts and ensure clean shadow baking. Used Lightmass for static lighting and baked shadows for optimal rendering. Rendering Settings: Optimized rendering settings for real-time performance, including culling, occlusion, and anti-aliasing. PresentationTo showcase this workflow on your website, include: Visual Breakdown of Workflow: Diagrams or charts showing how assets move from Maya to ZBrush, Substance Painter, and Unreal Engine. Step-by-step images of the process in each software. Final Renders and Videos: Include high-quality screenshots of the final environment in Unreal Engine. Add cinematic flythrough videos to highlight the lighting, materials, and overall atmosphere. Interactive 3D Viewer: Use tools like Sketchfab or embed interactive 3D models to let visitors explore individual assets. Detailed Breakdown: Feature comparison shots of each stage (e.g., low-poly model, high-poly sculpt, textured asset, and final Unreal integration). Behind-the-Scenes Commentary: Include a blog-style section where you explain the creative decisions, challenges, and solutions during the project. Example Description for Website: "This stylized 3D environment was crafted using a comprehensive pipeline involving Maya, ZBrush, Substance Painter, and Unreal Engine. The project focuses on delivering vibrant visuals with optimized, game-ready assets. Each stage of the workflow, from modeling and sculpting to texturing and real-time rendering, is meticulously executed to showcase the synergy between artistic creativity and technical expertise. Explore the final environment through cinematic videos and interactive galleries below." Let me know if you need help adding visuals or interactive elements to your website!
More detailsPublished - Fri, 20 Dec 2024
Created by - Anil Chauhan
Sculpting Wood in ZBrush
Sculpting wood in ZBrush involves creating textures, forms, and details that replicate the natural characteristics of wood, such as grain patterns, knots, and bark. To achieve a realistic wood look, the process involves multiple steps and a combination of brushes, textures, and detailing techniques. Here's an overview of how you can approach wood sculpting in ZBrush:1. Base Shape Creation Start with a Primitive: You can begin by using a primitive shape such as a sphere, cube, or cylinder, depending on the object you're sculpting. For wood, a simple cylinder or cube may work best for logs or planks. Shape the Object: Use the Move and Scale tools to define the basic proportions of the wood piece. For example, a log might need to be elongated into a cylindrical form, or a plank can be flattened. DynaMesh: To ensure that the geometry is flexible for further detailing, use DynaMesh. This will allow for continuous modifications without worrying about topology while sculpting.https://www.youtube.com/watch?v=2iK0WTRaafI 2. Adding Wood Grain Detail Use the Standard Brush: The Standard Brush can be used with low intensity to carve out basic wood grain lines. Change the stroke type to DragRect or DragDot and apply it along the surface to create subtle grain patterns. Alpha Masks: Using alpha textures (such as wood grain alphas) is an excellent way to replicate realistic grain details. Load a wood grain alpha into the Alpha menu and use it with a brush to stamp and carve intricate grain patterns into the surface. Brushes like NoiseMaker can be great for creating larger, random textures as well. Noise and Surface Detailing: Apply noise or surface detail using the Noise Maker plugin. This tool allows you to simulate small-scale imperfections such as growth rings, bark texture, and other details that can be added to make the wood look more organic.https://www.youtube.com/watch?v=M24NbQFYSco 3. Sculpting Wood Features Knots and Imperfections: Use the Clay Buildup or Dam Standard brushes to create knots, cracks, and other imperfections in the wood. These are essential for adding realism, as natural wood typically features these irregularities. Smooth Transitions: For smoother parts of the wood, such as areas between knots or features, use the Smooth brush or Polish function to create a polished, realistic finish.https://www.youtube.com/watch?v=85vlhh_A5tQ 4. Sculpting Bark or Surface Texture Bark Detailing: For the outer texture of wood, such as bark, use brushes like Bark or Alpha Stamps designed specifically for wood textures. You can add these to a log or trunk, applying the alphas or brushes to build up layers of bark. The Surface Noise function can help simulate a rough bark appearance. Roughness and Imperfections: Wood often has cracks, splits, and other imperfections. Use the TrimDynamic or HPolish brush for more controlled smoothing of areas, adding or removing material to create rough or worn sections of the surface.https://www.youtube.com/watch?v=hcU7S-52gmI 5. Color and Materials Polygroups: After the shape and detail are done, use Polygroups to help separate different parts of your object, like the bark from the wood grain. This allows you to easily apply different materials and textures to distinct parts. Paint and Materials: Use ZBrush’s Polygroups and Fill Polygroups features to paint the model with various shades, imitating the color variations in real wood. You can use Procedural Materials for added realism (like the default Wood material, or other custom wood shaders), adjusting them to match the specific kind of wood you're sculpting (e.g., oak, pine, or walnut).https://www.youtube.com/watch?v=ptviiKw-ri8 6. Rendering and Final Touches Once you're satisfied with your sculpt, you can set up lighting in ZBrush to emphasize the texture details and grain patterns. Experiment with different lighting angles to make the wood texture appear more dynamic. Subsurface Scattering (SSS): If you’re aiming for more realism, you might want to adjust the material properties to include subsurface scattering, which can simulate the way light interacts with the surface of wood.https://www.youtube.com/watch?v=tbcAqzJY0Hw Tips for Wood Sculpting in ZBrush: Use Layers: Create different layers for different elements like wood grain, bark, and knots. This allows you to tweak each element separately.https://www.youtube.com/watch?v=--F-0uYchqE Detailing Brushes: Custom brushes specifically designed for wood grain or bark can save a lot of time and give you high-quality results.https://www.youtube.com/watch?v=8ejYoxjrgTQ Adjust ZIntensity: Make sure to adjust the ZIntensity (strength of the brush) to avoid over-exaggerating small details, especially when working on the fine texture of wood grain.https://www.youtube.com/watch?v=PHE2X64mM-0&list=PLIi3DnFfUZQFdg-MTdgpZi_FC1PiUP6uO By combining these techniques, you can create realistic wood models with detailed grain, knots, bark, and other natural imperfections that give them authenticity.Stylized wood sculpting in ZBrush and texturing in Substance Painter can be a powerful combination for creating detailed, artistic wood assets. Here’s a breakdown of the process:1. Sculpting Stylized Wood in ZBrush: Base Shape: Start by creating a basic shape using the Cylinder or Cube tool, which you will then transform into a stylized wood piece. For example, a log or a wooden plank. Dynamic Subdivision: Turn on DynaMesh or Subdivision Levels to ensure you can freely sculpt and add detail without worrying about the topology. Sculpting Wood Details: Wood Grain: Use ZBrush's TrimCurve brushes or Alphas to add stylized grain patterns. You can modify existing alpha textures for a more exaggerated or abstract look, giving it a cartoonish or fantasy vibe. Surface Noise: For subtle detail, apply Surface Noise with a wood texture for added realism or stylization. Adjust the intensity to match the look you're aiming for. Detailing: Sculpt out knots, grooves, and imperfections by using Standard Brush, Pinch Brush, and other detailing tools. Stylized pieces often have exaggerated features like bigger knots or smoother lines. 2. Texturing in Substance Painter: Exporting the Model: Once you're satisfied with the sculpt, export the model from ZBrush in .FBX or .OBJ format to Substance Painter. UV Mapping: Ensure your model has clean UVs. You can generate UVs directly in Substance Painter if necessary, but ideally, these should be unwrapped in ZBrush or a dedicated UV tool for better control. Base Material Setup: Start by applying a base wood material in Substance Painter. You can either use pre-made materials or create your own by combining base wood textures (like color, bump, and roughness). Stylized Textures: Base Color: Paint the base color to reflect the stylized tone of the wood. You can use grays, browns, or even more colorful hues depending on your stylization (e.g., blue wood, orange wood). Wood Grain Details: Use Stencils or Masks with grunge maps to refine the wood texture, adding variations in the grain and details like scratches or dents. Specular/Glossiness: Adjust the roughness map to make the wood look either polished (low roughness) or rough (high roughness). Stylized wood often has exaggerated gloss or matte finishes. Ambient Occlusion & Baked Textures: Bake maps like ambient occlusion or curvature to enhance the realism and give depth to areas like the wood’s knots or crevices. 3. Final Touches and Export: After texturing, you can tweak the details in Substance Painter to add effects like wear, age, and stylized highlights. Once finished, export the maps (diffuse, roughness, normal, etc.) for use in your game engine or rendering software. By combining ZBrush’s sculpting power and Substance Painter’s texturing tools, you can create a stylized, detailed wood asset that fits seamlessly into a variety of art styles.Creating a stylized wood asset using Maya for modeling and unwrapping, ZBrush for sculpting and retopology, and Substance Painter for texturing is an effective pipeline. Here's a detailed breakdown:1. Modeling the Base Shape in Maya Conceptualize the Shape: Plan the type of wood asset you want (plank, log, stump, etc.). Keep stylization in mind—exaggerate proportions or add creative curves to make the model visually appealing. Basic Blockout: Start with primitive shapes (e.g., cubes or cylinders) to block out the rough structure. Add key features like beveling edges or splitting faces to prepare areas for detail. Export to ZBrush: Save the base shape as an .OBJ or .FBX file and import it into ZBrush for sculpting. 2. Sculpting in ZBrush Dynamic Subdivision: Turn on DynaMesh or Subdivision Levels to sculpt freely without worrying about topology at first. Add Stylized Details: Wood Grain and Imperfections: Use brushes like Standard, ClayBuildup, and Orb Cracks to carve out exaggerated wood grain patterns, knots, and splits. Surface Noise: Apply a wood texture through Surface Noise or use alpha maps to quickly add repetitive grain patterns. Exaggerated Features: Stylized assets often have bold details like deep grooves, large knots, or stylized carvings. Retopology: Use ZRemesher for automatic retopology, ensuring a manageable polycount for game engines or rendering. For manual control, use ZModeler or export the high-poly sculpt for retopology in Maya. 3. Retopology and UV Unwrapping in Maya Import High-Poly Model: Bring the sculpted model back to Maya for manual retopology if ZRemesher wasn't used or needs refinement. Retopology Workflow: Use the Quad Draw Tool in Maya to create clean, low-poly geometry. Maintain edge loops around key features like knots or deep grooves to retain detail in the low-poly version. UV Unwrapping: Open the UV Editor and create a clean, non-overlapping UV layout. Focus on efficient packing to minimize wasted space. Ensure seams are placed strategically (e.g., along less visible areas) to avoid texturing artifacts. 4. Texturing in Substance Painter Bake High-Poly Details: Import both the high-poly and low-poly models into Substance Painter. Bake maps such as Normal, Ambient Occlusion, and Curvature to capture the sculpted details on the low-poly model. Base Materials: Apply a base wood material with stylized grain patterns and colors that align with the design. You can tweak or create a custom wood material by combining maps for diffuse, roughness, and normal. Stylized Texture Details: Add highlights, shadows, and hand-painted details to emphasize the stylization. Use Procedural Masks, Stencils, or Grunge Maps to introduce variation and imperfections, such as scratches or dirt. Create exaggerated highlights and shadows for a cartoonish or fantasy look. Final Touches: Adjust roughness and glossiness for polished or weathered wood finishes. Apply color gradients or edge highlights to make the texture pop. 5. Exporting and Integration Export Textures: Save textures (e.g., Base Color, Normal, Roughness, Metallic) in the appropriate formats for your rendering engine (e.g., Unreal Engine, Unity). Final Model: Export the low-poly model with the applied textures for rendering or game integration. Tips for a Stylized Look Keep proportions exaggerated and details bold to align with the stylized theme. Use colors and textures that are more vibrant or artistically expressive than realistic wood. Experiment with hand-painted elements in Substance Painter for additional flair. This pipeline ensures a balance between artistic creativity and technical precision, resulting in a high-quality stylized wood asset.
More detailsPublished - Sat, 21 Dec 2024
Search
Popular categories
Adobe After Effects 2025
28Unreal Engine
14zbrush
10Maya Animation
8zbrush tutorial jewelry
7Maya 2025
6Latest blogs
Mesh |Edit Mesh|Mesh Tools
2 Hours Ago

Advanced Editing Techniques
11 Hours Ago

Introduction to Level Design Through Blocking in Unreal Engine
1 Day Ago
Write a public review